Marinated Skirt Steak
Posted on 14 June 2010 | 2 responses
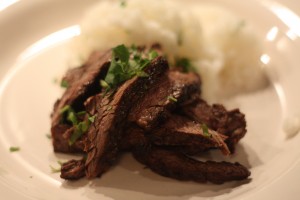
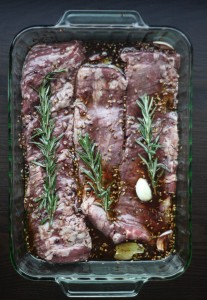
Marinating is similar to brining (which I believe my love of is well documented), both add flavor to the meat but a marinade is more concerned with tenderizing the meat rather than adding moisture. This recipe takes a slightly tougher skirt steak and makes it tender, delicious and more-ish. At a push I would say that the flavors in this dish are Central or South American and when the steak is left for long enough the flavors seep fully into every bite. This marinade is especially easy to make, just a quick toasting and crushing of spices and a short whisk.
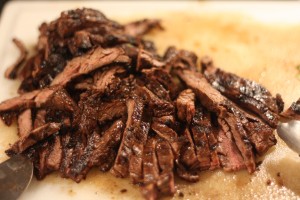
Skirt steak is a great cut of meat, it is cheaper which is a huge bonus but it also contains a ton of flavor. Due to the location of the steak on the cow, the meat is tougher. There are a couple of things you have to do to get this cut as tender as a filet. Marinating goes a long way into breaking down the tougher fibers; the vinegar, worcestershire and red wine are the ingredients in this marinate that do that. As I have mentioned before, bringing the meat to room temperature before you cook helps the meat cook better as the meat is ‘relaxed’ and will not get shocked from the heat of the pan, resulting in a tough outer layer. Resting the meat after cooking helps the juices to redistribute. But I would say the most important point is cutting the meat against the grain. The skirt steak is made up of long thin muscle fibers which are very chewy if you cut along them. If you cut ‘against the grain’ (at right angles to the fibers) you cut through these fibers leaving you with all the flavor but none of the long chewy strands. You should be able to see the direction of the fibers within the meat but if you want to read more, Serious Eats has a great article, with detailed pictures, explaining the science behind it.
Notes: as well as being able to serve this as is with a salad or a starch, the steak would be excellent in fajitas or steak sandwiches. We had our leftovers on ciabatta with mashed avocado, thin sliced of mozzarella, mixed baby spring lettuces and a lemon vinaigrette.
Marinated Skirt Steak, serves 4 people (modified from a Saveur recipe)
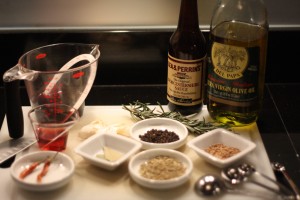
1 tbsp black peppercorns
1 tbsp coriander seeds
1 tbsp fennel seeds
2 dried chiles de arbol, broken
1 dried bay leaf
1/2 cup dry red wine
2 tbsp red wine vinegar
2 tbsp worcestershire
4 garlic cloves, crushed, skin-off
3 sprigs rosemary
1/2 extra virgin olive oil
2 lbs skirt steak (cut into 3 long strips)
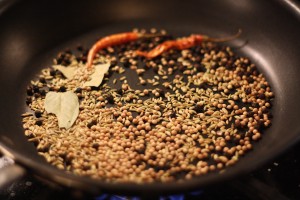
1. Toast peppercorns, coriander seeds, fennel seeds, chiles, and bay leaf in a small skillet until fragrant, about -3 minutes.
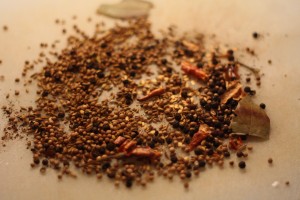
2. Transfer to a cutting board and lightly crush with bottom of saute pan.
3. Pour spices into 9 by 13 inch casserole dish and add wine, vinegar, worcestershire, garlic, rosemary and oil. Whisk to combine. Add steaks, turning over to coat. Cover and place in refrigerator at least 4 or up to 12 hours, turning occasionally.
4. At least 30 minutes before cooking, remove steak from marinade and set at room temperature. Pour marinade into a small saucepan and bring to a boil. Set aside to use to baste the steak as is it cooking.
5. Heat a cast iron grill over a medium high flame. Grill steak for 6-8 minutes each side, (6 minutes – medium rare, 8 – medium well), basting with cooked marinade occasionally.
6. Remove from grill and allow to rest for at least minutes. Slice steak thinly against the grain (see above for notes) and serve hot or at room temperature.
Watermelon Curry (Tarbooz ki Subzi)
Posted on 10 June 2010 | 1 response
For me, summer can be ‘summed’ up by a watermelon. Watermelon is the epitome of seasonal fruit. The rest of the year seems colder and lonelier without having the happy red and green crescents in the produce aisle. So a couple of weeks ago when it first began feeling like summer, I jumped the gun slightly. I bought the first watermelon I had seen this year. I did not just buy a small, conservative slice, I came home with a 6 pound chunk of melon! My husband who is not a fan of watermelon – he thinks it’s all downhill after the first juicy mouthful – was somewhat surprised and alarmed that a whole shelf in our little fridge was now dominated by this wedge.
One mistake I make every year is to get too enthusiastic too soon. After the first couple of bites I soon realized that this watermelon was bland and lacking all the dripping goodness that late summer watermelon possess by the bucket load. I actually held off posting this recipe for a couple of weeks to make sure that no-one ran out and came home with a similar one. I now think though that we are in safe watermelon territory.
Not-so-nice, insipidly pink watermelon
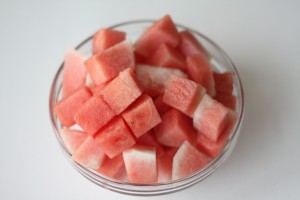
I would estimate that I ate roughly half of the watermelon before finally calling a truce. So the other three pounds just sat in the fridge…. and it sat some more. I was not quite sure what to do with the rest of this watermelon as I knew it would not be flavorful enough for a sorbet or gelato but I did not want to throw it away. Then I remembered a recipe from two years ago from Saveur. A couple of summers ago Saveur did an issue highlighting watermelon. I worked in the test kitchen that summer and as lowest man on totem pole (I was right out of culinary school at the time), it was my unfortunate task to purchase the thirty-some pound melons and bring them on the long subway ride back to the kitchen. It may have been have the only time in my life when I could not stand the site of watermelons!
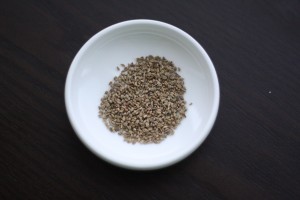
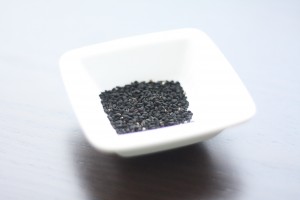
This recipe as it is so unexpected; you can completely change someone’s perspective on watermelon, showing that is is more versatile and deserves more than just being cut up into slices every 4th of July. The recipe is Indian in origin and some of the spices are a little hard to find. The ajwain and the nigella seeds are both used frequently in Indian cuisine (I have included online links in case you do not have a good Indian speciality store near you).
Before making this dish I had not heard of either of these spices and I also did not know that you could use watermelon rind to cook with. I vaguely recall hearing that you could pickle it but as I grew up hating vinegar I had not tried this. Although it would be a great way to use up all the leftover rind when making something with the flesh.
Watermelon Curry
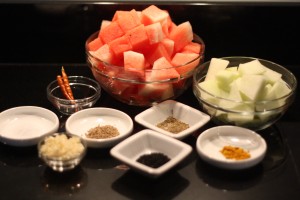
3 pounds seedless watermelon, with rind left on
2 tbsp canola oil
1/2 tsp ajwain seeds
1/2 cumin seeds
1/2 nigella seeds
2 dried chiles de arbol, stemmed
4 cloves garlic, finely chopped
1 tsp kosher salt
1/4 tsp tumeric
2 tsp chopped fresh cilantro, to garnish
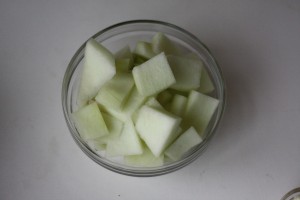
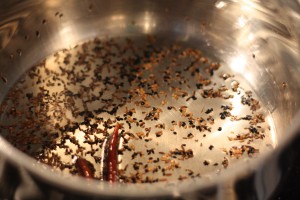
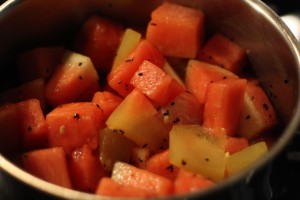
1. Trim and discard the thin, green skin of the watermelon rind, leaving the inner, whitish-green rind intact. Separate the rind from the red flesh with the knife and cut both rind and flesh into 1″ pieces. Set aside in separate bowls. In a medium saucepan, heat oil over medium high heat. Add ajwain, cumin, nigella seeds, and chiles and cook, swirling the pan, until spices are toasted and fragrant, 2-3 minutes.
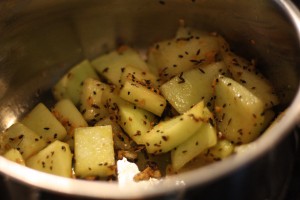
2. Add garlic, cook, stirring, until golden brown, about 30 seconds. Add watermelon rind, salt, and tumeric and cook, stirring occasionally, until the rind is lightly browned and the liquid has almost evaporated, about 7 minutes.
3. Pour 1 cup water into pan, cover, and reduce heat to medium low. Simmer curry, stirring occasionally, until the rind pieces are tender, about 10 minutes. Uncover saucepan, add the red flesh, and stir to combine. Raise the heat to medium high and boil, stirring occasionally, until the flesh softens and the flavors come together, about 5 minutes.
4. Transfer curry to a serving platter and sprinkle with cilantro. Serve with rice.
Tomato and Jalapeno Jam
Posted on 8 June 2010 | 8 responses
When I was last at a farmer’s market I became slightly over eager about the new summer produce (well, almost-summer produce). Somehow, this translated into my coming home with 3 pints of little, ripe grape tomatoes. I diligently added them to every salad I ate for a week, momentarily pondered making a chilled tomato soup but at the last minute decided that this jam would be the perfect way for the last pint of these beauties to get used.
This is my first attempt at a savory jam. As a serious cheese lover, I have long been a fan of the savory jam especially when the jams have even the slightest kick to them. This jam has a whole chorus of high kicks to it, from the jalapenos, the ginger and the garlic. The vinegar and the sugar help to round the flavor out and make it sweet and spicy all at the same time.
I was amazed at how quickly the jam thickened. Keeping the skin on the tomatoes not only keeps more nutrients from the fruit but it also helps with the thickening process. And here is some more good news – tomatoes are better for you when they are cooked than when they are raw. Crazy but true! I spent at most five minutes preparing the ingredients, threw some in a blender, then poured the puree with the rest of the ingredients in a saucepan and just stirred occasionally.
I served this jam on the side of my Pork and Potato Croquettes to my darling man and it got rave reviews!! It could honestly be served with a thousand things, just a few off the top of my head: anything grilled, anything eggy and breakfast-y (it would be amazing with an omelette or a frittata), or as I mentioned above, with cheeses.
Notes: If you are unable to find jalapeno peppers, you can use any peppers that are a similar level of heat.
Tomato and Jalapeno Jam, makes 1 cup (8 fl oz)
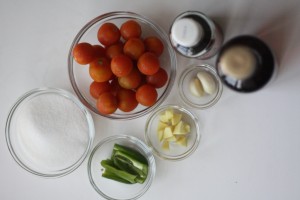
1 pint ripe grape tomatoes (about 9 oz)
2 green jalapeno peppers, (see Notes) halved and seeds mostly removed
2 garlic cloves, peeled and roughly chopped
3/4 inch piece ginger, peeled and roughly chopped
1 tbsp fish sauce
3/4 cup sugar (about 5 oz)
3 1/2 tbsp red wine vinegar
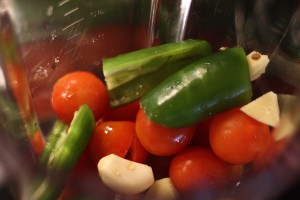
1. In a blender combine tomatoes, jalapenos, garlic, ginger and fish sauce.
2. Blend until pureed.
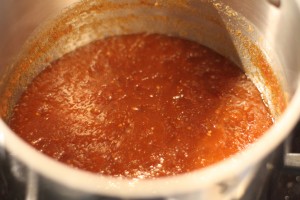
3. Add puree, sugar and vinegar to a small saucepan and bring to a boil. Reduce heat to medium low and simmer for 30-40 minutes, until reduced by a third. Stir occasionally to make sure the jam is not burning.
4. Pour into sterilized jar and allow to cool at room temperature. Once cooled, store in fridge for up to 2 weeks.
Pork and Potato Croquettes
Posted on 7 June 2010 | 4 responses
Last week I posted photos and a recipe for a brine for delicious pork chops. Given the immense size of the chops (Fred Flinstone would have been sated!), the hubby and I could only finish half of our chops. This left us with a cup and a bit of leftover, tender and juicy pork, perfect for making a quick weekday meal with. I had served the chops with mashed potatoes and we had some packaged up in the fridge. As I was working through my mental recipe roledex, my mind stopped at croquettes. (I also served creamed summer corn and gourgeres, which are mini Gruyere cheese puffs.)
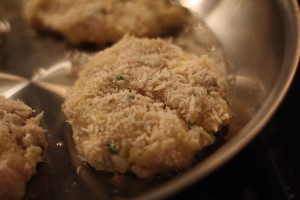
The beauty of croquettes is that you can add whatever you have around to them. In my case, I kept them relatively simple and added mascarpone, chopped chives and mustard. I used an egg to bind the mixture and then rolled the patties in some panko bread crumbs. These gave the cakes a light and crispy exterior, which was a perfect contrast to the creamy and soft interior.
I served these with a mixed salad and my homemade, spicy but sweet, tomato and chili jam. All in all the meal took about 35 minutes to make. Perfect for a quick and easy lunch or a weeknight meal.
Notes: This recipe either feeds two people as an entree, with two croquettes each, or four people as a starter.
The diced pork is leftover from my Chef & the Farmer’s Brined Pork Chops post last week.
I used my Creamy, Buttery Mashed Potato recipe to make the mashed potato in these croquettes. The only changed I made was to replace the cream with milk for a lighter texture.
If you are unable to find mascarpone cheese, you can use 1 tbsp sour cream.
You should be able to find panko bread crumbs in most supermarkets in the ethnic aisle, or in a Japanese speciality store.
Pork Croquettes, makes 4 croquettes
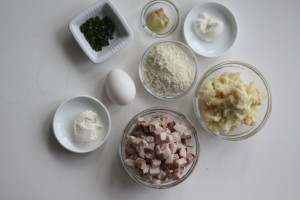
1 1/2 cups medium diced pork (see Notes)
1 cup mashed potatoes (see Notes)
2 tbsp mascarpone cheese (see Notes)
1 1/2 tsp chopped chives
1 tsp Dijon mustard
1 large egg, beaten until whites and yolk are combined
1/2 cup panko bread crumbs (see Notes)
2 tbsp olive oil
1. Heat oven to 275F. Line a baking tray with parchment paper. Add pork, potatoes, mascarpone, chives, and mustard to a medium mixing bowl. Add egg and mix until thoroughly combined. Form into 4 hamburger shaped patties. Roll in panko crumbs.
2. In a 12 inch frying pan, heat olive oil over medium high heat. Add croquettes to pan, making sure they are not touching. Cook for 4 minutes on each side, until the croquettes are golden brown, flipping carefully with a spatula. Move croquettes from the frying pan onto the baking sheet and place in oven for 6-8 minutes.
3. Serve with a simply dressed salad and tomato and chili jam.
Carrot Cake Cupcakes
Posted on 4 June 2010 | 2 responses
As promised in my post from last Friday… Ad Hoc At Home‘s Carrot Cake Cupcakes! As many of you know I am obsessed with this book, the restaurant Ad Hoc in Yountville, Napa, and Thomas Keller in general (hello Bouchon vanilla and caramel macarons!). While it may look as though there are a lot of ingredients in these beauties, this recipe is so easy to prepare and it helps that the ingredients are common pantry items that we all have in our cupboards. The only slightly time consuming part is grating the carrots (see Notes for a shortcut).
These carrot cake cupcakes are wonderfully tender, with a light and moist crumb. They have just the right amount of carrot and walnuts to make you feel as though eating them does your body good. The frosting is divine, it is so silky and rich and works so well with the cinnamon in the cakes. I recently spread some on my delicious whole wheat waffles, which also contain cinnamon, then drizzled them with maple syrup – out of this world!! I know it may sound slightly gluttonous spreading frosting on a waffle but don’t judge it until you’ve tried it 🙂 What makes it slightly better is that they are healthy whole grain waffles!
Notes: As I said above for 12 cupcakes it should not take you too long to grate the carrots. I once made 36 of these cupcakes, which took 6 large carrots. It made me feel as though my arm was going to seize up! If grating really is not your thing and you have a food processor with a grating attachment you can pop the carrots in there. The grate will not be as fine as with a hand grater but it will work.
Carrot Cake Cupcakes, makes 12 cupcakes
Cupcakes
1 cup cake flour
1/2 tsp baking powder
1/2 tsp baking soda
1 tsp ground cinnamon
2 large eggs
2 tbsp whole milk
1/2 tsp vanilla extract
1/2 cup granulated sugar
1/2 cup packed light brown sugar
1/2 cup canola oil
1 1/2 cups finely shredded carrots (about 2 large carrots)
3/4 cup coarsely chopped walnuts
1. Heat oven to 350F. Line 12 cupcake cups with cupcake liners. Sift flour, baking powder, baking soda and cinnamon into a medium bowl. In the bowl of a stand mixer fitted with a paddle attachment, beat eggs, milk, vanilla, and both sugars until smooth. Beat in oil.
2. Slowly add dry ingredients. Turn off mixer and stir in carrots and 1/2 cup chopped walnuts.
3. Divide batter among lined cupcake cups.
4. Bake for 10 minutes. Rotate pan and bake for another 10 minutes, or until a toothpick inserted into the center of the cupcake comes out clean. Remove the cupcakes from the tins and let cool at room temperature on a cooling rack. While they are cooling make the frosting (recipe below).
Cream Cheese Frosting
12 oz cream cheese, at room temperature
4 oz unsalted butter, at room temperature (1 stick)
3/4 cup confectioners’ sugar (icing sugar in the UK)
1/2 tsp vanilla extract
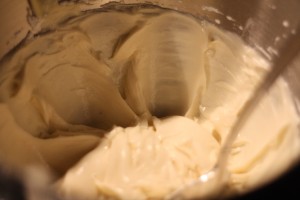
1. In the bowl of a stand mixer fitted with the paddle attachment, beat cream cheese at medium speed until smooth. Add butter and mix until smooth. Turn speed down to low and mix in powdered sugar, then add vanilla. Once combined, scrape down sides. Beat on high for 30 seconds.
To frost the cupcakes…
1. Spread frosting on the tops of the cooled cupcakes and sprinkle with the remaining chopped walnuts.
Chef & the Farmer’s Brined Pork Chops
Posted on 3 June 2010 | 12 responses
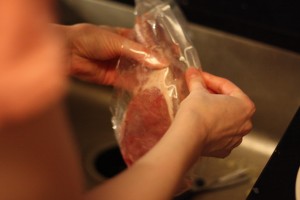
As anyone who has read this blog from the beginning knows, I love anything brined and I adore pork, which means that I am downright lusty when it comes to brined pork. I have already posted a recipe for brined pork tenderloin, but for a while now, one of good friends and neighbors has raved about the pork chops at the Chef & the Farmer in Kinston, North Carolina. My husband is from Morehead City, North Carolina and when we fly into Raleigh we pass through Kinston on our drive. We seem to only travel through in the early morning so we have never been able to get dinner at Chef & the Farmer, much to our chagrin. We often look at the menu and discuss what we would get. This is a game I could plan for hours. If you have not guessed yet, we’re really into food… I think the ones in the lead at the moment are baked oysters with bacon, fennel and arugula and the braised pork shoulder and butternut squash lasagne. Not even mentioning the deviled eggs my neighbor was describing that he had last time he was there! As we were not able to make the trip down, thankfully Chef Vivian Howard mailed our friends four vacuum packed and outrageously thick (two-inches!!), Rainbow Meadow Farms’ bone-in, blade end pork chops, allowing us to get a taste up here in New York.
After defrosting them for three long days (I told you there were thick!), they were finally ready. The chops came pre-brined – the brine recipe is below for those of you who want to make these at home and who would not after looking at the pictures?
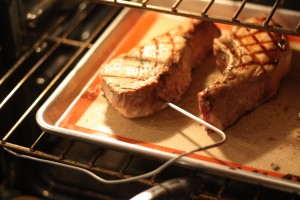
I took the chops out of their bags and let them sit for thirty minutes at room temperature, anytime up to an hour is good. In general I do this for all meat, with the exception of ground meat, especially when grilling or sauteing. If the meat is cold when you first put it on the grill it gets a shock. This results in a tough outer layer and the meat is also more likely to stick to your grill. As the chops were so thick, I knew it would take a while to get the perfect medium-medium rare I was looking for. I heated the oven to 350°F, and set our cast iron grill over a medium high flame. I am big fan of hatch marks since I really think they are an indicator of an accomplished griller and they are the easiest thing to do – if you possess some spatial awareness! Simply, you just have to turn the meat 90° (a quarter turn). I say ‘simply’, I think the size of the chops yesterday confused me as I somehow turned one pair 180°, resulting in two sets of parallel lines – brainy!!
Using the timings for the pork chops below, we had perfect medium pork chops. (As I said in my last brined pork recipe, only cook the pork to this temperature if you know where your meat comes from. If you do not cook the pork to a higher level of doneness.) The brine had permeated the pork with the sage, thyme and rosemary intermingling wonderfully. The meat was juicy and flavorful. The only way it can get better is when we finally head down there and get to eat at the Chef & the Farmer!
Notes: I served these gorgeous chops with creamed summer corn, mashed potatoes (I used milk to replace the cream for lighter potatoes), gourgeres (recipe up soon) and a green salad.
I cannot recommend brining enough. I went into some of the science behind it in my post for the brined pork tenderloin, but if you do not want to re-read just know that brining will add moisture to leaner meats and also add a terrific depth of flavor.
In the how-to I mention measuring the temperature of the meat to check its’ doneness. I use a Taylor Digital Thermometer that I can leave outside of the oven, with an alarm so it just alerts me whenever my meat is done.
To grill 2″ thick pork chops to medium – medium rare…
1. Once the chops were room temperature, place them on the heated grill. Cook for 4 minutes, before turning them 90° and cooking for 3 more minutes.
2. Flip the chops over and repeat – cook for 4 minutes, rotate, cook for 3 more.
3. Place the chops onto a sheet pan and place in the oven. Keep checking until the center of the chops reach 135°F (see Notes)
4. Pull out of oven, cover and allow to rest for 5 to 10 minutes.
Chef and the Farmer Pork Brine recipe, brines 1 whole pork loin or 12 2″ pork chops
Reproduced with the kind permission of Chef Howard from Chef & the Farmer
3 quarts plus 3 cups water
1 1/4 cups kosher salt
1 1/2 cups brown sugar
6 tbsp crushed black peppercorns
3/4 cup Dijon mustard
10 smashed garlic cloves
Handful thyme
3 sprigs rosemary
Small handful sage
1. Combine all ingredients in a stock pot. Bring to a boil, and boil for 1 minute. Allow to cool to room temperature, then chill in the fridge before adding the pork.
Creamy, Traditional Lasagne
Posted on 1 June 2010 | Comments Off on Creamy, Traditional Lasagne
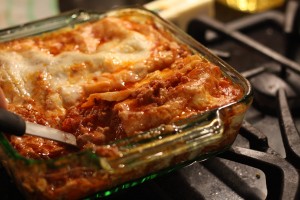
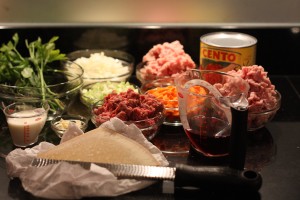
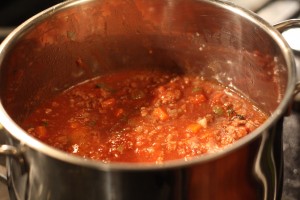
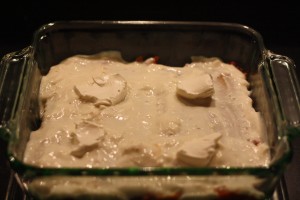
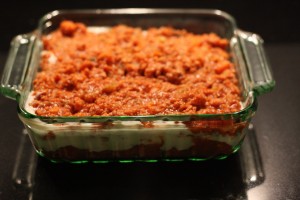
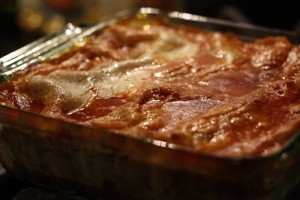
As you may have gathered, I am more than slightly obsessed with Italian food and I also love the combination of veal, pork and beef. With those two things in mind, I often make this lasagne. The ragu I make is pretty old World, from the fresh herbs I use to the mixture of the meats, even down to the addition celery. I challenge you not to feel like an authentic Italian grandma when you have this ragu simmering on your stove.
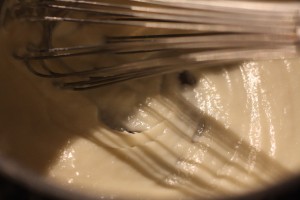
Even though the cooking time is fairly long, it is mostly inactive; aside from a couple of stirs every now and then to make sure everything is cooking together, you are free to watch television, read a book, wash your hair or do whatever it is you want to do. I usually make the meat sauce on a quiet night when I am home and use the lingering fragrance the same way some people use Febreze or Glade plugins. When you make the sauce ahead, the dish is a snap to make. All that is left is just a quick batch of bechamel. I use the same basic white sauce that I use all the time, with slightly less nutmeg than I use in my Homemade Cannelloni. To add some creaminess, I add marscapone and for some saltiness, freshly grated Parmesan.
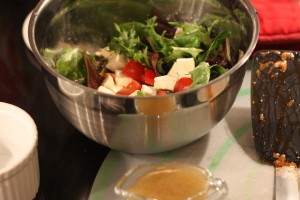
To serve, I made a green salad with tomatoes and mozzarella with a white balsamic vinaigrette with a few drops of white truffle oil.
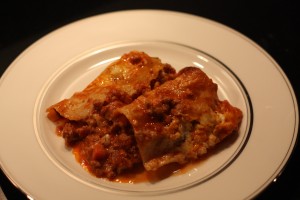
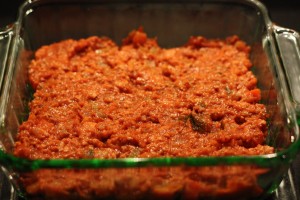
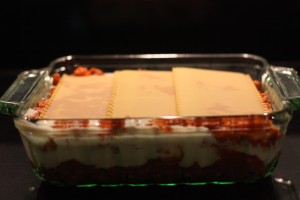
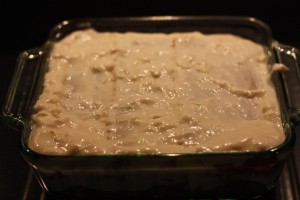
Notes: As you will notice in the pictures, this lasagne is very saucy. By that I do not mean a little bit naughty or cheeky but gooey, sloppy and kind of messy to eat. Personally I love this, it think intermingling sauces and pasta are great in this case. Originally however, the hubby was not a huge fan. The first time I made this for him he asked why it did not look like Olive Garden’s lasagne. Not being familiar with any Olive Garden entrees, we did a recon trip. Having eaten the large, generic tasting block of food, I was able to explain the reason for the cafeteria presentation as pleasantly as I was able. The reason is they freeze their lasgane in bulk and then nuke squares in the microwave to order. So if your lasagne collapses as you are putting it on the plate, know that you did something right! 🙂
Creamy, Traditional Lasagne, serves 4-6 as an entree
Ragu
2 tbsp olive oil
2 small onions, chopped
3 celery stalks, chopped
1 carrot, peeled and chopped
3 garlic cloves, minced
12 oz ground veal
12 oz ground pork
8 oz ground chuck
1/4 cup whole milk
1/2 cup red wine
28 oz can crushed tomatoes
5 parsley sprigs
5 thyme sprigs
4 sage leaves
1/2 rosemary stem
1 bay leaf
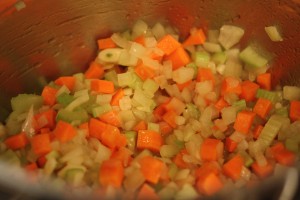
1. Heat large saucepan over medium high heat. Add olive oil, once heated add onions, celery, carrot. Season with a pinch of salt, put a lid on the pan and turn heat down to medium and cook for 5 minutes.
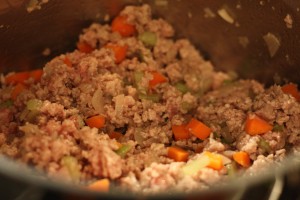
2. Add garlic, replace lid and cook for another 2 minutes. Turn heat back up to medium high, add meats. Using a large wooden spoon, break up the meat and brown.
3. Add milk, simmer until absorbed. Add wine, tomatoes and herbs, and season with salt and pepper. Turn heat to medium low and cook for at least 45 minutes to 1 hour, simmering gently.
Bechamel (White Sauce), makes 3 cups
4 tbsp unsalted butter
1/2 cup all purpose flour
3 cups whole milk
Freshly ground nutmeg, to season
1. Place a medium saucepan over medium heat and melt butter. Add flour, whisking constantly to combine, cook for 1 minute until flour is cooked. Continuing to whisk, slowly begin adding milk. Once all the milk is added and while whisking bring sauce to a boil and then reduce to a light simmer. Cook for 10 minutes, whisking occasionally to prevent burning on the bottom of the saucepan. Remove from heat and season with salt and nutmeg.
To assemble the lasagne…
6 De Cecco lasgane sheets
4 tbsp mascarpone cheese
1/2 cup Parmesan cheese
1. Heat oven to 350F. Pour half the ragu into an 8 by 8 inch baking dish.
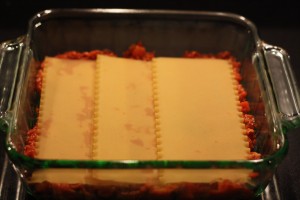
2. Layer with 3 lasagne sheets.
3. Pour on half the bechamel and top with mascarpone.
4. Layer the rest of the ragu.
5. Add second 3 lasagne sheets.
6. Finish with the rest of the bechamel and sprinkle with Parmesan and season with salt and pepper.
7. Cook for 45 minutes, until the sauces are bubbling.
Woman at Work (well, in the Kitchen…)
Posted on 28 May 2010 | 3 responses
Sorry I haven’t posted today, terribly naughty of me! We have guests coming into town this evening to celebrate the Memorial Day holiday with us. I hate not having treats and things to nibble on in the house when we have company so I have been busy in the kitchen all day. I didn’t want to leave you picture-less so I thought I would pop some pics of the food I am whipping up today (I will add more throughout the day), recipes to follow….
The Carrot Cupcakes cooling before I ice them with cream cheese frosting

The graham cracker crust of the Key Lime Bars cooling before I add the key lime curd and whipped cream

Pat LaFrieda Burgers at home
Posted on 27 May 2010 | 11 responses
I thought that I would post this just in time for Memorial Day and also as, and I say this with a super straight face… tomorrow is National Hamburger Day! I really should not laugh as hamburgers are one of my favorite, favorite food groups (that’s right, I think of them as a food group all on their own). In my four short years in this city I have attempted to eat all the “best” hamburgers in this city. This is an almost impossible task as burger mania has taken over this town and every restaurant is on a quest to have the number one burger. People attribute this burger craze to the recession as hamburgers are comforting and affordable. I believe it is because they are darned delicious and if cupcakes have had their time to shine why can’t burgers?
Every month there seems to be a new place ‘you just have to go to’ in order to get the best burger. For a while I have been fixated on Minetta Tavern’s Black Label Burger. I just have to get past the $26 price tag and the fact that you cannot get a table there unless you want to eat on a Tuesday at 10pm. As I always do, whenever I think something is overpriced in a restaurant, I try to research it as much as possible to recreate it at home. With this burger I instantly hit a wall! This is because, dear readers, I have as much chance of finding out what goes into Minetta Tavern’s Black Label burger as I do the composition for Coca Cola. The meat mixture for these patties is ground at Pat LaFrieda’s warehouse in the Village and they have a thick confidentiality agreement with Minetta Tavern to never reveal the exact blend of meats that goes into their Black Label beef. All I have managed to uncover is that it is made with dry aged rib eye steak the thought of which makes me drool a little! You know when there are legal documents about the composition of the meat in a burger that the world is crazy about burgers.
The Minetta Tavern ‘Black Label’ Burger
But it is not just Minetta Tavern that has these confidentiality agreements with Pat LaFrieda, Shake Shack does as well; my culinary school was just a block away from Shake Shack’s home in Washington Square Park and I was constantly amazed by the length of the lines. It did not matter if I was heading into class or leaving for the day, there would always be a crazy queue (you can avoid this by going online at home and checking out the line on the Shake Shack cam or with their app… I kid you not!). And the lines at this location are not some anomaly. If you head to the Met’s home, CitiField, the vendor with the craziest lines is ALWAYS Shake Shack. The average wait in line is two innings (the photo below does not do the lines justice) – burger fever has taken over New York!
Most of the contenders for NY’s best burger all buy their meat from Pat LaFrieda’s. When I saw the list of restaurants that they supplied the meat for I almost could not believe it! Almost every place that I have had foodgasms over the burgers was on the list… Blue Smoke, Union Square Cafe, BLT Burger, 5 Napkin, Stand, City Hall, Broome Street Burger and newcomer, The Breslin’s lamb burger. They supply upwards of two hundred restaurant in the New York area.
Until recently you could not get any LaFrieda burgers at home, (although there is an approximation on Food&Wine.com of the Minetta Burger from Minetta Tavern, which at $16 is a slightly more wallet happy than their Black Label Burger), so when I found out that Pat LaFrieda was going to begin selling to our online grocery store, FreshDirect, I did a little happy dance! While none of the burgers for sale are the exact restaurant mixes, you still get variety: there are the original, brisket and short rib styles. We opted for the brisket variety as I had read that this was the juiciest and most flavorful of the three, being made with chuck, brisket and shoulder, yum!
In a 12 inch frying pan
On a cast iron grill
We tried cooking the burgers two ways; the first in a frying pan, draining off the excess grease until we got a nice crust on either side and the second was on a cast iron grill. We found that 6 minutes on each side resulted in the perfect medium burger, this should be true of all 6oz patties. However we cooked them, we still added cheese during the final stages to get it nice and melted, mozzarella for me, sliced American for the hubby. I love brioche so we use brioche rolls and then added lettuce, tomatoes, ketchup and mayonnaise (and onions and Dijon for me, what can I tell you I love filled burgers.)
The hubby’s American cheeseburgers…

And my fully loaded mozzarella burger…

The advice we were given was correct! The brisket burgers were so juicy and flavorful. The brioche soaked up all the juices that begin to run out after your first bite, keeping each mouthful as good as the first. I think we’ll be going back for the other kinds of burger soon, I’m pretty sure that the short rib burger has my name all over it.
* Photo of the Shake Shack line courtesy of GrubStreetNY
* Photo of Minetta Tavern Black Label Burger courtesy of SeriousEats
Thai Red Curry Broth with Udon Noodles
Posted on 26 May 2010 | 2 responses
As everyone who regularly reads this blog knows, I absolutely hate to waste food! Everything that can be salvaged from a meal served in my kitchen, will be salvaged. As I made Tuesday’s Thai Red Curry for just my husband and myself I had about a third of it leftover (I should have had half but the hubbie went back for seconds… he had just been on a long run so it’s allowed :)). These leftovers made their way into one of my cute glass storage bowls to rescue me another day.
And today was their time to shine. I needed to have something filling and interesting on the table in fifteen minutes. This ruled out almost anything I could think of except pasta and jarred sauce (which has come in handy many a time), but when I looked in the refrigerator I saw this shining beacon of deliciousness! The inspiration behind this recipe was some of the amazing noodles dishes I have had at two of my favorite restaurants, Wagamama in London and Republic in New York, both of which I am wildly obsessed with. Whenever I fly home to London, the first thing I do is eat at Wagamama’s. Hello, miso ramen with extra chili oil and terriyaki sauce! This is shortly before I fill my suitcase with jars of goose fat and cans of Heinz tomato soup.
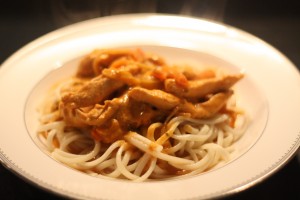
Any way back to this entree… I simply boiled some udon noodles in unsalted water and simmered the leftover curry with some chicken stock and viola! A meal for two in no time! I only added 3/4 cup of chicken stock but feel free to add more to make it extra soupy.
Notes: I used Shirakiku brand, Japanese Style Noodles Inaka Udon, as they contain no preservatives and are made with just wheat flour, salt and water.
Thai Red Curry Broth with Udon Noodles, serves 2 as an entree
1/3 to 1/2 of Tuesday’s Nearly Authentic Thai Red Curry recipe, about 1 1/4 cups
3/4 cup chicken stock
6 oz udon noodles (see Notes)
1. Cook udon noodles according to directions. In a medium saucepan, bring red curry and chicken stock to a simmer over medium low heat, stirring to combine. Cook for 10 -15 minutes.
2. Once cooked, drain noodles and add to shallow bowls. Divide the red curry broth, chicken and vegetables between the two bowls. Serve immediately.
