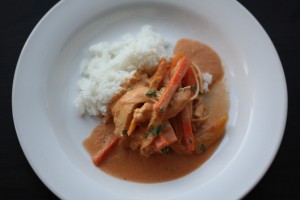
Nearly Authentic Thai Red Curry
Posted on 25 May 2010 | 7 responses
As I have mentioned before, one of the prerequisites to being English is that you must love curry, and if you don’t I am not quite sure what to do with you! This usually refers to what most people think of as “Indian” curry; for me it covers all manners of curry. In fact, I have not met a curry that I didn’t want to take home with me! So it is only natural that I love thai curries as well. While I am sure there are many great Thai restaurants in New York, we have not found one yet (if any one has any recommendations let us know), so I often make this dish at home. As it cooks it fills our apartment with a wonderful smell that is just a little bit exotic and spicy.
One of the advantages of making this entree at home is that I am able to make it spicier than I would usually get in a restaurant. The recipe reflects this so feel free to add less curry paste and to leave out the sliced jalapeno pepper garnish when you are making it. I love being able to quickly simmer the chicken in the coconut milk. It tastes almost like braised chicken, so tender!, but so much quicker.
While this recipe is somewhat authentic I have definitely switched up the ingredients, hence the name! While I have kept the red curry paste, fish sauce and lime juice, I left out tamarind juice, palm sugar, sweet Thai basil leaves and lime leaves. I also added peppers, rather than bamboo shoots, and jalapenos, rather than Bird’s eye chilies. I think that these ingredients make this recipe far more approachable for the home cook. While I may be able to get most of the authentic ingredients they are usually so pricey and I know that I would not be able to use all the ingredients before they went bad. I prefer to leave them out unless I am making this dish for a special occasion. If I get enough requests for a truly authentic recipe, I will post one and a recipe for homemade red curry paste as well.
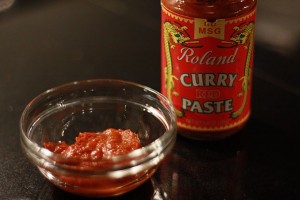
Traditionally, red curry paste is made with a pestle and mortar. It is made of a whole host of ingredients; Bird’s Eye chilies (dried and fresh), lemongrass, garlic, shallots, ginger, cilantro, galangal, coriander seeds, lime zest, cumin, and shrimp paste or anchovy paste. You can make curry paste as home more easily by using a blender but it only keeps for three days. I prefer to buy mine premade in jars, knowing I will have two months or so before I have to use it all and will not have to waste it. There are so many brands of red curry paste but I prefer the Roland brand, it is made in Malaysia and does not contain any of the food additive monosodium glutamate (MSG), which is contained in lots of premade Asian condiments. While all the ingredients are fresh and natural is does contain shrimp paste making it unsuitable for veggies. I know that Thai Kitchen’s red curry paste is vegetarian friendly and is also gluten free.
Notes: I use Chaokoh brand of coconut milk. It is thicker and creamier than most other brands I have tried and has a more prominent coconut flavor. Other brands that I like – if you only eat organic, Roland Organic Coconut Milk and for a low fat diet, Thai Kitchen Pure Coconut Milk.
To make sure the carrots cook the whole way through in the short time it takes to make this meal, I blanche them before hand. This simply means that I put the cut carrots into boiling water for two minutes and then drain them before adding them to the curry.
Thai Red Curry, serves 4 as an entree
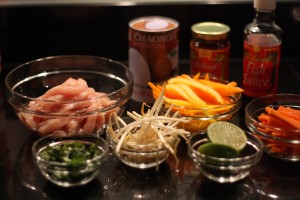
13.5 fl oz can coconut milk (see Notes)
3 tbsp red curry paste
1 carrot, peeled and cut into thin strips, blanched for 2 minutes (see Notes)
1/2 yellow pepper, thinly sliced
1/2 orange pepper, thinly sliced
2 1/2 tbsp fish sauce
Juice of a half lime
2 boneless, skinless breasts, thinly sliced
1/4 cup beansprouts
1/4 cup cilantro, chopped, plus extra leaves for garnish
1 jalapeno pepper, sliced thinly
Freshly cooked short grain rice, to serve
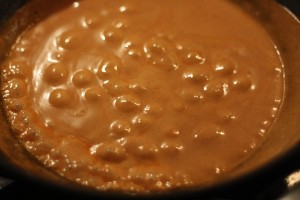
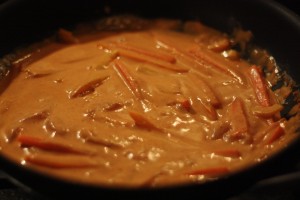
1. Place wok over medium high heat. Add coconut milk and red curry paste, stir to combine. Bring to a simmer and cook for 5 minutes.
2. Add peppers and carrots to simmering coconut milk, cook for 2 minutes. Add fish sauce and lime juice, stir in. Add chicken, cook for 4 minutes, until cooked through. Add beansprouts, stir in and cook for 2 minutes. Make sure the chicken is cooked completely, by cutting a piece in half and checking for any pink color; the chicken should be white the whole way through.
3. Remove from heat and stir in cilantro.
4. Serve with rice and garnish with extra cilantro leaves and lime slices and sliced jalapeno peppers.
Blue Cheese Puff Pastry Tarts
Posted on 24 May 2010 | Comments Off on Blue Cheese Puff Pastry Tarts
These tarts are one of my go-to’s. I always have puff pastry in the freezer; it has so many uses that it is always best to keep it on hand (lids of pies and stews, the base for this tart, palmiers, even cutting it into strips and sprinkling with a little sugar and cinnamon makes a delightfully easy sweet treat). Although you can make puff pastry at home, it is pretty tricky. I find it far easier just to buy the dough frozen and defrost it as I need it. I will put up a recipe for homemade puff pastry (and perhaps another video!) so you can take a gander just in case you want to make your own. I also always have a couple of ounces of cheese in our cheese drawer. You can add any kind of good cheese to these tarts, I have added blue cheese, goat cheese, cheddar cheese, anything with a good strong flavor.
They look fancy enough for a dinner party but are quick and easy enough to make for a lunch. Whenever I do make them for other people I always receive rave compliments! All you have to do is defrost the puff pastry and caramelized the onions and you are ready to go, everything else is so quick. I served this most recently with a salad of mixed baby lettuce with avocados, fresh mozzarella (I really love cheese!), with a white truffle and white balsamic vinaigrette.
Notes: I recommend that the onions should be thinly sliced lengthwise, by which I mean root to tip.
I use an Australian blue cheese called Roaring Forties Tasmanian Blue as it is creamy, melts perfectly but is strong enough to use sparingly. I use it in these tarts and in my blue cheese salad dressing for cobb salad (the recipe for which I will post soon).
Blue Cheese Puff Pastry Tarts, makes 2 tarts
1 sheet of pre-made puff pastry, defrosted, folded into thirds
2 tbsp olive oil, plus more for drizzling
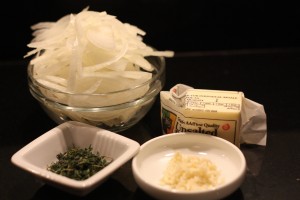
1 large onion, thinly sliced lengthwise (see Notes)
2 large cloves garlic, thinly sliced
2 tbsp white wine
1 tsp thyme leaves, minced
1/4 cup freshly grated Parmesan
1/4 cup blue cheese, crumbled (see Notes for recommended cheese)
2 medium Campari tomatoes, sliced into 5 slices each
2 tbsp chives, sliced finely
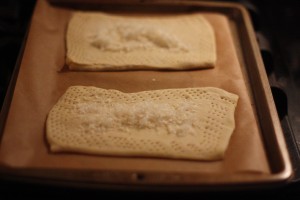
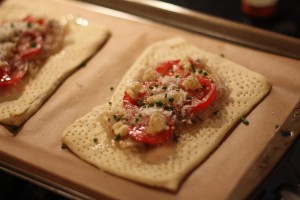
1. Heat oven to 425F. Line a baking sheet with parchment paper. Flour a clean work surface and place the folded puff pastry and dust flour over the top. Using a rolling pin, roll puff pastry into an 8 by 7 inch rectangle. Cut the dough into two smaller rectangles, along the long side, so you have two 4 by 7 inch rectangles. Place on the prepared baking sheets. Prick edges of the smaller rectangles with prongs of a fork (as shown in picture below). Add one tablespoon of Parmesan to each tart.
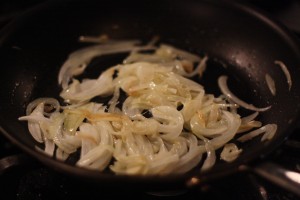
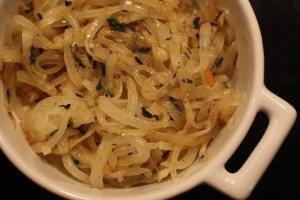
2. Heat olive oil in a large frying pan over medium heat. Add onions and garlic, saute for 15 minutes, stirring occasionally, until onions are soft and translucent. Turn heat down to low, add wine, thyme and season with salt and pepper. Cook for another 10 minutes, until onions are a golden brown.
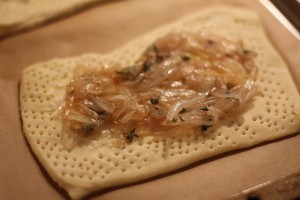
3. Place half of caramelized onions on top of Parmesan cheese in the center of each tart.
4. Add crumbled blue cheese, slices of tomatoes, the rest of the Parmesan, and half the chives. Drizzle with olive oil and sprinkle with kosher salt and freshly ground black pepper.
5. Bake for 25 to 30 minutes, until the pastry is golden brown and has risen. Sprinkle with the remainder of the chives and serve with a fresh green salad.
Crepe Suzette
Posted on 20 May 2010 | 4 responses
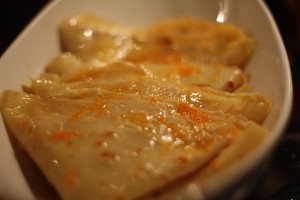
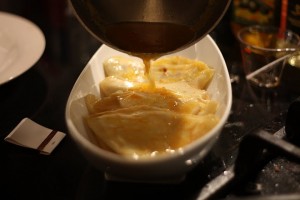
I have a confession to make… when I made this dessert I was thinking more about the yummy deliciousness I was about to experience and how soon I could eat them rather than taking photos, so we only have a couple with this recipe. I promise that as soon as we make them again I will add the photos for better visually cues, especially the impressive flaming sauce!
This dessert is such an iconic one; I feel as though in the 1980’s every restaurant was making Crepe Suzette table side, flames shooting around dining rooms the world over. I grew up in awe of the dessert without knowing just how easy it is to make. The sauce it takes moments, only four to five minutes, but you have a dinner party dessert ready to wow your guests. Make sure to be careful with the sauce as it is flaming otherwise your guests will be talking about something else other than how sumptuous your food was! Jesting aside, please make sure to use a long match and remove the pan from the burner before you add the alcohol (just to make sure the gas flame does not jump) and never pour alcohol directly from the bottle into the pan or near a naked flame.
Notes: you can make the crepes in advance. Just keep the crepes in the bubbling sauce until they are warmed through.
Crepe Suzette, serves 4 for dessert
4 tbsp unsalted butter
2 oz sugar
Zest of 2 oranges
Juice of 2 oranges
2 tbsp Grand Marnier, or another orange liqueur
2 tbsp cognac or brandy
8 freshly made crepes, made with the Basic Crepe recipe
Mascarpone or creme fraiche, to serve
1. Fold crepes in half and then half again to form small triangles; set aside. In a large frying pan, over medium heat, melt the butter. Add sugar, orange zest and juice and heat until mixture bubbles. Place quartered crepes into the mixture until heated through, about 30 seconds. Place crepes on a heatproof serving dish.
2. Remove pan from burner, add Grand Marnier and cognac to pan and carefully (!) ignite alcohol with a kitchen match. Carefully, swirl the pan to put the flame out. Pour the liquid over the pancakes, serve immediately.
Creamy, Brandied Mushroom Crepes
Posted on 19 May 2010 | 1 response
Ever since I was little my parents have tried to broaden my palate and make sure that I would not turn out to be a fussy eater. And for the most part, that has been the case; there are few things that I will not eat or at least try. Growing up I had a tactic to get out of eating foods that did not appeal to me. I always claimed I was allergic to them. This white lie saves me and my hosts – yes, I still do it occasionally, although my cover may be busted now – from very dramatic scenes. For some reason, I am completely incapable of behaving normally when I do not like something I am eating. Just to give you an example, the first time I ever tried an olive, I cried, in public! I may only have been eight years old but these things stick with you.
Mushrooms are one of those foods for me (along with olives – still!, sweetbreads and calves liver – I have tried and I just can’t, oysters, mussels and clams – so very chewy, and I am sure there are more that I am missing). But I realize that I am shutting myself off to tastes that other people like or even love. As a chef I know that I have to be able to stomach anything and so now as an adult I am making sure that my palate is as open to tastes as possible.
I simply make myself eat certain things. The best method I have found to do this is to either eat the item in a fancy restaurant (thank you Le Bernadin, you almost made me like oysters), but when budget does not allow, I make it myself at home. Almost all the foods that terrify me are all spongy or slimy, so for me it is a texture issue. All I have to do is somehow change the texture until I can appreciate the flavor.
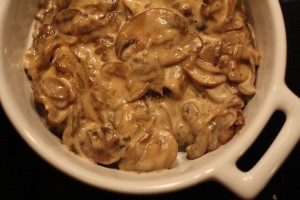
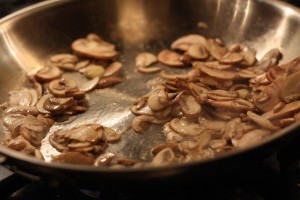
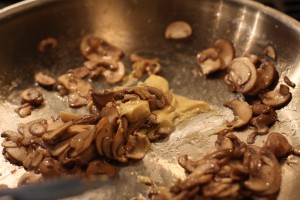
I have added mushrooms to risottos, soups, stews and some sauces to get myself used to the taste. In this sauce the mushrooms are sauteed over high heat and browned so that they are not spongy and they have texture. I also added garlic, cognac, Dijon mustard and cream, all flavors that cut the sponginess and mask any negatives I would find in the mushrooms.
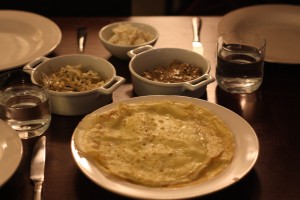
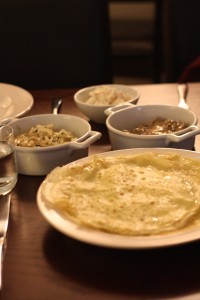
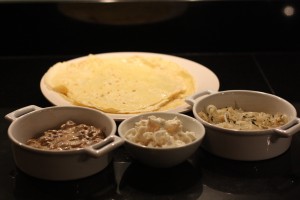
As I mentioned yesterday I serve this mushroom sauce with the caramelized onions and goat cheese and a pile of crepes. This allows everyone to mix and match and add what they would like to their crepe. You can also use this sauce as a side with any grilled meat. The creaminess is the perfect compliment to the charred smokiness.
Notes: In the recipe below I state that the garlic should be “smashed and then roughly chopped”. The smashing simply means to squish the clove with the side of a large chef’s knife, and then roughly chop to get larger pieces of garlic. This gets more of the flavor out of the garlic but allows you to have a larger surface area so the garlic will not get burnt easily when cooking over a high heat.
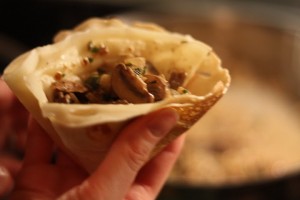
To serve crepes with just this sauce, fold the crepe in half and then in quarters and form a small pocket, then fill this pocket with the filling. It is a more refined presentation of a crepe.
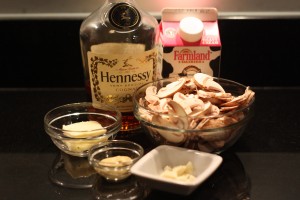
Creamy Mushroom Sauce
1 tbsp unsalted butter
1 tbsp canola oil
1 large garlic clove, smashed then roughly chopped (see Notes)
7 oz cremini mushrooms, thinly sliced
2 tsp Dijon mustard
2 tbsp cognac
2 tbsp heavy cream
Chives, finely chopped, for garnish (optional)
4 crepes, made with Basic Crepe recipe
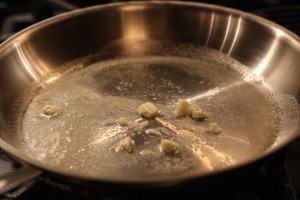
1. Heat large frying pan over medium high heat. Add butter and canola oil. Add garlic and cook for 2 minutes, stirring often to prevent burning.
2. Add mushrooms in a single layer, shaking the pan often and cook for 5 minutes, until mushrooms have absorbed most the oil and have begun to brown.
3. Add mustard and stir to coat mushrooms and garlic with it.
4. Add cognac and allow it to evaporate. Add cream and stir to combine. Season with salt and pepper. Turn heat to low to keep warm until ready to serve.
Caramelized Onion and Goat Cheese Crepes
Posted on 18 May 2010 | Comments Off on Caramelized Onion and Goat Cheese Crepes
Adding these onions, caramelized slowly with garlic and thyme and a splash of white wine, with melting goat cheese to basic crepes takes them completely out of breakfast and into a sophisticated dinner realm. The addition of wine also makes this a more adult tasting meal.
When I make these caramelized onions I serve them in a mix and match way. I put a couple of different fillings on the table, these onions, some crumbled goat cheese and a mushroom filling (which I will post tomorrow). This way everyone is able to make their perfect crepe. I also add a large, fresh green salad with a simple vinaigrette.
Caramelized Onion and Goat Cheese Crepes, makes 4 filled crepes
2 tbsp unsalted butter
1 large yellow onion
1 garlic clove, minced
1 tbsp thyme, minced
1/4 cup white wine
4 crepes, made with Basic Crepe recipe
4 oz goat cheese, I use Bucheron, crumbled into small pieces
1. Place a frying pan over medium heat. Add butter and allow to melt. Add onion and cook until soft and translucent, about 10 minutes. Add garlic and cook for 1 minute, until fragrant. Add thyme and wine, turn the heat down to low and cook until onions are soft and beginning to turn a golden brown. Season with salt and pepper.
2. If using freshly made crepes, place onions down the center of the crepe. Cover with goat cheese pieces and roll into a thin log and serve immediately.
If the crepes are not warm. Place onions down the center of the crepe. Cover with goat cheese pieces and put under a broiler until the cheese melts. Roll into a thin log and serve warm.
Crepes
Posted on 17 May 2010 | 2 responses
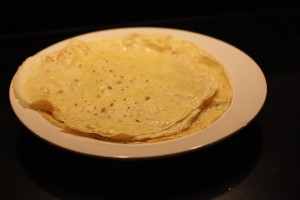
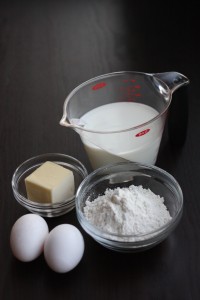
For unknown reasons, crepes are called pancakes in England. As far as I can tell, through recipe research and tasting them both, French crepes and English pancakes are exactly the same thing. The only difference between the two is the fancy French name. Pancakes, or crepes require just 4 ingredients, and all of them being kitchen staples, it could not be easier. It takes about 5 minutes to make the batter and 3 minutes to cook each pancake. Allowing you to have a meal for four on the table in 20 minutes. They are perfect for a light weekday lunch or dinner, or make for a very cute entree for a weekend brunch party.
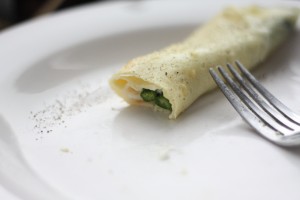
This week I am going to write up recipes for different fillings for crepes, some savory and some sweet; a creamy, mushroom sauce flambéed with brandy; caramelized onion and goat cheese; an orange flavored dessert, crepe suzette; and a gorgeous layered crepe cake called mille crepe! Today I am posting the basic crepe recipe which you can use for all of these meals and more. The beauty of crepes is you can fill them with anything. I made some this morning for breakfast and filled the hubby’s with blanched asparagus and goat cheese (he’s has more of a savory tooth than I do) and sprinkled sugar and drizzled some fresh lemon juice on mine (must be an English thing!).
I put 3 snapped cooked asparagus spears lengthwise along the crepe and then crumbled some goat cheese – I used Bucheron – over the top, while the crepe was still very hot. Then rolled the crepe into a long cylinder so that the gooey goat cheese melted over the asparagus. To serve, I ground some fresh black pepper over the top and served immediately.
Notes: I do not usually buy into something that I can only use for one thing but when I first bought my crepe pan that is what I thought I was doing. It was only after I began cooking with it did I find it so useful with other things. As the sides of crepe pans are so low, using one makes it so much easy to flip thin or potential melting things, such as the goat cheese in my Warm Goat Cheese Salad with Pickled Peppers. The pans are also on sale at the moment at Sur La Table, so now is a perfect time to pick one up. I have the largest sized, the 9.5 inch pan.
I find the crepes come out more perfect looking if I pour the batter into the pan in one or two additions rather than several. I do this by using measured ladles, this way I know exactly how much I am pouring in the pan at one time. I have them in a couple of sizes, 2 fluid ounces and 4 fluid ounces. I usually use my 2 fl oz for crepes and just pour one and a half filled ladles into the pan.
Crepes
7 fluid oz whole milk
3 fluid oz water
1 cup plain flour (4 oz)
Pinch table salt
2 large eggs
2 tbsp melted unsalted butter, plus more for greasing the pan
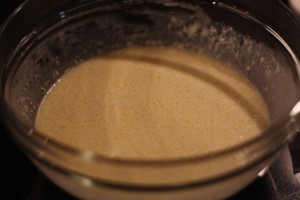
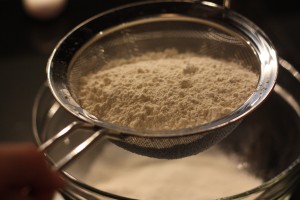
1. Combine milk and water. Sift flour and salt into a large mixing bowl. Make a well in the center of the flour. Break eggs into well and whisk to mix. Begin adding milk mixture in small amounts, whisking to combine. At the end the batter should have the consistency of cream. Add melted butter and stir to combine.
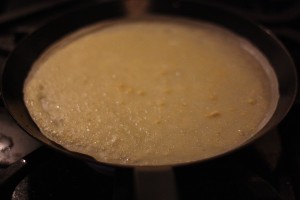
2. Place crepe pan over high heat. Turn heat down to medium and grease pan with a little butter on a paper towel. Add 3-4 fluid oz of batter and turn pan to coat bottom of pan. Allow to cook for 2 minutes and then loosen the edge with a spatula and flip. Allow to cook for 1 minute.
3. Remove crepe from pan and add fillings or toppings.
Snickerdoodles
Posted on 14 May 2010 | 2 responses
These old fashioned cookies with a peculiar name have been around since the nineteenth century, which in culinary terms really is not that long. There is much debate over whether they are a New English invention or from Germany or Holland, but there are a couple of things we do know for sure though. They are delicious, chewy on the outside and buttery and melt in your mouth on the inside; basically a sugar cookie with cinnamon rather than lemon zest. These cookies are so incredibly quick to make – the part that takes the longest time is waiting for the butter to come to room temperature. And they are incredibly more-ish (I have eaten three four since I made them… oops!)
And not to sound too Stepford, but they make an excellent present as they stay fresh tasting for up to three days. Get that cellophane and ribbon out!
Snickerdoodles
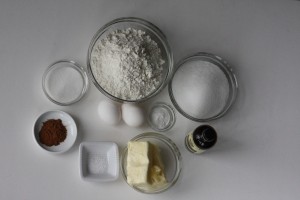
Cookies
2 3/4 cups all purpose flour
2 tsp baking powder
1/2 tsp kosher salt
1 cup unsalted butter (2 sticks)
1 1/2 cups sugar
2 large eggs
1/2 tsp vanilla extract
Cinnamon sugar
1/4 cup sugar
2 tsp ground cinnamon
1. Heat oven to 350°F. Line 2 to 3 large baking sheets with parchment paper. Mix together cinnamon sugar ingredients on a small plate; set aside. Over a large bowl, sift flour, baking powder and salt together.
2. Place the butter and sugar in the bowl of a stand mixer with the paddle attachment fitted. Mix on medium speed for 3 minutes, until light and fluffy.
3. Mix in eggs and vanilla extract on medium speed. Reduce speed to low and gradually mix in flour mixture until well combined.
5. Roll dough into 1 1/2 inch balls and roll in cinnamon sugar mixture. Place onto parchment lined baking sheet and repeat. Place balls 2 inches apart on sheet. You should be able to fit 12 balls on each sheet.
6. Bake for 12 minutes, until edges are golden, rotating pans half way through baking. Allow to cool on sheets on cooling racks.
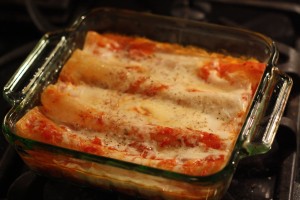
Homemade Cannelloni
Posted on 13 May 2010 | 6 responses
The first time cannelloni was explained to me, I was told it was pasta filled with meat sauce, with red sauce and white sauce. Not being familiar with American vernacular for Italian sauces at that point I thought it sounded abhorrently processed. Little did I know that it was all food that I was familiar with.
White sauce is simply bechamel sauce. Bechamel is a sauce that not everyone knows the name of but everyone is familiar with it. It is the foundation of so many dishes, fish pie, macaroni and cheese, anything served en croute and lasagne. Red sauce is tomato sauce also called pomodoro sauce or marinara sauce. Bechamel and tomato sauce are two of the great “mother” sauces, five sauces that are said to be the basis of all classic French sauces. (The others are espagnole, veloute, and hollandaise.) Somehow I was able to deduce what meat sauce was after I worked out the other two. See, staying in school did pay off!
There is nothing processed about this recipe at all. In fact, everything is this dish is homemade except for the pasta sheets. You can make these yourself using the recipe I posted a couple of weeks ago – rather than cut the sheets into strips to make fettuccine, you just cut the sheets into 4 by 6 inch rectangles, like lasagne sheets. I cheated by using pre-made lasagne sheets! I think it is a-okay to take a short cut every once in a while, especially when you are making every thing else from scratch.
Notes: Once again, you can replace the veal with beef if you have dietary restrictions.
Cannelloni, serves 2 as an entree
Marinara Sauce (Red Sauce), makes 2 cups
2 tbsp olive oil
1/2 large onion, chopped
2 garlic cloves, thinly sliced
1/4 large carrot, peeled and grated
1 tbsp chopped fresh thyme
2 parsley stems with leaves
1 28-oz can San Marzano tomatoes in juice
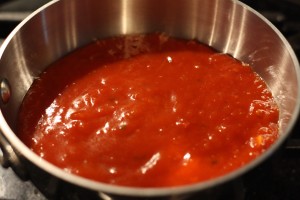
1. Add oil to a large saucepan over medium heat. Add onion and garlic and for 10 minutes, until soft and lightly golden. Add carrots and thyme and cook for 5 minutes, until carrots are cooked. Add tomatoes and parsley and bring to a boil, stirring to prevent burning. Lower heat to a simmer, cook until thick, about 30 minutes. Season with salt to taste.
Bechamel (White Sauce), makes 3 cups
4 tbsp unsalted butter
1/2 cup all purpose flour
3 cups whole milk
Freshly ground nutmeg, to season
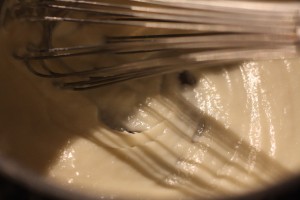
1. Place a medium saucepan over medium heat and melt butter. Add flour, whisking constantly to combine, cook for 1 minute until flour is cooked. Continuing to whisk, slowly begin adding milk. Once all the milk is added and while whisking bring sauce to a boil and then reduce to a light simmer. Cook for 10 minutes, whisking occasionally to prevent burning on the bottom of the saucepan. Remove from heat and season with salt and nutmeg.
Cannelloni Filling (Meat Sauce), makes 1 1/2 cups
1/2 tbsp unsalted butter
1/4 ground pork
1/4 ground veal
1/4 cup freshly grated Parmesan cheese, separated
1 1/2 tsp all purpose flour
1/2 whole milk
1/2 large egg
Freshly ground nutmeg, to season
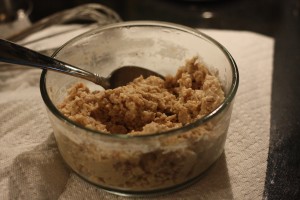
1. Place a 10 inch frying pan over high heat, add butter. When the butter stops foaming, add pork and veal, breaking up the meat with a wooden spoon and stirring, until browned, about 5 minutes.
2. Drain any excess fat, add 1/4 cup of Parmesan, flour and milk and bring to a boil. Reduce heat to a simmer and cook for 10 minutes, stirring often to prevent burning. Remove from heat and allow to cool. Taste to season with salt, pepper and nutmeg. Stir in egg.
To Assemble Cannelloni…
4 lasagne sheets
Olive oil
1 1/2 cup marinara sauce
1 1/2 cup cannelloni filling
1 1/4 cup bechamel sauce
1/4 cup grated parmesan
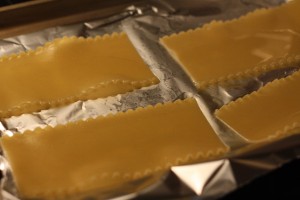
1. Heat oven to 350°F. Bring a large pot of salted water to a boil. Cook lasagne sheets to al dente, according to manufacturer’s directions, usually 5-7 minutes. Remove with a slotted spoon and place onto a foiled baking sheet, cover with a little olive oil.
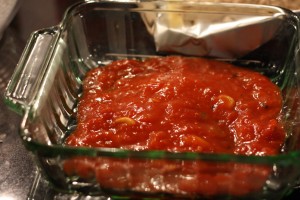
2. Pour half the marinara sauce into an 8 by 8 inch baking dish.
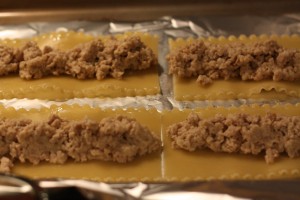
3. Fill each lasagne sheet with a quarter of the filling mixture and roll into a long tube.
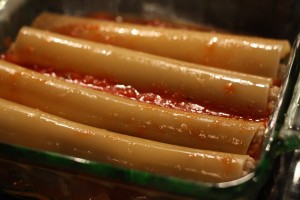
4. Carefully place tubes, seam side down, onto the marinara sauce.
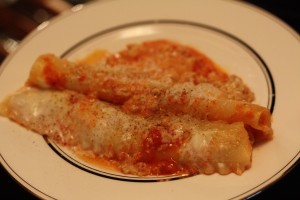
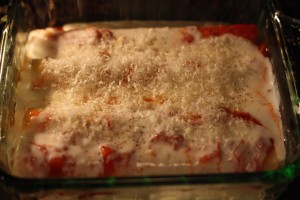
5. Pour the rest of the marinara sauce over the rolls so that they are all covered. Pour the bechamel over the top of this and sprinkle with Parmesan and salt.
6. Place baking dish in the oven and bake for 25 to 30 minutes, until the sauces are bubbling and the edge of the pasta are browned.
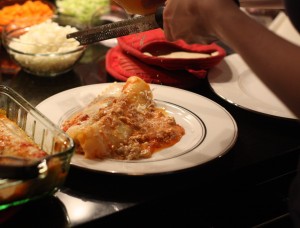
7. Leave to sit for 3-4 minute. Using a spatula, place cannelloni onto plates and then grate some Parmesan cheese over the top and serve with a green salad.
Spring Frittata
Posted on 12 May 2010 | 2 responses
So this morning I woke up to one of New York’s daily options for spring… During this precarious season, there is always a high probability that it will be miserably overcast, frightfully damp and cold with a good chance of drizzling rain. Every day like this makes me feels as though summer is months away. I forget that the day before may have brought glorious sunshine, warm breezes and the sound of children playing in the park. All I can think about is getting way from the grey. So sometimes I have to make myself something that will cheer me and remind me that summer (or the rest of spring for that matter) cannot be too far away.
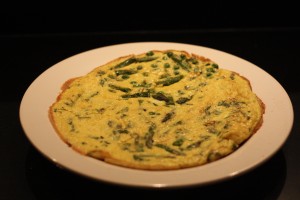
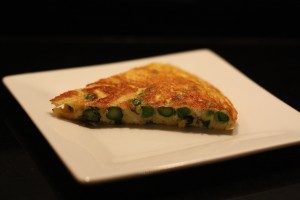
Which is how this frittata came into being. I looked into my fridge and freezer and grabbed the first three spring vegetables – it was just coincidence they were all green. This meal is so easy to make, it takes no time at all and makes a filling and healthy meal. I served my frittata with a mixed mesclun salad with a quick lemon vinaigrette – made by whisking together freshly squeezed lemon juice, Dijon mustard, a tiny squeeze of honey, salt and pepper and then continuing to whisk, adding olive oil in a slow drizzle. If you serve this with some warm, buttered French bread as well, you can almost imagine the sun! A meal made in Provencal heaven (you may have to close your eyes very tightly!)
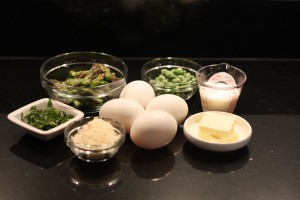
Asparagus, Pea and Mint Frittata, serves 4
1 tbsp unsalted butter
10 asparagus spears, trimmed and cut into 1 inch pieces
1/3 cup fresh or frozen peas
4 extra large eggs
1/2 cup Parmesan cheese, plus extra for garnish
2 tbsp heavy cream
2 tsp mint, cut into thin strips, plus extra for garnish
1. Turn broiler on to high. Place a 10 inch non-stick frying pan over medium high heat. Add butter and allow to melt. Add asparagus and peas and stir to cook with butter, cook for 4 minutes, shaking the pan occasionally to prevent burning.
2. At the same time, whisk eggs, cheese, cream and mint until well combined. Season with salt and freshly ground pepper. Cook for 4 minutes or until edges of the eggs turn golden brown. Pour egg mixture on top of asparagus and peas. Turn heat to medium and cook for 4 minutes.
3. Place pan until broiler and broil until eggs are just set. Invert frittata on to a plate.
4. Slice and serve with a green salad and warm, buttered French bread.
Thai Stir-Fried Chicken
Posted on 11 May 2010 | 2 responses
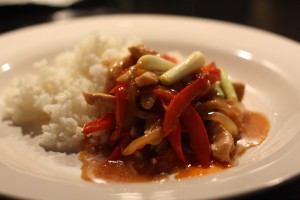
For some reason on Monday evenings I hit a wall when it comes to cooking. I just cannot fathom how exactly I am going to cook wholesome, interesting meals for the next five days until the weekend rolls around again. That is why I am thankful I have meals like this one in my back pocket. This whole meal takes twenty minutes to come together. You can literally put the rice on to cook, prepare the other ingredients and cook the stir fry in the last eight minutes. Unlike other meals that can be ready in such a short time, this one is healthy and not laden with trans-fats, chemicals and additives!
And even though I attempt to plan our week’s meals down to the exact amount of garlic cloves I will need, I somehow always forget an ingredient. As it happens, this also throws my world into disarray – have I mentioned that I am a delicate little flower yet? – so again I am thankful for meals like this. At any given time, I know that I have the ingredients for a stir fry, even if it is a man’s worst nightmare, ‘The Veggie Stir Fry’! For this one you just need chicken, which of course you can take out or replace depending on your dietary restrictions, a red pepper, an onion and some scallions.
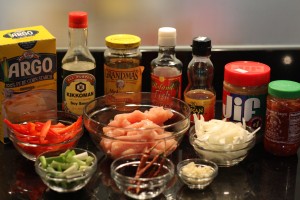
I have used common household pantry items for the rest. I could literally reach up into my cupboard, or the back of the fridge for some, and grab everything I needed. Which as we all know is the most refreshing thing to be able to do on a Monday evening!
Notes: I state that the onion should be sliced lengthwise. This means from root to tip. It simply gives a more tidy appearance to the finished dish as the longer pieces of onions hold their shape better.
I specify dried chiles de arbol, you should be able to find them at your local supermarket. Stored correctly (airtight container in a cool, dark place), they keep indefinitely so you can order in bulk and use a couple whenever you need them.
Thai Stir-Fried Chicken, serves 2-3 as an entree
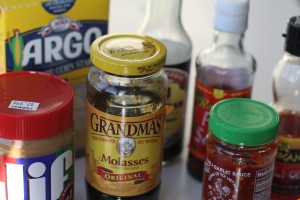
1 tbsp plus 1 tsp soy sauce
1 tbsp molasses
1 tbsp fish sauce
1 tsp cornstarch
3/4 tsp chili garlic sauce (Huy Fong brand)
1/2 tsp peanut butter, creamy style
1/4 tsp chili oil
2 tbsp vegetable oil
3 garlic cloves, crushed and roughly chopped
1 lb chicken breast, boneless and skinless, thinly sliced
1/2 yellow onion, thinly sliced lengthwise (see Notes)
1/2 red pepper, thinly sliced
5 dried chile de arbol peppers
6 scallion, cut into 1 inch pieces
1 tbsp cashews
1. Combine soy sauce, molasses, fish sauce, cornstarch, chili garlic sauce, peanut butter and chili oil in a small bowl. There will still be streaks of peanut butter no matter how much you stir it. Set aside.
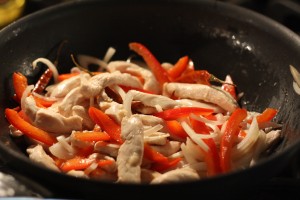
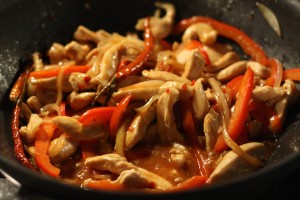
2. Place a wok or a large frying pan over medium high heat and add oil. Add garlic and cook for 30 seconds, stirring constantly. Add chicken and cook for 3 minutes, until chicken is no longer pink, stirring and shaking the pan constantly. Add onion, pepper, and chile peppers and cook for 2 minutes, stirring and shaking the constantly.
3. Add reserved soy mixture to wok and stir in, coating all the ingredients. Cook for 1 minutes, continuing to stir. Turn off heat.
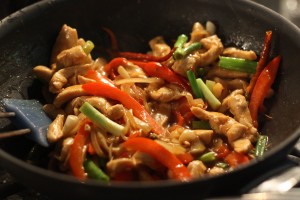
4. Add scallions and cashews. Stir to coat them in sauce.
5. Serve with steamed rice.
