Carrot and Coriander Soup
Posted on 10 May 2010 | 2 responses
One of the worst feelings is when you arrive back from vacation starving and knowing all the delivery places are long since closed. This happened to my husband and I recently, after a long car journey back from North Carolina. I stared into the nearly empty fridge woefully, seeing just a bunch of carrots and the remains of a bunch of cilantro staring back at me. Having grown up eating (or should that be drinking?) this soup regularly, I was surprisingly flummoxed. Since I have lived in the US, I always associated cilantro with Central American cuisine, even though I know it is used in so many other places around the world. (One recipe I am working on at the moment is a South East Asian meatball with cilantro, pickled carrots and a spicy mayo – recipe coming soon!)
For me to remember this soup even existed, I had to call cilantro by the name I grew up calling it… coriander. When I first moved over it confused me to no end that fresh coriander was called cilantro but the dried seeds were still called coriander (so many other name substitutions confused me as well but I’ll tackle those one by one!). Why would a language make it so confusing for people to know where their food was from? In my mind it is much easy for me to understand that coriander seeds and fresh coriander are from the same plant when they have the same name. But that could just be me.
This soup is true to one of my favorite childhood brands, New Covent Garden Soup Company, and their delicious Carrot and Coriander Soup. I love their recipe but for some reason I always associate nutmeg with colder months so I wanted to make a cleaner tasting, more spring like soup. I decided to use coriander seeds as well as fresh coriander to get a better depth of flavor. And I used mascarpone to make the soup slightly thicker than cream adding would but still as creamy. I made this soup most recently for an evening meal so mascarpone makes it a little heavier. For a lighter soup, I use creme fraiche, making it perfect for a quick dinner or a lunch.
This soup is also amazingly low cost, so good for you with all fresh carrot and herby goodness, and still absolutely more-ish. I never have leftovers no matter how big of a batch I make!
Notes: you can replace chicken stock with vegetable stock to make this soup vegetarian.
You can blend this soup with a hand held blender but I do not think it gets the same creamy texture that an upright blender achieves.
Carrot and Coriander Soup, serves 3-4 as an entree
2 tsp whole coriander seeds
2 tbsp unsalted butter
1 1/2 pounds carrots, peeled and roughly chopped
1 garlic clove, crushed and roughly chopped
4 cups chicken stock, plus extra for thinning the soup
2 tbsp mascarpone or creme fraiche
2 tbsp cilantro, chopped
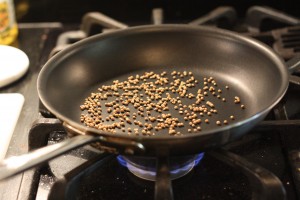
1. Heat a small frying pan over medium heat. Add coriander seeds, shaking the pan occasionally to prevent seeds from burning, cook for 1-2 medium, until seeds are fragrant and toasted.
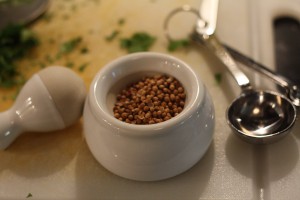
2. Use a pestle and mortar to grind the spices thoroughly. (Be warned the seeds fly everywhere!)
3. Heat butter in a large saucepan over medium high heat. Add carrots, garlic, and 3/4 of the ground coriander seeds, stir until coated in butter. Turn heat to low and cover, allow carrots to sweat for 10 minutes, until slightly softened.
4. Add stock and bring to a boil. Reduce heat and simmer for 20 minutes, or until carrots are soft.
5. Blend soup, in batches, in an upright blender. Making sure to secure the lid firmly with a kitchen towel. Return blended soup to a saucepan. Stir in mascarpone or creme fraiche and season with salt and pepper.
6. Serve soup in warmed bowls. Garnish with extra mascarpone or creme fraiche, some chopped cilantro and a sprinkle of crushed coriander seeds. Serve soup with crusty white bread and butter.
The Final Recipe: Creamy, Buttery Mashed Potatoes
Posted on 7 May 2010 | 7 responses
If I could make a type of food into a hug, it would be mashed potatoes. Nothing is quite as comforting or as reassuring as mashed potatoes. I could eat mashed potatoes for every meal – and I have occasionally done that, just ask anyone who has been at my house the week after thanksgiving, mashed potato pancakes anyone? – but I especially like them for dinner. There is nothing as satisfying as the type of ‘full’ you get when you eat potatoes and then are able to just snooze on the sofa, if you don’t believe me, come over to my apartment and watch my hubbie do it every evening in the winter! 🙂
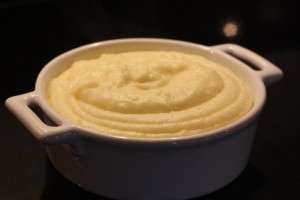
As the name may suggest, these mashed potatoes are seriously buttery and creamy. They are literally heaven in your mouth. I am not sure how to put it other than that… They are basically the french version of mashed potatoes, pommes puree. I get this texture by using a ricer (see Notes below for information about ricers). Ricing the potatoes into the cream and butter allows air to get into the mixture, resulting in lighter, fluffier potatoes without the need to use a machine or another utensil to whip them. The ricer also makes the potatoes far smoother than another other device except for maybe a tamis and who has room for one of those in their kitchen? Please excuse me for a moment while I go and try to find space for a 12 inch round drum in my little cupboards…
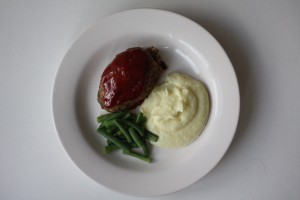
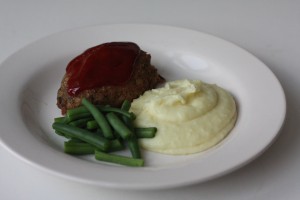
These potatoes make a glorious side dish for all manner of dishes. I especially like to serve them with my meatloaf though.
Notes: Potatoes have gotten a bad rap recently with all this high-protein, low-carb dieting. But I say Atkins, smatkins… I am certainly not recommending you eat these every day (although you will want to!), but potatoes are fundamentally good for you. They contain a ton of vitamins C, B3 and B6, potassium, iron as well as trace amounts of B1, B2, magnesium, calcium, folate and other minerals. And if that was not enough, the undigestable starch within potatoes acts as fiber. All in all, I am a big fan of potatoes!
Due to space constraints I do not like to have utensils or tools that only do one job but this tool has changed mashed potatoes for me. I had never seen a potato ricer until a couple of years, having always used a regular masher, but now, unless I am making lumpy mashed potatoes for a texture reason, I always use a ricer. A ricer is basically a device that squeezes the potatoes through small holes so the streams of potato are no thicker than a grain of rice (see below for photo). Ultimately, it produces the smooth, silky texture that makes this mashed potato recipe so good!
Tips: Although I mentioned using leftover mashed potatoes above in a joking way, there really are ways to use them so they do not taste like leftovers. Some great examples are: using them to thicken soups, or making a mashed potato soup, mashed potato pancakes, croquettes, fish cakes… There are so many uses when you think about it. I’ll post recipes for these in the future.
Creamy, Buttery Mashed Potatoes, serves 3-4 as a side
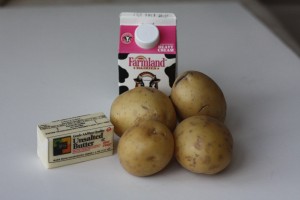
4 large potatoes, preferably Yukon Gold or Maris Piper (about 2 to 2 1/2 pounds)
4 tbsp unsalted butter, more to taste
1/2 cup heavy cream, more to taste
Kosher salt, to season
1. Peel potatoes and chop into 1 1/2 inch chunks. Place into a large saucepan and cover with cold water. Over high heat, bring to a boil. Boil for 15-20 minutes or until potatoes are very tender (test with your knife).
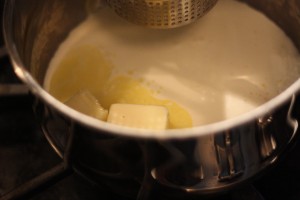
2. Drain potatoes thoroughly, reserving the pan, and place into a bowl. Add butter and cream to the pan and heat over low heat until butter melts.
3. Place as many potatoes as will fit in the ricer and press down firmly over the butter and cream. Rice the remaining potatoes in batches.
4. When you have riced all the potatoes, using a regular spoon, stir the mixture vigorously to combine and whip the potatoes. Season with kosher salt. If you want to, add more cream and butter, in small increments, stirring to combine after every addition. Serve while piping hot.
Individual Meatloaves
Posted on 6 May 2010 | 4 responses
Until I moved over to the States, there were so many traditional American foods that I had never eaten, let along tried. So when my husband and I first began dating I immediately asked what he favorite meal was. He told me that it was meatloaf with a red ketchup glaze, not covered with brown gravy! He had not had it since his mom last made it for him before she had become ill. This just about broke my heart so of course I set out to make it for him, even though I was completely unsure of what exactly meat loaf was. I sat down at my computer perplexed, intrigued and ready to learn all about the differences between red ketchup glaze and brown gravy. My curiosity quickly turn into complete confusion… Could it be that meatloaf was simply a loaf of meat? Having never eaten it I did not have any particular feelings, especially warm ones, toward this concept. I desperately needed to find a way of getting around the block of meat squished into a loaf pan.
I found a delicious recipe of Sara Moulton’s that combined ground beef, ground pork and ground veal with a ketchup based glaze. If there were any meatloaf recipe that I could get on board with it was going to be this one. There is a whole variety of meatloaf recipes out there made with a variety of different meats. Using the classically Italian combination of beef, pork and veal would create a milder tasting and softer textured loaf. (You can substitute ground turkey for the ground veal.)
Also the ingredients in this recipe are not the typically ones found in a classic dish such as meatloaf. I love the use of freshly sautéed celery, onions and garlic rather than celery, onion, and garlic powders; you do not add the chemicals to your food or get the aftertaste that these additives sometimes create. The fresh parsley adds just a hint of herb-iness and the sour cream gives a little kick and richness. It may seem as though there are a lot of ingredients in these but at any given time you probably have most of them in your pantry and fridge.
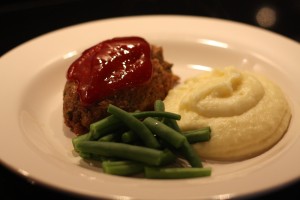
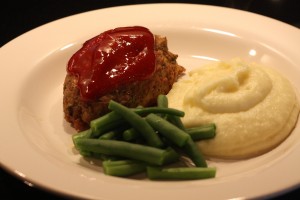
I serve my meatloaf with a generous helping of creamy, buttery mashed potatoes and a green, usually broccoli or green beans..
Notes: If you have fresh thyme lying around you can substitute it for the dried thyme. Remember to use the 3:1 dried to fresh herb substitution. So in this case, it will be 1/2 tsp chopped fresh thyme leaves.
You can leave the egg out if you have any egg allergies. The egg helps to bind but it is not compulsory as long as you make sure to form the loaves well before you place them in the oven.
As mentioned above, you can substitute ground turkey for the ground veal.
Even though the recipe specifies ground chuck steak, you can use any beef with a similar fat content (10 to 20%).
From time to time to keep things interesting (!) I mix up the ingredients adding them in different quantities. No recipe, other than baking recipes, are hard and fast with their exact measurements. I have made these countless times and always added more of one ingredient or forgotten another, somehow it always turns out well. The reason I have offered so many substitutions is so you can make this a master recipe and personalize it as you see fit.
Tip: If you make extra meatloaves, you can form them into ovals, wrap them in plastic wrap and place them in a resealable plastic bag and freeze them. Just increase the cooking time by 10 minutes.
Individual Meatloaves, makes 6 portion sized meatloaves
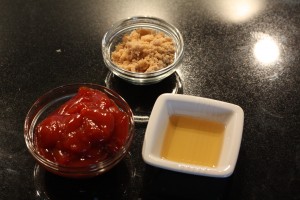
Ketchup Glaze
1 cup ketchup
1/4 cup light brown sugar
1 1/2 tbsp cider vinegar
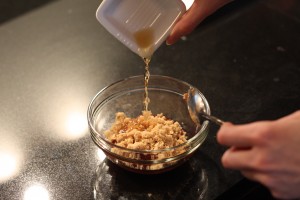
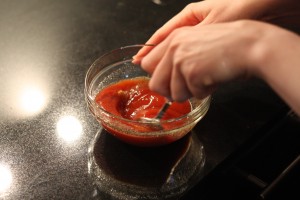
1. Combine ketchup, brown sugar, and vinegar. Stir to mix; set aside.
Meatloaves
1 tbsp olive oil, plus more for oiling the sheet pan
2 celery ribs, finely chopped
1 medium onion, finely chopped
3 garlic cloves, finely chopped
1 cup sour cream
1 cup breadcrumbs
1 large egg, beaten
1/4 cup whole milk
1/4 cup chopped parsley
2 tbsp Dijon mustard
2 1/2 tsp kosher salt
1 1/2 tsp dried thyme (see Notes for a fresh thyme substitution)
1 tsp freshly ground black pepper
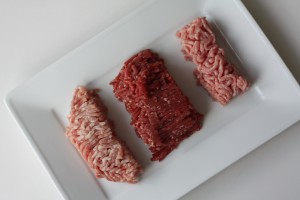
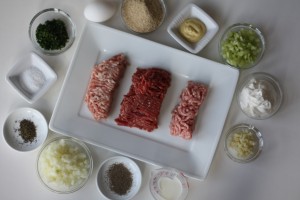
1 lb ground chuck
1/2 lb ground pork
1/2 lb ground veal (can also use turkey)
1. Heat oven to 350°F. Line a baking sheet with foil and using a paper towel oil the foil.
2. Heat 1 tbsp oil in a medium frying pan over medium heat. Add celery, onion and cook for 3 minutes, stirring occasionally. Add garlic, cook for a further 2 minutes, making sure the garlic does not brown. When vegetables are soft, remove from heat.
3. Place vegetable into a large mixing bowl and add 1/4 cup of the glaze; set aside to cool. Then add sour cream, bread crumbs, egg, milk, parsley, mustard, salt, thyme, and pepper and stir until combined. Add chuck, pork, and veal and combine well (I use my hands for this, taking off any jewelry of course!).
4. Scoop the mixture onto your prepared baking sheet, with either a 1/2 cup measure or your hands. Shape into ovals.
5. Divide remaining glaze over the tops of the loaves. Bake 35 to 40 minutes, or until the internal temperature reaches 165°F. Serve at once, while warm.
Raspberry Cream Sandwiches
Posted on 5 May 2010 | 5 responses
Originally I picked this recipe out for a Kentucky Derby party we had last weekend. The pink raspberry filling seemed so spring like and festive and perfect for a day spent watching horse races and sipping mint juleps. Alas, in the end the menu I had planned fell by the way side as I had to get myself and my apartment back into company ready condition after a night out at the Lucky Rice Festival Night Market (more on this in another post), which resulted in some late night karaoke with some friends and neighbors back at our place. My menu had involved these raspberry cream sandwiches, key lime bars topped with whipped cream and a slice of key lime and Benedictine sandwiches, a traditional Derby staple, which have cucumber and cream cheese filling which is dyed a light green with a splash of food coloring. The spring pastels would have work so well together, sigh!
As I did not get to make them this past weekend I decided to make them for dessert at a dinner party we had last night for one of my closest friends from university. I was making a mild and creamy Chicken Curry with a curried onion risotto for an entree so I wanted to have something light and refreshing after. The flavors in this cookie are so bright and at the same time subtle. The cookies have a delicate texture that melts in your mouth leaving you with a gently yet decidedly vanilla taste on your tongue coming from the pure vanilla extract and the seeds just scraped from a vanilla bean. The filling has body from the chocolate and the cream but it is silky and there is a freshness from the raspberry that prevents the sandwich from being too sweet or too cloying on the palate. The flavors in this sandwich remind me of my favorite ice cream bar growing up, the Haagen Dazs raspberry sorbet and vanilla yoghurt bar. While writing this post this morning I learned that they discontinued the bar earlier this year, so if I seem a little upset and down in the mouth for the next few days you know why…
Vanilla seeds, freshly scraped from a plump vanilla bean pod, have the most amazingly beautiful aroma. Nearly all my perfumes are vanilla based…
I found this recipe in Martha Stewart’s fabulous book of Cookies, called funnily enough Martha Stewart’s Cookies. There really is a cookie for every occasion and for every season of the year. Also the notes of packaging and gift giving at the back of the book make me want to become a Stepford wife, maybe even more than I already do.
I think these cookies are great for any spring gathering, a dinner party like ours, a buffet lunch, a pot luck party. And they are truly perfect for a bridal shower or a baby showers! Could there be a better way to toast a new baby girl?
Notes: As I have stated before, I believe that you should buy the best quality ingredients you can and with chocolate you can really taste the difference. I used Guittard Choc-Au-Lait baking chips, which also meant that I did not have to chop the chocolate. They are currently on special at my local grocery store, so if you are in NY click here to get them.
This recipe specifies that the filling needs to be refrigerated for 30 minutes. In this case it means at least 30 minutes, you can however leave it longer if you need to. When I tested these I was wary of leaving it longer, just in case the chocolate harden and I would have to reheat it to get it to become spreadable again. In the end I left it in the fridge for over an hour and it didn’t harden.
In the original recipe it calls for a 1 inch ice cream scoop to scoop the batter. I do not own one so I used a regular teaspoon and formed 1 inch round balls, it worked just as well. I do not believe in having every gadget out there and try to reduce the items I do have to save drawer space so multi tasking items are a live saver.
Raspberry Cream Sandwiches, makes 15 sandwiches
Vanilla Bean Sugar Cookies
cup all-purpose flour
1/2 tsp baking soda
1/4 kosher salt
5 tbsp unsalted butter
3/4 cup sugar
1/2 large egg
1 tsp pure vanilla extract
1/2 vanilla bean, halved lengthwise, seeds scraped out and reserved
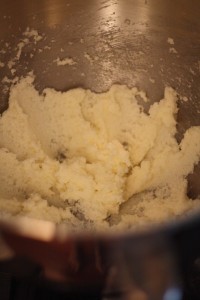
1. Heat oven to 350F. Whisk together flour, baking soda and salt. Put butter and sugar in the bowl of an electric mixer fitted with a paddle attachment. Mix on medium-high speed until pale and fluffy, about 2 minutes, stopping to scrape down the sides after 1 minute.
2. Add egg, vanilla extract, and vanilla seeds, reserving bean for another use. Mix until smooth. Reduce speed to low and gradually mix in flour mixture.
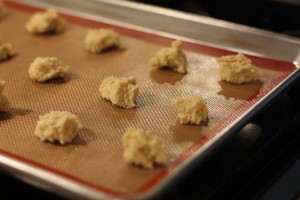
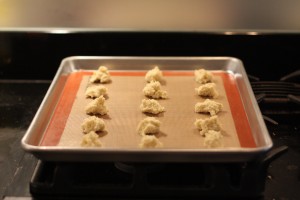
3. Using a teaspoon, make 1 inch balls of batter and drop onto baking sheets lined with Silpats or unbleached parchment paper, spacing 2 inches apart. I managed to fit 15 1-inch cookie dough mounds onto a 18 by 13 inch baking sheet.
4. Bake, rotating sheets halfway through until golden and just set, 8 to 10 minutes. Let cool on Silpats or parchment on wire racks.
Raspberry White Chocolate Filling
Just under 1 cup fresh raspberries
1 tsp sugar
3 3/4 oz best-quality white chocolate, coarsely chopped, just over 1/2 cup
2 tbsp plus 2 tsp heavy cream
1. Puree raspberries and sugar in a food processor. Pour mixture through a fine sieve into a small bowl, pressing to extract juice; discard any seeds.
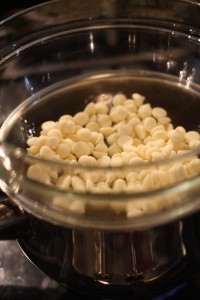
2. Melt white chocolate in a heatproof bowl set over a pan of simmering water (a double boiler). Remove from heat; whisk in cream in a slow, steady stream. Add reserved raspberry mixture; slowly whisk until pale 3 minutes. Refrigerate for 30 minutes.
To assemble…
1. Spread 1 tbsp of filling onto the bottom of one cookie and sandwich with another. Repeat until you have all 15 sandwiches made. Enjoy!
Meatball Subs
Posted on 4 May 2010 | 2 responses
Whenever my husband heads to work in the city I know two things are going to happen. One, he will be far later home than he says he is going to be, and two, he will rush out in between meetings and buy some awful sounding, bacteria laden sandwich from a hole in the wall. Needless to say, I prefer the days he can work from home and I can make him a clean, wholesome lunch 🙂
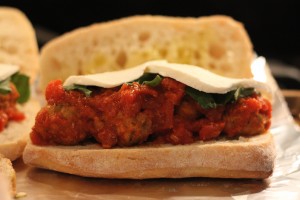
One of my hubbie’s sandwich shop favorites is a meatball sub. Once again, as a Brit I was not familiar at all with these so I am pretty impressed that my first attempt beat out the competition (well according to my husband and it is in his interest to flatter my ego). I am actually having difficulty putting into words just how delicious these meatballs subs are. The meatballs are still unbelievably tender, the sauce is delicious and soaks into the bread, the mozzarella is gooey, sweet and salty all at the same time, the basil joins the oregano, they fuse and somehow become even more amazing… All in all perfection on a plate.
If you make the meatballs for a romantic meal for two a la Lady and the Tramp (see below for a reminder), you will have plenty leftover for 4 good-sized sandwiches or 2 over flowing stuffed sandwiches. Either way you will require a napkin… These bad boys get saucy! It is more than worthwhile making the Tiny Test Kitchen meatballs just to make this sandwich, just throwing it out there!
Notes: For the roll for this sandwich I like to use crusty ciabatta bread. You can go two ways with this. I always have some parbaked ciabatta sandwich rolls in my freezer so I can pop them them in for tadalafil 20 mg best price a sandwich any time. But if I feel like a treat, I will go and get some fresh, warm, deliciously chewy, fresh ciabatta. Either works well!
The amounts of mozzarella and basil are just recommendations. You of course can add more or less, or even different things, (a splash of balsamic vinegar brings out the sweetness of the sauce and the mozzarella amazingly). I usually err on the side of more in my sandwich… so feel free to add as much as you want!
Meatball Subs, makes 2-4 sandwiches
4 sandwich rolls, sliced horizontally
1/2 batch of yesterday’s Tiny Test Kitchen meatball and sauce recipe, about 28 meatballs
1/3 lb good, fresh salted mozzarella, sliced thinly
12-16 basil leaves
Olive oil, for drizzling
1. Turn the broiler to high. Line a baking sheet with foil. Reheat meatballs and sauce in a small saucepan over medium-low heat, stirring occasionally. Drizzle top and bottom with olive oil, to prevent burning in the broiler. Once the meatballs are hot, place on top of basil and cover generously with sauce. Cover with basil leaves (3-4 per sandwich), slices of mozzarella (2-3 per sandwich) and a couple of grinds of fresh pepper over the top.
2. Place rolls on baking sheet and place in oven for 2-3 minutes, watching to make sure the bread does not burn. After one minute rotate the sheet. Remove from oven, grab a napkin and enjoy!
Veal and Pork Meatballs
Posted on 3 May 2010 | 4 responses
Often I make dishes with ground meat, ragu, lasagne, meatloaf and I love to use a combination of organic ground beef, ground pork and ground veal. This usually results in my having leftover veal and pork. Not wanting to waste it I began looking for recipes that combined just these two meats. I simply could not find anything that wowed me in all my cookbooks. I did notice however that I kept seeing meatballs from different cuisines, lamb from Northern Africa, beef based polpette from Italy, ‘pork balls’ from China, so many types of kofkas from Turkey, albóndigas from Spain… I began to think that a pork and veal meatball would work.
I have used traditional Italian ingredients but simply exchanged the beef to pork and veal and have switched up the cooking method. As we have a small kitchen, whenever I fry anything every counter top gets covered in a fine oily mist so I try and substitute baking wherever possible (it also works out being a lot healthier). Sometimes this leads to a reduction in flavor but in this case it has turned out well and leaves me with a mess-free kitchen. The result is a mouth watering-ly tender meatball, with texture and body from the breadcrumbs, onion and egg and lots of flavor from the fresh herbs and garlic. This whole meal is ready in an hour and most of that time is inactive cooking time. This really is a perfectly balanced meal, taste wise, time wise and nutritionally.
Notes: The dish we now think of as Italian meatballs has changed so much from the dish that was first served in Europe. In the US to order meatballs in an Italian restaurant you assume you are going to get meatballs on top of a tomato sauce with spaghetti. This would not have been the case originally. While meatballs were braised in a tomato sauce, they were not served with any pasta and this switch only occurred when Italian immigrants moved to America and the patrons here simply prefer a starch on their plate with the meat.
I have found that this amount is perfect for a satisfying meal for 2 people, leaving you with enough left overs for 4 sandwiches (I will post the how-to for this tomorrow). For a meal for 2 people (plus leftovers), reduce the amount of spaghetti to half a pound.
I specified using the crumbs of stale white sandwich bread but you can also use 1/4 cup dried plain breadcrumbs instead if you do not have any to hand. The sandwich bread will result in slightly softer meatballs but there is not much taste difference.
You can substitute the fresh oregano for dried. I use a ratio of 1 to 3 for dried to fresh herbs, so you should use 1 tsp of dried oregano for 1 tbsp of fresh.
Meatballs with a Simple Tomato Sauce and Spaghetti, makes 36 meatballs, serves 4 to 6 as an entree
Meatballs
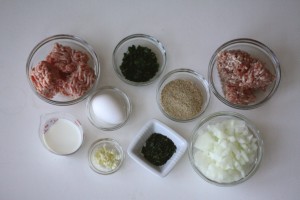
2 slices of stale white sandwich bread, should give you 1/4 cup (see Notes above)
1/4 cup organic whole milk
1 tbsp olive oil
1 small yellow onion, finely chopped
1 garlic clove, finely chopped
12 oz ground veal
12 oz ground pork
1 egg, lightly beaten
2 tbsp parsley, finely chopped
1 tbsp fresh oregano, finely chopped (see Notes for dried herb substitution)
1 tbsp plain flour, for dusting
1. Heat 9 inch frying pan over medium heat. Add oil to hot pan. Add onion and cook for 4 minutes, stirring occasionally, until soft. Add garlic, cook for 1 minute, stirring occasionally and make sure it does not color. Let cool.
2. While onion and garlic are cooking, pulse bread in a food processor or using a hand grater, form crumbs. In a small bowl add milk to crumbs, stir to combine.
3. In a large bowl, combine cooled onion and garlic, milk and crumbs, pork, veal, egg, parsley and oregano. Season with a sprinkle of kosher salt and a couple grinds of pepper.
4. Heat oven to 390. Line 2 18 inch by 13 inch baking sheets with unbleached parchment paper. Form 1 inch meatballs, placing them 3 inches apart on the lined baking sheets (you should have 3 rows of 6 on each sheet).
5. Place flour into a sieve/sifter and dust meatballs with flour.
6. Place in oven and bake for 20 minutes. Begin cooking sauce, recipe below.
7. Remove from oven, using tongs, place meatballs in sauce. (I scrape the ‘foot’ that has formed around the bottom of the meatball off with a spoon prior to adding them to the sauce, you may have to make them to know what I mean.) Reduce heat to low and cover with lid, for 20 minutes.
Simple Tomato Sauce
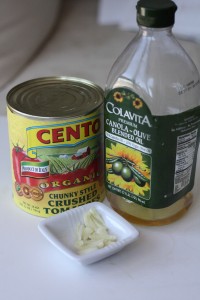
2 tbsp olive oil
2 garlic cloves, crushed with side of chef’s knife, skin removed
1 28oz can of crushed tomatoes, preferably San Marzano
1. Heat oil in large saucepan oven medium high heat. Add garlic, cook for 1 minute, stirring occasionally, making sure it does not color. Add tomatoes, reduce heat to medium prevent spitting and leave to cook for 15-20 minutes.
2. Return to recipe above, step 7.
Spaghettini
1 lb spaghettini or spaghetti
Kosher salt
Parmesan Reggiano, for serving
Parsley, freshly chopped, for serving
1. Place a large pot of water over high heat and bring to a boil. Add pasta and follow cooking directions. Strain pasta.
To serve…
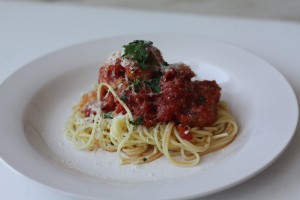
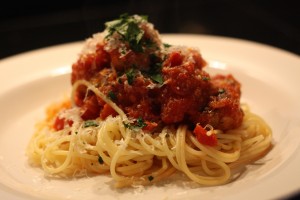
Add a good amount of pasta to each plate, top with tomato sauce and meatballs. Grate a generous amount of Parmesan cheese on each serving and sprinkle on some fresh parsley. Season with a couple grinds of black pepper. Serve whilst still hot and enjoy!
Pork Fried Rice
Posted on 30 April 2010 | 4 responses
My hubby and I love Chinese food, the flavors, the sauces, the succulent roasted ducks, suckling pig, fire grilled beef. However, we do not often like the places that serve them. In New York there are some excellent Chinese restaurants but none near us so if we want to get our Chinese food fix we have to either brave one of the delivery places around us or make it at home. After too many questionable oily and greasy meals and feeling extremely questionable after them, we have chosen to make it at home.
This meal is truly a one pot recipe. If you have a wok or even a large frying pan, you can make this meal (well, you also need a spoon…). The first time I made this I used the leftover cooked brined pork tenderloin I had cooked a couple of days before and some cooked rice I had in the fridge. The meal literally came together with random odds and ends I had in the fridge. They are just items that we always have in our fridge. If I were to make one addition it might be for some bok choy, Napa cabbage or another Asian green just to boost the vegetable level even further. As it is this meal is so healthy, there is no way it should not taste this good. It contains protein from the pork and eggs, carbs from the rice, and plenty of fiber from the vegetables. And even better, all the condiments and flavor added have negligible calorific importance. Just what you want from a quick, easy weekday meal!
Notes: This recipe uses some traditional Asian condiments. You should be able to find mirin, chili oil and chili garlic sauce at your local supermarket but I have also added online links just in case you can not.
I specified using extra large eggs in this recipe as I always have surplus of these from baking. You can of course substitute these for 2 or 3 large eggs depending on how eggy you want your egg fried rice.
In the ingredient list I state that the carrots must be blanched before being added to the stir fry. The purpose of this is to reduce the cooking time the carrots need to cook in the final dish. Blanching simply means to put in hot water to cook slightly and then plunge the food into cold water to stop the cooking process (see below). In this case, as we are using the carrots right away you do not have put the carrots in cold water and you can use them right out of the boiling water.
Even though this is a recipe designed to use up any leftover pork you may have from Tuesday’s recipe, you can use regular cooked tenderloin or any other cooked meat.
Pork Fried Rice
1 tbsp sesame oil
1 1/2 tsp vegetable oil
1/2 medium yellow onion, chopped
1 large carrot, peeled, cut into short thin strips (batons), about 1 cup, blanched in boiling water for 3 minutes
2 scallions, thinly sliced into rounds
1/2 cup frozen sweetcorn
Just under 1 cup frozen peas
2 cups cooked brined pork tenderloin
2 tbsp soy sauce
1 1/2 tsp mirin (sweetened Japanese cooking wine)
1 tsp freshly grated ginger, preferably grated on a rasp Microplane
2 cups cooked Japanese rice, I use Nishiki brand
2 extra large eggs, beaten until whites and yolk are combined.
1/4 tsp chili oil
1/4 tsp chili garlic sauce, Huy Fong brand
1 tsp soy sauce (optional)
1. Heat large wok over medium high heat, add oils. Add onion and cook until soft, stirring occasionally, about 5 minutes. Add sweetcorn, carrots, peas. Stir and cook for 5 minutes. Add pork, stir to combine. Add soy sauce, mirin and ginger, stir to combine. Add rice and stir to combine. Make a small well or hole in the center of the food. Add eggs in the center, stir until eggs are cooked. You should be able to see little bits of cooked egg white and yolk throughout the mixture. Taste and adjust seasoning, if more salt is needed add the optional soy sauce.
2. Sprinkle scallions on top and serve immediately.
Molten Chocolate Cakes
Posted on 29 April 2010 | 14 responses
Few things set restaurant-goers’ hearts aflutter like molten chocolate cake but no one realizes just how easy they are to make at home. With a little inactive time and almost no prep time you’ll have a dessert that will wow your guests. You can even fib and not let them in on how easy they were to make. I usually achieve this by just simply shrugging my shoulders and saying, ‘you know’ with a knowing smile when asked how long I spent in the kitchen. This is usually blown when my husband tells all our guests that the Kitchen Aid made it… thank you, darling! 😉
I let the seasons dictate how I will garnish these little pots of chocolate-y joy. In the winter I use small tart redcurrants, in the fall some dark, plump blackberries and when I made these cakes last week I used raspberries and sprigs of mint with a large dollop of freshly whipped cream. I add a teaspoon of sugar and a splash of vanilla extract to my cream as I whip it. The chocolate used in these cakes is dark and not that sweet so the cream adds a little hint of sweetness, as do the raspberries.
This dessert goes perfectly with the rest of this week’s dinner party menu. Whilst the cakes and their chocolate gooey centers are rich and decadent, the portion size prevents anyone from feeling dessert guilt. As some people really do not believe how easy these are to make we decided to do another video just to show the simple steps that go into making molten chocolate cakes.
Notes: As I have mentioned before it is always better to get the best quality ingredients you can. In this case if you get inferior chocolate you don’t get the velvety, gooey and deeply chocolate flavor; you get bland and waxy ooze – trust me, not as good. I use Ghirardelli 60% Cacao Bittersweet Chocolate, you should be able to get it from your local supermarket but if not click here.
This recipe uses whole eggs and egg yolks. As I do not believe in waste – waste not, want not, and all that – you should save the egg whites for another use. The easy Italian almond macaroons are a perfect use for them and you need exactly two, so it works out well! I’ve put this recipe in a category labeled egg yolks and I will have a correlating one labeled egg whites so you never have to waste any partial eggs again.
In this recipe I mention using a double boiler. This may not be a common concept but it is a handy one when it comes to chocolate (you can see it illustrated in the video above). Chocolate has a tendency to scorch when heated to quickly, giving it a bitter taste, and this technique allows gentle heating of the chocolate causing it to melt gradually. To form a double boiler all you need is a medium saucepan with about an inch of water and a bowl that fits on top. Place the medium saucepan over medium heat until the water begins to simmer (you will see little streams of bubbles), then put the bowl over the top and place the ingredients you need to melt/mix in this bowl.
I made these cakes in advance, up to step 4, and then put them in the fridge so when our friends arrived all I had to do was pop them in the oven and whip some cream. Easy-peasy!
Mini Molten Chocolate Cakes, make 6 dessert sized cakes
Gooey Center
2 oz bittersweet chocolate, at least 60% cacao, see note above
1/4 cup heavy cream
1. Place chocolate and heavy cream in double boiler (see notes above for explanation of a double boiler). Whisk to blend. Refrigerate until firm, about 1-2 hours. Once firm, with cold, wet hands to prevent melting and sticking, roll chocolate mixture into 6 equal balls. Place the balls back in the refrigerator until needed.
Perfectly Tender Chocolate Cake
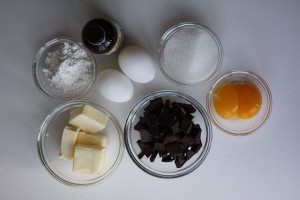
4 oz bittersweet chocolate, at least 60% cacao, see note above
4 oz unsalted butter (1/2 cup)
2 eggs
2 egg yolks
1/3 cup sugar
1/2 tsp vanilla extract
1/4 cup cake flour
Butter, for greasing the ramekins
Whipped cream and fresh fruit and herbs to garnish
1. Heat oven to 400°F. Butter ramekins well, this will help prevent the cake sticking and make it easier to turn them out.
2. Melt chocolate and butter in double boiler (see note above for explanation of a double boiler). Whisking gently to blend. 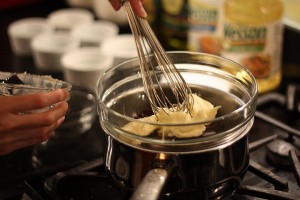
3. Using a stand mixer fitted with whisk attachment, place eggs, yolks, sugar and vanilla in mixer bowl. Whisk on medium speed for 5 minutes, until mixture is light and thick.
4. Remove bowl from mixer and fold chocolate mixture and flour until just combined. Divide among the 6 prepared ramekins. Place one chocolate ball into each ramekin.
5. Bake for 15 minutes, until cake is firm to the touch. Let sit for 5 minutes. Run a small, sharp knife around each cake, place a plate on top, invert and remove ramekin (you may have to give it a couple of sharp taps too). Garnish with fresh fruit, herbs and cream.
Creamed Summer Corn
Posted on 28 April 2010 | 7 responses
In Ina Garten’s most recent cookbook, Back to Basics, she mentions that in any well constructed menu you have to make a certain dish the “star”. The second I saw fresh, sweet unshucked corn back in my grocery store I knew that it would be the star of my dinner party. I began to plan my menu for our dinner party around it. I knew I wanted to make something that would highlight the sweetness and the juiciness of the corn but I also wanted something that was more refined and less messy to eat than corn on the cob (which I entirely love but do not think you can usually serve at a dinner party when everyone is wearing dresses!)
Immediately Ad Hoc’s creamed summer corn came to mind. From that point on it was easy to choose the rest of the menu. I would serve a leaner meat, as the creamed corn would add the richness and some obvious creaminess to the entree, I decided on brined and roasted pork tenderloin. To start I would have something green, fresh and exciting but easy on the palate, a warm goat cheese salad, which I posted on Monday. For dessert, a rich and decadent chocolate molten cake with whipped cream, raspberries and mint, which I will be posting tomorrow (and there’s a video to go with it. Get excited!).
As anyone who has been reading this little blog of mine knows I am so excited about the quickly approaching summer, maybe even more than usual. Just one of my reasons was so I could make this creamed summer corn from Thomas Keller’s book, Ad Hoc at Home. Last year, when my sweet husband originally bought me my copy of Ad Hoc it was the beginning of winter here in New York. Even though I knew corn was not in season I still made the creamed summer corn. It was delicious, unlike any other creamed corn I had had before. It was almost like a hybrid of creamed corn and our favorite!, the Mexican style grilled corn from Cafe Habana, a restaurant in New York. The cayenne pepper adds a little spicy smokiness and the lime juice and zest kick this creamed corn into something extraordinary. Without sounding hyperbolic I would say that a mouthful of this corn is a taste of glorious summer sunshine! 🙂
Notes: While I made this creamed corn along side of a lean pork tenderloin it goes with all kind of meats. I would say more simple preparations, such as a nicely charred steak, butter roasted turkey (you could even brine it) or even seared and roasted duck breast. It is such a perfect summer side.
Tip: To remove the silk (the long strands inside the husk of the corn) place the kernels in a large bowl and cover with a couple of inches of cold water. Stir the kernels with your hand and let sit for a couple of minutes. The silk will rise to the top and at that point you can just swish your hand around gently on the top of the water and the silk will stick to you. Carefully drain the corn and continue with the recipe.
Creamed Summer Corn, serves 4 as a side (modified from a recipe from Ad Hoc at Home, by Thomas Keller)
4 ears yellow corn, shucked
1 tsp lime zest
2 tbsp unsalted butter
1/2 tbsp fresh lime juice
3/4 cup heavy cream
1/8 tsp cayenne pepper
1 tbsp finely chopped chives, optional
1. With a sharp knife, carefully cut vertically down each ear of corn to slice of the kernels. Put kernels in a large bowl, then hold each cob over the bowl and use a spoon or the back of a knife to scrape any remaining corn and the milk from the cob.
2. Grate the zest of the lime, preferably with a Microplane grater, set aside. 3. Melt butter in a large frying pan over medium heat. Add corn and lime juice to pan and season with salt. Reduce heat to medium-low and cook until all the liquid has evaporated and the corn begins to sizzle, 15 to 17 minutes.
4. Stir in cream, cayenne and lime zest. Continue to cook for 6 to 8 minutes, until the cream is absorbed by the corn. Add salt to taste, stir in the chives (optional), serve warm and enjoy!
Brined Pork Tenderloin
Posted on 27 April 2010 | 6 responses
So day two of our dinner party menu brings us the main entree, brined pork tenderloin, following our Warm Goat Cheese Salad appetizer posted yesterday. As with the rest of the recipes this week, the amount of active time to make this delicious protein is laughable for something so delicious. It does, however, require a fair amount of inactive time, waiting for the brine to cool, then brining itself, so make sure to read the recipe carefully and work backwards on your timeline. If you want to do everything day of I would make the brine at least 4 hours before your guests arrive, to give it an hour or so to become cool enough for you to chill it in the refrigerator. You can also make it up to 3 days in advance and store it in the refrigerator, if you would prefer. I would then begin brining the tenderloins 2 1/2 hours before your dinner guests arrive.
This recipe produces tender, moist and herbed pork. The flavor that the brine imparts into the tenderloin in such a short time is remarkable. I serve my pork pink at medium to medium-rare but I also make sure I know exactly where my tenderloins are coming from. If you do not have a butcher you completely trust I would recommend you firstly, cook your meat longer and second, you find yourself a good butcher. There is nothing like heritage raised pork cooked to medium-rare. It has a flavor that is missing from bland, supermarket meat. If you are using regular pork I would suggest you definitely brine the meat to give it some flavor and much needed moisture but do make sure to cook it a little bit longer, (USDA recommends an internal temperature of 160°F).
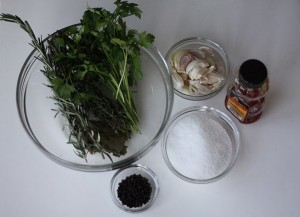
Brining is a great way to add moisture (aka juiciness) to the ‘healthier’ lean meats, like pork tenderloin, chicken, turkey. In meats with a higher fat content – think T-bone steak, flank steak, pork shoulder, lamb shank and so on – the fat is marbled through the meat and different ways of cooking cause the fat to melt into the meat to make it juicy. The leaner meats are not blessed with this fat so we have to give them a helping hand by brining them. A brine is also a great way to impart some flavor into the meat. The pork brine that I have used in this instance has rosemary, thyme, parsley, garlic and peppercorns but you can completely mix it up. The only things that must always be present in a brine are salt and water. This is because technically brining works by giving the meat moisture by osmosis but I am not a science teacher and it gets a little boring after that so I’ll stop there! All you really need to know is you can brine something in a solution with water and dissolved salt and any other herb or spice you would like, and you will get juicy, flavorful meat.
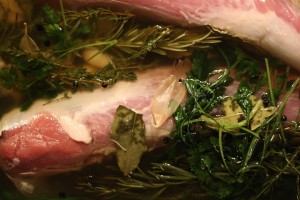
With all these herbs, how could you go wrong?
Notes: We served this pork with a light red. At our local wine store, we were recommended a Rioja to go with this light meat and decided on Decenio 2004 or Decenio 2008.
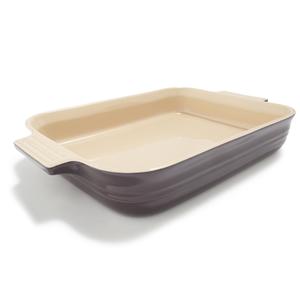
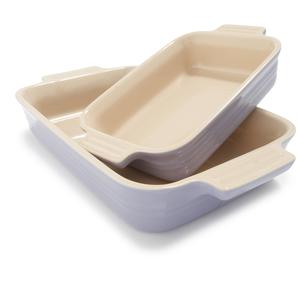
I used a 9 by 13 inch baking dish, it is 2 inches tall and has a 3 quart capacity. Even though these do not match the exact dimensions how beautiful are these bakers, below? I am totally in love! Both are available from Sur La Table.
To cook the pork you need a large roasting pan with a roasting rack that fits both tenderloins. Make sure to get a roasting pan that you can use over direct heat (your burners) so that you can sear your meat in the pan before finishing it off in the oven. This will reduce clean up and make for more flavorful roasts when you use the juices for your gravy! I have this roasting pan set but I covet this one.
Searing is just a cooking term used to describe cooking something over high heat quickly, usually in a frying pan or on a grill. It helps to keep the moisture inside and creates a delicious crispy exterior. You can sear food before roasting or braising or if it is applicable you can eat it as is, i.e. seared sashimi grade tuna or a juicy steak.
Tip: As I was running short on time, I used 2 cups of water in the brine in the saucepan and cooled down the boiling liquid with the remaining 6 cups of water and ice necessary for the recipe. If you have plenty of time you can, of course, use all 8 cups of liquid immediately and boil them all. Just remember that this will take far longer to cool down.
Brined Pork Tenderloin, serves 4-6 people
2 pork tenderloins, excess fat removed, should wear about 1 to 1 1/4 pounds each
Pork Brine (see recipe below)
1 tbsp canola oil
1 oz unsalted butter
6 thyme sprigs
2 rosemary sprigs
2 garlic cloves, smashed, skin on
1 1/2 tbsp lemon juice
1. Place pork in a container large enough for both tenderloins and the chilled brine (see Notes above). Refrigerate for 1 1/2 hours (do not brine for longer than 4 hours, the pork will become salty).
2. Remove container from refrigerator and let sit for 30 minutes at room temperature. Remove pork from brine and dry with paper towels and set to one side to allow them to keep coming up to room temperature.
3. Heat over to 350°F. Place your large roasting pan over two burners set to high-medium/high heat. Add canola oil. Season your tenderloins with kosher salt and pepper. Add the pan and cook until each side is golden brown, turning to sear (see Notes) each side, about 5-6 minutes.
4. Add butter, thyme, rosemary, garlic and lemon juice. Baste the tenderloins with the juices for 2 minutes.
5. Add the rack to the pan and place the tenderloins on the rack. Place the thyme, rosemary and garlic over the pork. Roast for 20 minutes, until the internal temperature is 135° to 140°F. If you like your pork less pink, cook longer. Remove from oven and rest for 15 minutes for medium rare to medium.
6. Slice pork on the diagonal into 1/2 to 3/4 inch slices. Arrange slices on a serving platter. If you want you can garnish with the rosemary, thyme and garlic.
Pork Brine
2 cups water
1 cup kosher salt
1 garlic bulb, cloves individually crushed, with skin on
10 bay leaves
2 oz flat leaf parsley (also called Italian parsley)
1/2 oz thyme sprigs
3 rosemary sprigs
2 tbsp black peppercorns
1/4 cup plus 2 tbsp honey
3 cups cold water plus 3 cups ice
1. Combine all ingredients, except for the cold water and ice, in a large saucepan. Cover and bring to the boil, boil for 1 minute, until salt is dissolved, you can stir occasionally if you feel compelled.
2. Remove from heat and add cold water plus ice, stir, and allow to cool to room temperature. Place in refrigerator to chill.


