Warm Goat Cheese and Pickled Pepper Salad
Posted on 26 April 2010 | 8 responses
As I have mentioned in a previous post, alright… many previous posts, I love to entertain. This previous Friday we had one of our favorite couples over for a last minute dinner party. As I knew I had a lot of errands to run that day I wanted to make something that I could do most of the preparation earlier in the day and then throw everything together that evening. I decided on a menu of this warm goat cheese salad, then brined pork tenderloin with creamed summer corn, and a molten chocolate cake with freshly whipped cream, raspberries and mint to finish. I’ll be posting the recipes day by day so that you have the full menu for your own dinner party this weekend!
This salad is perfect for this time of year (that is not to say it does not work during colder times of the years as well though). The peppers are bright and colorful, the arugula is peppery and a little bit spicy, the dressing adds some acidity and sweetness to the dish and the goat’s cheese is creamy, gooey and melts over the peppers and greens and it pulls the whole dish together.
This salad is one of my go to recipes. It looks elegant but is really simple to make. With the exception of heating the goat cheese right before serving, you can do everything in advance. I washed the arugula leaves that afternoon and wrapped them with slightly damp paper towels, in a log shape, and put them back in refrigerator, ready to plate that evening. I cooked the peppers, left them to cool in the pan and then made the vinaigrette in advance (once you have the liquid for the dressing you can pour the rest of the cooking liquid away). I even made the breadcrumbs and split the egg for the egg white. So when my guests arrived all I had to do was dip the goat cheese in the egg white, then breadcrumbs, heat through and plate! And I was done in five minutes, ready to sit down and enjoy the evening!
Notes: In the ingredients below I did not specify a type of bread to get the fresh breadcrumbs from. Until last Friday I had always used regular white bread, quickly grated in my food processor to make the breadcrumbs, but alas!, five minutes before our guests were arriving I realized that I did not have any white bread, only brown wholegrain. Rather than run out and get a whole loaf of white for just two slices, I used brown bread. I could not taste the difference so any bread you have lying around is perfectly fine to use. You do, however, need to use fresh breadcrumbs, if you use dried crumbs the goat cheese does have the same softness and it becomes more crunchy and grainy, which is not what you want.
The pan that I use to fry the goat cheese is my nonstick crepe pan. I find that the shallow sides of the pan make it easier to pick up the goat cheese to flip it. You can use any frying pan though. I like to use a fish spatula as its’ length allows it to easily slide underneath the whole round and gives it the support it needs as it begins to get gooey as it cooks.
We went to a local wine store and told them what we were making and they recommended a delicious white wine for us. It was dry and fruity, which offset the creaminess of the goat cheese perfectly. It was also really reasonably priced, which is always awesome! It was the ‘Les Trois Domaines des Cotes de Gascogne’, Croix Blanche 2008. Although I have taken wine courses and attended a ton of wine tastings (some fun, some less than fun), you can never know everything so I always think it’s best to consult with someone who works with the wines day in and day out.
Tip: Goat’s cheese can be tricky to slice. A knife usually gets stuck half way through the log and the cut never looks smooth. A quick tip I picked up in culinary school is to slice goats cheese with a household item everyone (hopefully!) has at home, unflavored waxed dental floss – I’ve used mint by mistake before, not good! The dental floss just glides through the cheese easily, leaving perfectly clean looking rounds of goat cheese. This works for other soft cheeses as well.
Warm Goat Cheese and Pepper Salad, makes 4 appetizer sized salads
1/2 cup white wine vinegar
1/2 cup water
1/2 cup sugar
1 red pepper, sliced
1 orange pepper, sliced
1/2 tsp Dijon mustard
3 tbsp olive oil
4 1/4 inch slices goat cheese, preferably Boucheron (see video in Tips, above)
1 egg white
1/3 cup fresh breadcrumbs, from 2 slices of bread, crusts removed
1 tbsp unsalted butter
2 oz wild baby arugula
Salt and freshly ground pepper, to taste
1. Combine vinegar, water, sugar and peppers in a small saucepan and bring to a boil. Reduce the heat to a fast simmer (the bubbles are still quick) and cook for 5-7 minutes, stirring occasioally, until the sugar is dissolved and the peppers are beginning to get soft. Remove from heat and allow peppers and liquid to cool.
2. Pour 3 tbsp of the cooled pepper cooking liquid into a small bowl. Add mustard and whisking continuously, slowly add the olive oil. Set aside.
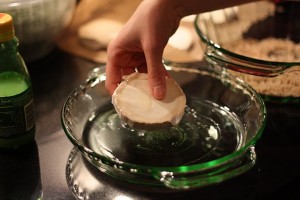
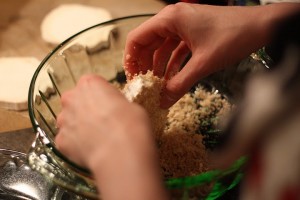
3. Get two shallow pans/plates or bowls out and place the egg white in one and the breadcrumbs in the other. (I have my eye on these breading pans, but have to wait until I have slightly more room in my over packed kitchen to get them.) Place a round of goat cheese in the egg white, turn to coat and then place in the breadcrumbs, again turn to coat and shake of any excess.
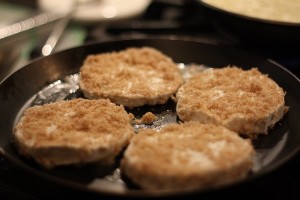
4. Heat the butter in your pan (see Notes above), over a medium-high heat, swirl the pan to coat with butter. Add the goat cheese slices and cook for 2 minutes or until lightly browned, using a spatula, flip the slices and cook for 1-2 minutes more.
5. Place 1/2 oz of arugula on each plate, add a large spoonful of the pickled peppers. Top with a goat cheese round, add a couple more peppers. Drizzle with vinaigrette (made in step 2). Serve whilst the goat cheese is still warm.
Chicken Salad Sandwich
Posted on 23 April 2010 | 6 responses
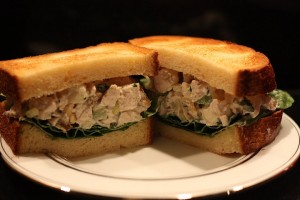
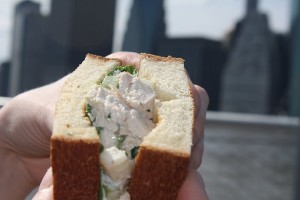
Whilst I love all times of the year for different reasons, when I am stuck in the doldrums of rainy end-of-winter-beginning-of-spring all I can think about it sun, sea and picnics (maybe that last one is because I’m English :)). I am also sure that my time spent googling last minute vacations quadruples this time of year – Costa Rica or Maldives anyone? So when we had a nice, sunny and warm day a couple of weeks ago – you know the day I’m talking about, the whole of New York rushed to a park! – I ran to my fridge to begin making a sandwich worthy of such a beautiful day.
My hubby and I have debates over whether sandwiches should be cut diagonally (me) or through the center (him). Which do you think?
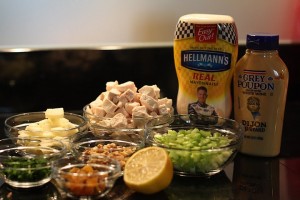
When I am creating a recipe I usually pull everything out of the fridge that looks as though it will go well together. In this case I wanted the freshness of a traditional chicken salad with some of the sweetness of coronation chicken (which is just curried chicken for all you non-Brits). I had a couple of apples at hand and thought that they would go well with the walnuts, I had bunches of celery that looked lonely, and some chicken breasts that needed to be eaten. I usually chop up a random amount of each and keep on adding ingredients in little increments until I get the taste I am looking for. In this case I just mixed them all together with some mayo, mustard, lemon juice and voila… a perfect chicken salad!
After I had seasoned the salad, something still seemed to be missing so I added some fresh parsley. I usually have 3-4 fresh seasonal herbs in my fridge at any time to spice and jazz up dishes (at the moment I have parsley, cilantro and mint but I also still have some more wintery ones for the colder days: thyme, sage and rosemary).
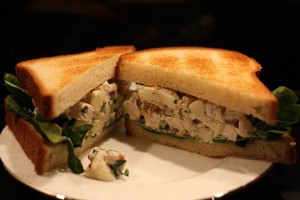
I had half a loaf of brioche leftover from some bread pudding I had made, and decided that this would be the perfect vehicle for this creamy and fresh salad. Brioche is a deliciously soft bread originally from France, it is made with more egg and butter than usual bread so it is sinfully chewy, rich and slightly sweet.
This weekend the weather is meant to be beautiful in London, NY, NC and beyond so whip up a batch of these sandwiches, grab a towel and a book and run to the park! And any of you who are reading from Brooklyn, if the lawns are open at Pier 1, that’s where we’ll be so stop by and say hi!
Notes: This recipe is perfect for leftover roast or poached chicken. However, it is just as easy to poach 2 skinless, boneless chicken breasts. Bring a medium saucepan up to a gentle simmer, carefully place the chicken breasts into the water and poach for 10 minutes. Make sure that the water remains at a gentle simmer, you want there to be movement in the water. Allow the breasts to cool to room temperature before dicing.
Now, I like my chicken salad mayonnaise-y. You can add more or less mayo to your salad depending on your taste.
Chicken Salad Sandwich, makes 3 large doorstop sandwiches
2 1/4 cups diced cooked chicken (see notes above)
1/2 cup celery, roughly chopped
1/2 Granny Smith apple, peeled and diced, about 1/2 cup
1/4 cup walnuts, roughly chopped
2 tbsp golden raisins
4-5 tbsp mayonnaise
1 tbsp fresh lemon juice
1 tsp mustard
1 tbsp parsley, roughly chopped
Salt and pepper to taste
1 1/2 cups baby spinach leaves, washed and thoroughly dried
6 thick slices of brioche
1. Combine chicken, celery, apple, walnuts and raisins and stir until mixed. Add mayonnaise, lemon juice, mustard and parsley. Taste and adjust seasoning with salt and pepper. Add more mayonnaise if needed.
2. Toast brioche on a low setting on your toaster or broiler. (I toast mine on setting 3 out of 9 on our toaster). Until brioche is golden brown.
3. Add half a cup of baby spinach leaves to a slice of brioche, top with 2/3 cup chicken salad and form a sandwich. Repeat with the other two sandwiches. Wrap in aluminium foil, find a park on a glorious day, sit and enjoy!
Quick Italian Almond Macaroons
Posted on 22 April 2010 | 2 responses
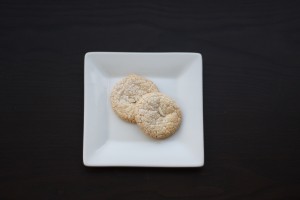
The reason these tasty morsels are called Quick Italian macaroons is I have two really good recipes for Italian macaroons but the other one is not quite as quick. It requires granulated sugar as well as confectioners’ sugar and as a result the mixture needs to be aged overnight to allow the flavors to meld. The result is similar to what we think of as a gentler tasting amaretti cookie but not as crispy. I will post the other at a later date and have a taste test between the two to see if you can tell the difference in the techniques and to see if the overnight aging – and waiting! – is worth it.
This recipe is extremely quick and easy. It only contains 5 ingredients and takes about an hour from start to finish for 24 delicious, crispy-on-the-outside and chewy-on-the-inside cookies. They look elegant and are perfect for serving with afternoon tea, making petit fours for after a dinner party (and you have too much going on already I’ve been there a million times!) or as I did at an anniversary party for a gorgeous boutique!
Notes: There may be some confusion between Italian, French and coconut macaroons. The Italian macaroon came first, then the French refined it and Pierre Desfontaines Ladurée added some ganache to make those divine petit fours sandwiches (thank you, thank you, thank you Pierre!). The origins of the coconut macaroon are less clear. It is believed that it was created in Scotland and that they were made with mashed potatoes, and somehow coconut got thrown into the mix. Jewish Italian are said to have modified the recipe and due to their lack of yeast and wheat products they became a popular Passover treat.
I will be posting a recipe (or a couple!) for French macaroons in the future.
When you place the batter on to your sheet pan it will spread a lot and they puff up in the oven. Make sure to leave enough space between them to avoid them sticking together, about 2 – 3 inches.
You can make half or double batches of this recipe with no consequences. Most almond paste comes in 7 oz tubes, so I occasionally cheat it and use one tube and make just under a double recipe.
I use whole almonds and then slice them myself since I think if you are able to buy a whole ingredient rather than a processed one you should. I really believe that the oil evaporates from the almond when they are sliced and packaged, leaving them sort of dusty tasting… that could just be me though. Also buying whole almonds are a lot cheaper than buying sliced if you need an extra incentive.
Italian Almond Macaroons, makes 24 cookies or 36 mini petit fours
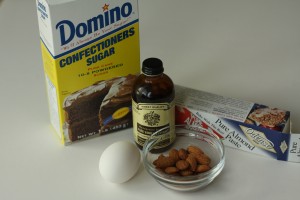
8 oz almond paste, crumbled into small pieces
1 cup confectioners’ sugar, plus extra for dusting
Pinch of kosher salt
2 large egg whites
1/2 tsp pure vanilla extract
1/4 cup almonds, sliced
1. Heat oven to 300°. Line 3 baking sheets with parchment paper, baking mat or a Silpat.
2. Put almond paste, sugar and salt in the bowl of an electric mixer with the paddle attachment fitted. Stir on medium speed, until the mixture is crumbed together, about 3 minutes. Add egg whites and vanilla, mix until smooth, about 3 minutes. At this point the mixture should be thick and look slightly granular.
3a. For larger cookies, drop 1 tbsp of batter onto the lined baking sheet to form small circles, 8 on each sheet. Place two almond slices on each round of batter.
3b. For petit fours sized cookies, drop 2 tsp of batter onto the lined baking sheet to form small circles, 12 on each sheet. Place one almond slice on each round of batter.
4. Bake until cookies are golden brown, about 17 – 20 minutes, rotating the baking pans half way through. Let cool on their sheet on a wire rack until you are able to remove them without them tearing, about 15 minutes. Remove from sheet and continue to cool.
5. To serve, dust with confectioners’ sugar. Cookies can be stored in an airtight container at room temperature for 3 days.
Lemon Squares
Posted on 21 April 2010 | Comments Off on Lemon Squares
Even though the weather channel is claiming it is 68°F in New York City right now, I cannot help but feel that the grey skies I am currently looking at, take off about 10 degrees. It is also not helping that I just looked again and found out that we have a chance of rain from 4 pm today, goodbye outdoor run! So I am definitely in the mood for something fun, bright and sunny to eat and I think these zesty, citrus-packed lemon bars I made yesterday will help me perfectly.
Yesterday, two of my dear friends from university celebrated their store’s 2nd anniversary (happy birthday Thistle & Clover!) and they kindly asked me to cater! (Please see photo below.) As any one who lives in New York or is even just passing through for a weekend knows, I love throwing parties. Any excuse to have one and we will: college football, college basketball, the Oscars, the Kentucky Derby, Christmas, Thanksgiving, Halloween, my husband’s birthday, my birthday, an out of town guest visiting, it’s sunny outside, it’s rainy outside…. You get the picture. So I was super excited to begin planning what I would make for this joyous event.
I wanted to make things as adorably sweet and yet as sophisticated as my friends’ store is. I also wanted the two treats I picked to compliment one another and be different enough that people would get some variety. So without wasting another minute I hit my cookbooks and notes to pick out a couple of recipes. I meant to short list them down but somehow, as often happens when I think about food, I could not help but want to make about 5 different things. Being completely unable to decide I had to have my husband pick!
In the end, lemon bars and Italian almond macaroons won. I will post the macaroon recipe tomorrow, but for today we can feast on these! I have a couple of changes I want to make for a future recipe, which I shall post, but these morsels are too good to not tell you the recipe now.
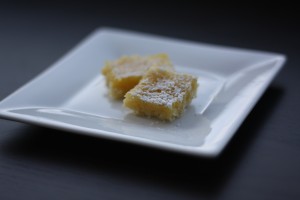
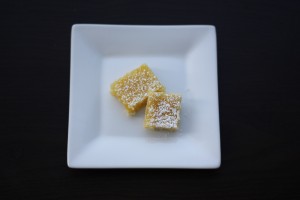
Notes: This recipe is originally from the Magnolia Bakery Cookbook, which suggests that you cut these little curd pastries into 3 inch bars. I think that they are slightly too sweet for such a large serving so I cut mine into 1 1/2 inch squares, which also makes for the perfect mouthful. I’ve also made a couple of changes to the method to make the steps simpler.
In the future I do want to experiment with a less sweet version of this bite. I want to find a way to keep the crust as melt-in-your-mouth tender as it is now but with less sugar. I also want to somehow have even more fresh lemon taste in these. I’ll keep you posted!
Lemon Squares, makes 98 little bites
The melt-in-your-mouth crust
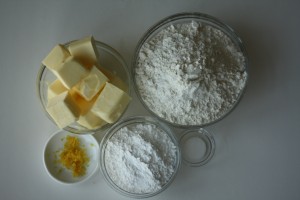
1 pound unsalted butter, softened (4 sticks)
4 cups all-purpose flour
1 cup confectioners’ sugar (or icing sugar in UK)
2 tsp grated lemon zest (zest from 1 1/2 large lemons)
1/2 tsp salt
1. Heat an oven to 350°F. Butter a 12 x 18 inch jelly roll pan (also called a baking sheet or a half sheet pan).
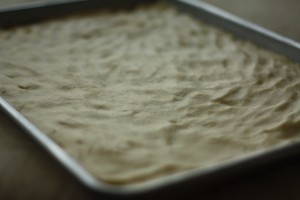
2. In a stand mixer (e.g. a KitchenAid) fitted with a paddle attachment, combine all the ingredients and mix on a low speed (the flour and sugar will go EVERYwhere if you try to mix faster, trust me!), until the mixture comes together as a ball. This will take about 4 minutes. Turn off the mixer and remove the dough from the paddle and reform into a ball. Place the dough on the baking sheet and spread evenly over the sheet pan with your fingers.
3. Bake crust for 20 minutes, or until lightly golden. Remove from oven and allow to cool for 15-20 minutes before the next step.
Lemon Curd Topping
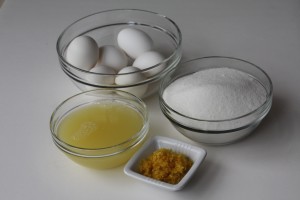
2 cups sugar
6 large eggs, at room temperature
1 cup lemon juice (from 7 lemons)
6 tsp grated lemon zest (from 6 lemons)
1 tbsp confectioners’ sugar, for dusting the squares
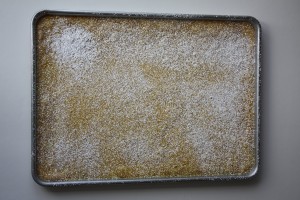
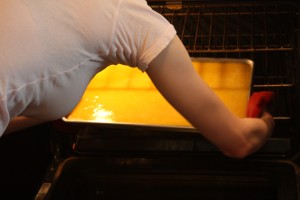
1. While the crust is cooling for 15-20 minutes, make this topping. In a large bowl, whisk all the ingredients for the curd until well combined. Pour over the crust and return to oven. Bake for 20-25 minutes, or until the edges are golden brown.
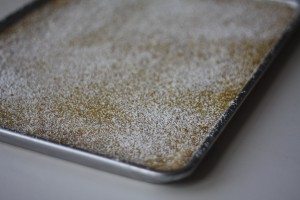
2. Remove from oven and let cool for 20 minutes, dust with confectioners’ sugar.
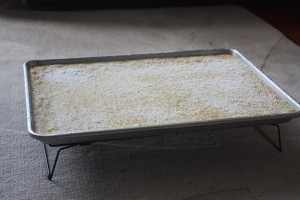
For some reason, the coolest place in our apartment is our sitting room, hence the cooling rack on our rug…
3. Allow to cool to room temperature, or overnight, before cutting and serving.
Cream of Cauliflower Soup
Posted on 13 April 2010 | 1 response
I go through phases where I become obsessed with a certain cookbook. When I first received Thomas Keller’s Ad Hoc At Home from my husband, I went through one of those phases. I think within the first week I had made the braised pork belly (time consuming but delicious), the carrot cake cupcakes (super easy and delicious), roasted beets (simple method), creamed summer corn (cannot wait to make this again!), and the buttercream frosting (in chocolate and vanilla – I’m biased, but I preferred vanilla). It even inspired the hubby to cook for date night and make the brined pork tenderloin, which trust me, is not something that happens very often (read: ever). However, for some reason I did not make this cream of cauliflower soup until a few weeks ago.
Cauliflower is not one of those vegetables I never used to put on my shopping list. Due to some Pavlovian response thinking about cauliflower always brought back traumatic memories of cauliflower cheese with congealed, orange cheddar cheese from the school cafeteria. I can now freely banish those memories and declare that I am a convert. I can officially eat cauliflower, even if it is only in this soup…
I usually shop with two things in mind, the first being seasonality. If something is in season it usually tastes better and in general it is cheaper as the stalls and stores are flooded with it. Which brings me to the second factor I look for; if something is on sale I usually look twice. I buy most of my produce from either Fresh Direct (which is an online supermarket in New York) or from the greenmarket. For some reason, even though it is not the peak season for cauliflower, both have this vegetable at a serious discount which means now is the time to make this soup!
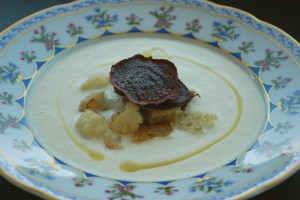
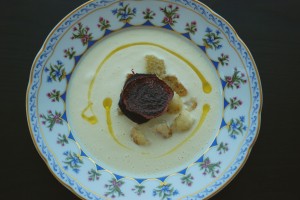
If the photos of this soup are unable to persuade you to give it a whirl I am not quite sure what else I can say. Although, I’ll give it a try. It is velvety, rich, creamy, seriously moreish (which is a word – I googled it!), and the croutons, beet crisps and the mini cauliflower florets give the soup some texture. All I can say is, today is the day that you could become a huge cauliflower fan or at least a fan of this cream of cauliflower soup.
Notes: When I am blending soup I always get wary of the top suddenly shooting off and covering me and the rest of my kitchen with the scorching hot liquid, so I take two steps for precaution*. Firstly, I only blend small batches at a time. From the lesser amount of soup, there is much less steam to build up and create pressure meaning that you are able to hold down the lid far more easily. And secondly, I always cover the lid and its’ sides with a kitchen towel (or tea towel in the UK) and hold down firmly so the top is unable to come off.
*This is not just an irrational fear. When I was younger I attempted to blend an almost full blender full of watercress soup, the steam from the hot soup combined with the blender motion caused the top to explode off. And it did cover me and the kitchen in hot soup… or should I say my parents’ kitchen… Sorry about that mum!
To measure the oil temperature I use a candy thermometer (also called a deep fry thermometer). If you had made the fleur de sel caramels I wrote about a couple of weeks ago you will already have one, but if not they are handy for all kinds of tasks in the kitchen.
Cream of Cauliflower Soup
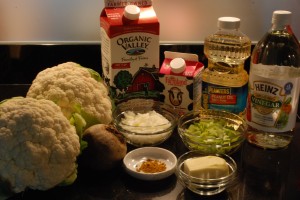
2 heads cauliflower (4 to 5 pounds total)
3 tbsp unsalted butter
3/4 cup coarsely chopped onion
3/4 cup coarsely chopped leeks (white and light green parts only)
1/4 tsp curry powder
Kosher salt
2 cups milk
2 cups heavy cream
2 cups water
Torn croutons (you can also use my Easy Garlic Croutons instead)
Extra virgin olive oil
1. Remove the leaves from cauliflower and cut off 2 cups of florets, about the size of a quarter. Set aside for floret garnish (see recipe below). Coarsely chop remaining cauliflower into 1 inch pieces, you need 8 cups, reserve any extra for another use.
2. Melt butter in a large saucepan over medium heat. Add onion, leeks, curry and coarsely chopped cauliflower. Season with 2 tsp salt, and cover with a parchment lid. Cook, for 20 minutes, stirring occasionally, until vegetables are almost tender. Remove and discard parchment lid.
3. Pour in milk, cream and water, increase heat to medium-high and bring to a simmer. Simmer for 30 minutes, skimming off foam from time to time.
4. In small batches, transfer soup to a blender and begin to puree (begin on the slowest speed and slowing increase to reach puree). Once pureed, transfer to another saucepan to keep warm. Check seasoning.
Garnish with torn croutons, extra virgin olive oil, beet chips (see below) and floret garnish (see below).
Red Beet Chips
About 1 1/2 cups peanut or canola oil
1 medium red beet
1. Fill a small deep pot with 1 inch of peanut oil and heat over a medium heat to 300°. Set cooling rack, lined with paper towels, over a baking sheet.
2. While the oil is heating, peel the beet and slice off 1/2 inch from the top. Using a Japanese madoline, slice the beet into rounds that are slightly thicker that paper-thin. Reserve only the full rounds.
3. Add the rounds to the oil in batches, making sure that the rounds are not touching. Fry in the oil, turning them with a slotted spoon, making sure to keep them submerged. Fry for 1 to 1 1/2 minutes. Remove with a slotted spoon and transfer to the paper lined rack. Season with salt. The chips can be kept warm in a low oven.
Cauliflower Floret Garnish
2 cups cauliflower florets (reserved from step 1 of the soup)
1 tsp distilled white vinegar
1 tbsp unsalted butter
1. Bring a medium saucepan of salted water to the boil. Add vinegar and reserved florets, blanch for 4 to 6 minutes, until tender. Drain well.
2. Melt butter in a medium frying pan over medium-high heat, swirling the pan occasionally, until the butter turns a rich golden brown. Add florets and saute until a right golden brown. Set aside.
Homemade Yellow Curry Powder
Posted on 12 April 2010 | 10 responses
Curry was mentioned in the first English cook book commissioned by King Richard II in the 1300’s. I do not know if it is because I am English and it was ingrained in me by nationality, but I absolutely love curry. In fact I like people more if they also love curry (no offense non-curry eaters!). The fact that I still have not found a regular curry house in New York amazes me. I have had so many recommendations from friends recently though, so I will be trying a couple of them soon and report back.
Making curries at home has kept me going in between visits home to London. I had always just bought the regular curry powder in the plastic container from the grocery store assuming that was the best way to make curry at home. I would keep this bottle of curry powder until it ran out, using a teaspoon here, a tablespoon there, never thinking about just how long it would sit in my cupboard. It was not I recently, when I had several recipes containing curry powder, that I began to think about making my own.
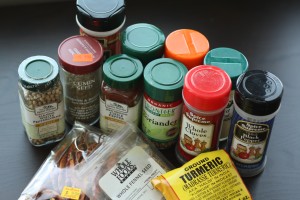
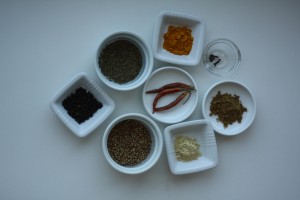
While looking for a recipe for an all-purpose curry powder I learnt there is not just one recipe. There are so many ingredients that can be added to curry powder that I began to get overwhelmed. Some of the common spices I have seen included are tumeric (bright yellow, it gives curry powder its yellow color, for more information see below in notes), coriander seeds, cumin seeds, brown mustard seeds, yellow mustard seeds, chili powder, dried chilies, fenugreek seeds, cloves, ground ginger, garlic powder, onion powder, cinnamon, green cardomom, mace, nutmeg, poppyseeds, fennel seeds and black, white and red peppercorns!
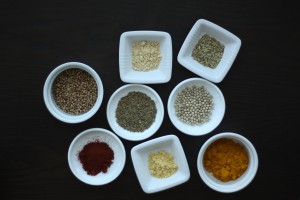
As I have recently become obsessed with taste tests, which you would know if you saw my pimento cheese recipes from Friday, I decided that I would try out 2 different basic recipes. As I pointed out before, there are dozens of ingredients which could go into a curry powder with each recipe being as individual as the person creating it. I thought that these two curry powders would be a good starting place. They both contain a few of the more common ingredients: whole coriander seeds, whole cumin seeds, tumeric, whole fenugreek seeds and cloves. However, I also wanted to see how certain ingredients would affect the taste so there are a couple of differences; in one recipe I used yellow mustard seeds, the other brown mustard seeds; in one I used black peppercorns and in the other white peppercorns; and finally in one I used whole dried chilies (dried chile de arbol) and in the other ground red chili pepper (ground New Mexico chili); I also added whole fennel seeds to one of them and not to the other.
So the first starter recipe was tumeric and coriander based, also containing cumin seeds, ground fenugreek, ground yellow mustard, cloves, white peppercorns, ground red pepper and I added whole fennel seeds at the last minute to see how they would taste.
The second contained coriander, cumin, tumeric, cloves, fenugreek and also brown mustard seeds, black peppercorns and whole dried chilies.
Both recipes required toasting of the ingredients (however I made one batch without toasting and it has so much less depth of flavor). Toasting the seeds also changes the composition of the oil contained within the seeds resulting in a different flavor.
So the results… I completely subjectively preferred the second recipe. I think the fact that the chilies were just ground gives the spice a freshness that the pre-ground chili does not have. I also prefer the addition of the black peppercorns rather than the white as I believe it has a less muted flavor. As I said earlier though, this is just a starter recipe and you can tweak it, omit things, and add things in. The options with making your own curry powder are endless!
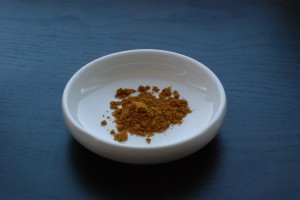
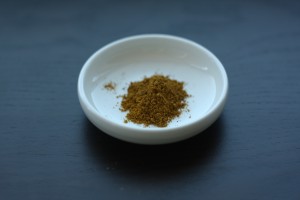
The winning curry powder.
Notes: I did not have whole fenugreek seeds or whole yellow mustard seeds at home and no grocery stores close to us did, so I used the ground variety of each. This means that not only would I be unable to get the full impact of the whole spice (the oils contained within each spice are very volatile and dissipate quickly when released from their seed), but also I was not able to toast them to develop the flavor. I would recommend trying to get the whole seeds for as many of the spices as possible, but both of my powders turned out tasting great. So while it is ideal to have the whole spice it is not compulsory.
You can store your homemade curry powder for as long as you would usually keep spices. Over time the pungency of the flavor will fade so it is best to use it soon after you make it.
On a side note, but an extremely important one nonetheless, the ingredients in curry powder are very beneficial to your health. I did not want to make this post all about nutrition and well being, but I also felt not adding these points here I feel would be negligent. Curcumin, a compound naturally found in tumeric, has long been used to treat inflammatory ailments in Asia but now it is being looked at as a potential new treatment for life threatening illnesses. Curcumin has been selected for further testing as it has been found to be a powerful anti-carcinogen. It has been linked to stabilizing patients of certain types of cancer, including pancreatic, colon, prostate and breast cancers. Research trials are underway at MD Anderson in Texas, to determine if curcumin is able to slow the growth of tumors and prevent the creation of new cancer cells. There are also prelimarinary tests at the neurology department of UCLA using curcumin to treat Alzheimer’s disease, as it is thought to prevent the build up of plaque on the neurons. They hope to soon begin testing on humans and are looking for people to enroll in their trial. Let’s hope this spice is able to provide some kind of cure to both these diseases.
Homemade Yellow Curry Powder, makes 5 to 6 tablespoons.
2 tbsp whole coriander seeds
1 tbsp whole cumin seeds
2 tsp whole black peppercorns
1 1/2 tsp whole brown mustard seeds
1 1/2 tsp ground tumeric
1 tsp whole fenugreek seeds (I used 1 tsp of ground fenugreek)
3 hot dried red chilies, crumbled (I used dried chile de arbol)
3 whole cloves
1. Heat a small frying pan over medium heat. When it gets hot, add coriander, cumin, peppercorns, mustard seeds, cloves and chilies. Keep moving the pan constantly, to make sure the spices do not burn, the spices will begin to begin to get toasted and become fragrant. Keep moving the pan over the heat until they begin to darken slightly in color. Add tumeric and fenugreek and stir constantly for 10-15 seconds.
2. Remove from heat and pour into a bowl. Allow to cool. Once cool, place into a spice grinder and grind until fine. Store in an air tight container.
The Unofficial Masters Pimento Cheese Sandwich
Posted on 9 April 2010 | 29 responses
Every year the Masters Golf Tournament is played in the first week of April at Augusta National in Georgia. Every year the Masters sells eight different kinds of sandwiches, the most popular being their pimento cheese sandwich which this year cost a very reasonable $1.50. And every year my husband and his father apply in the lottery for tickets to go and see a day of play. They had not been successful… until this year!
So 2010 was the year that my husband and his father went to watch the practice round on Tuesday. Being the dutiful husband he is, he went immediately to the concession stand and bought one of their famous pimento cheese sandwiches. He tried to remember exactly how the sandwich looked, how it felt in his hands, the texture of the filling and precisely how it tasted as he knew the second he walked through the door he would be quizzed. Now, reading this at home you may think that sort of sensory interrogation it slightly unfair and nigh on impossible for your average taster, but my husband is just no ordinary taster. Firstly, he is used to this quizzing, since we began dating I have always made him describe everything he eats when he is not with me (even boring work lunches when he runs to the deli to grab a sandwich); I love eating vicariously. And secondly, he is from North Carolina and he grew up eating pimento cheese sandwiches, so he knows a good one when he tastes it.
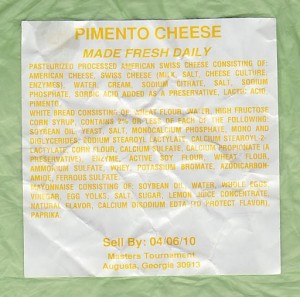
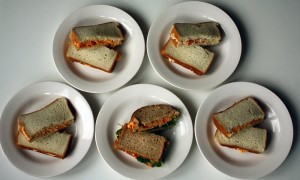
When he came back he described the pimento cheese sandwich as ‘good’, this was not exactly what I was looking for (he told me a lot more during the taste test, after I have tried to recreate the sandwich, but never mind!). Saying that, he did bring me back the wrapper from the sandwich, all the way back from Georgia! With this I learnt that the Masters sandwich is full of chemicals… and American cheese, Swiss cheese, mayonnaise and white bread. Sounds easy enough.
The label from the ‘official’ Masters pimento cheese sandwich.
And he bought me this snazzy visor!
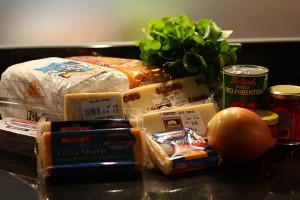
As I began researching pimento cheese sandwiches I was struck by the variety of ingredients and techniques. The cheeses in most were cheddar (sharp and extra-sharp), monterey jack and Velveeta. Some recipes were simply cheese, pimento peppers and mayonnaise. Another included hosts of ingredients, including garlic, pickle relish and chopped boiled egg. None of the recipes seemed to have American or swiss cheese in them. So I decided as any inquisitive chef would do, I decided that a test taste was in order!
I wrote a few recipes and picked out a couple of others that I thought ranged the spectrum of the pimento cheese family, a couple with different cheeses, some with varying amounts of mayonnaise, different styles of peppers, and different seasonings. I whipped up batches of each and made my husband eat them all… he was not unwilling. We then judged the sandwiches in three categories, the one which tasted most like the Masters, the one which tasted most like a childhood pimento cheese, and then the best tasting one (this is the Best Actor Academy Award in this taste test).
Surprisingly (and I am not bragging here as I am genuinely surprised), one recipe that I wrote won the categories for most like the Masters and most like childhood. My husband and I have deduced this is because most grown men like to eat things that remind them of their childhood (pb&j’s anyone?). With that being said, I can not judge as I still love the crustless cucumber sandwiches I had in my packed lunch for years.
So without further ado I bring you the winning recipes…
Notes: to hard boil the egg for the best tasting pimento, I placed an egg in a small saucepan, covered it with cold water by at least 1 inch. Then placed it over high heat until the water boiled. Removed it from the heat and placed a lid on the pan. Placed the pan aside for 10 minutes. Poured the water out and ran the egg until cold water until cool enough to handle. Finally I peeled the egg over a trash can, it can get messy!
The “Unofficial” Masters Pimento Cheese Sandwich (and most like childhood), makes 2 sandwiches
A sandwich like no other!
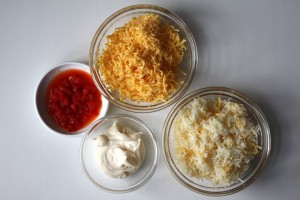
1 cup swiss cheese, about 5 oz, finely grated
3/4 cup american cheese, 4 oz, finely grated
1/4 cup mayonnaise
2 oz pimentos, chopped with juices
4 slices white bread, we used Arnold Brick Oven white bread
1. Combine all ingredients but bread. Stir vigorously for 2-3 minutes. Apply half to one slice of bread, form a sandwich with another slice. Cut through the middle, into two halves. Repeat.
2. It really is as easy as that!
The Best Tasting Pimento Cheese Sandwich (aka the Jeff Bridges), makes 3 sandwiches
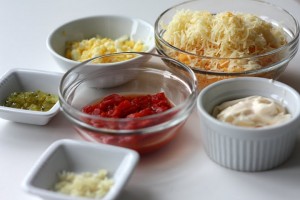
8 oz extra sharp cheddar, grated (preferably white cheddar)
2 oz pimentos, chopped with juices
2 garlic cloves, finely chopped
1 hard boiled egg, diced
1 tbsp sweet pickle relish
1/4 cup mayonnaise
6 slices white bread, we used Arnold Brick Oven white bread
1. Mix all the ingredients apart from the mayonnaise. Stir to roughly combine. Add mayonnaise and stir vigorously for 2-3 minutes until well combined. Apply half to one slice of bread, form a sandwich with another slice. Cut through the middle, into two halves. Repeat.
Katharine Hepburn Brownies
Posted on 8 April 2010 | 10 responses
The sweet, chocolatey aroma of brownies baking has currently filled my apartment, time seems as though it is standing still and I cannot believe that it has still not been forty minutes since I put them in the oven. Brownies are one of America’s most loved baked treats, they are a constant at bake sales and at birthday parties. They are one of the first things a child will make, working in the kitchen with their mum or their dad and then as a treat being allowed to lick the bowl after. There is something so nostalgic, so wholesome about brownies, they are an equalizer. As everyone loves brownies, they are the perfect thing to serve at an informal lunch as the only dessert, an afternoon tea with a collection of other cookies and cakes or cut into mini squares at a cocktail party (which I did this year at our annual Oscar party, most on that in a later post.)
The first known published recipe of what we think of as brownies is found in the 1906 edition of The Boston Cooking-School Cook Book, edited by Fanny Merritt Farmer (there was an earlier recipe for ‘brownies’ but it was of a molasses based confection that was made in individual sized molds). There are contrasting reports that they were created by a housewife in Bangor, Maine who had forgotten to put a leavening agent into a chocolate cake and decided to serve the flat squares instead, hence a name they were sometimes called, around the time of their conception, Bangor Brownies. Even though there is much debate over who created them and where, all accounts state that they did not become widely popular until the 1920s when chocolate became a much more accessible ingredient for most American households.
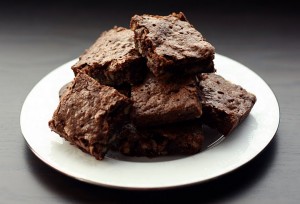
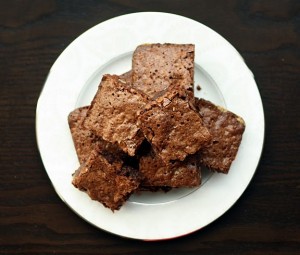
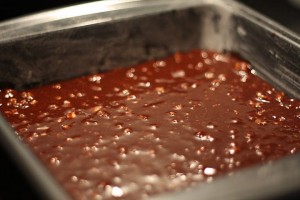
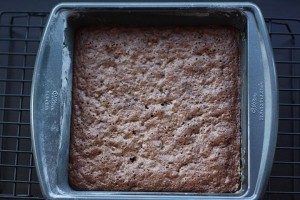
There are a few styles of brownies: cakey, fudgy or chewy. These fit the description of fudgy best as they contain less flour and more butter and sugar. However I would say that they also fit into the chewy category. These brownies are so easy to make, it requires only a medium saucepan and a baking pan, that is all! You can make them in about 5 minutes, making them just as easy as packaged mixes but without all the preservatives and so much more flavor. Also, the chances are you probably have all the ingredients at home already. The layer on the top of these brownies, which gives under your spoon with a slight crunch, is caused by the amount of sugar. With less sugar you will not get this lace thin crisp topping.
This recipe is from an interview Katharine Hepburn gave in 1975 to Liz Smith of The Ladies Home Journal. When I first heard about it I was naturally intrigued. I love the thought of someone as stylish and put together as Katharine Hepburn standing in a kitchen mixing up a batch of brownies. When I think of her it’s always in an outdoorsy, horse riding sort of way rather than wearing an apron in the kitchen. My parents also chose to give me my middle name after her!
Notes: When baking you should always use room temperature eggs, it helps to form a better crumb for the cake. The crumb are the air pockets contained within baked goods, which give cakes their fluffiness and their lightness. The air pockets are caused by an emulsion formed by the butter (the fat) and the egg white (the water). Room temperature eggs form a more stable emulsion. Cold eggs cause the batter to ‘weep’, which results in a flat and grainy textured cake. To get the eggs to room temperature just pull them out of the fridge 30 minutes or so before you want to begin mixing your batter.
With this recipe I think more than ever it is important to use good quality chocolate, you can really taste the difference. Also, you can chop the chocolate prior to adding it to the saucepan. It isn’t necessary but this will save you time as it is melting.
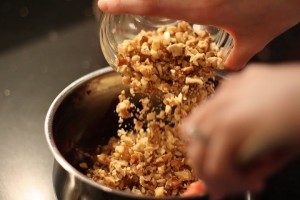
For brownie purists there are no nuts. Being English, I am not a purist. I am an equal opportunity brownie eater, so I include the nuts. Feel free to leave them out if you so desire.
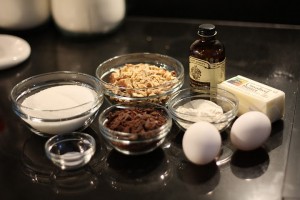
Katharine Hepburn’s Brownies, makes 16 brownies
2 oz unsweetened chocolate
8 tbsp unsalted butter
1 cup sugar
2 eggs, lightly beaten
1/2 tsp vanilla extract
1/4 cup flour
1/4 tsp kosher salt
1 cup walnuts, coarsely chopped
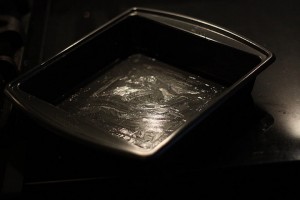
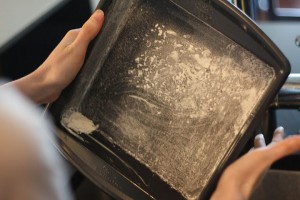
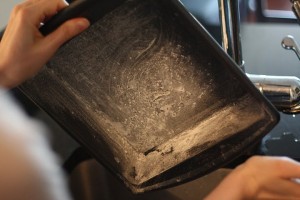
1. Heat oven to 325°. Butter and flour an 8 inch square baking pan.
2. Heat medium saucepan over medium-low heat, add chocolate and butter and stir until melted and combined.
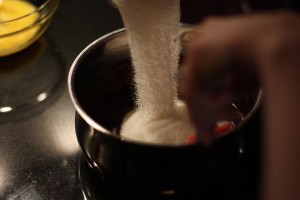
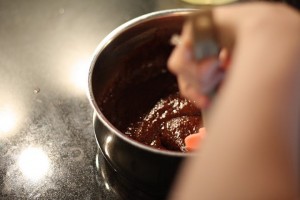
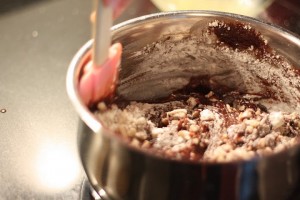
3. Remove pan from heat. Stir in sugar, it will look like chocolatey, wet sand.
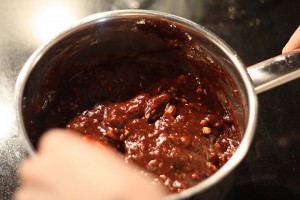
4. Once all the sugar is mixed in. Add eggs and vanilla and stir until smooth and glossy.
5. Add flour, salt and walnuts to batter and mix until well combined.
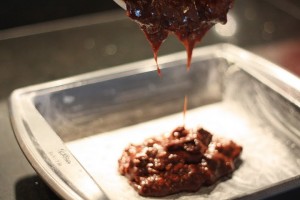
6. Pour batter into baking tin and spread with a spoon until the top is even.
7. Bake for 40 minutes, or until a toothpick inserted into the center of the brownies come out clean.
8. Allow to cool for 10 minutes in tin, then remove to a cooling rack and cool for 10 minutes before cutting.
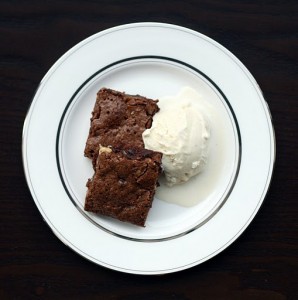
9. Cut into 2 inch by 2 inch squares. Serve alone or do as we do and serve with vanilla ice cream!
Torn Croutons
Posted on 7 April 2010 | 2 responses
These croutons are jammed packed full of flavor, which they should be with all the yummy ingredients that go into them. The downside is that they do require a couple of steps before you are able to make them. If you have the time it’s definitely worth them, they do add another bright, fresh layer of flavor to a dish. Make sure to cook these croutons over a medium-low heat, I know it will tempting to crank the heat up to crisp them more quickly, but it will result in a less juicy croutons.
I have teeny, tiny confession to make… I have only made these torn croutons once. They are amazing, don’t get me wrong, but I just have a pet peeve when a cookbook shuffles you around various recipes to make something as simple as croutons. If I was making the garlic confit anyway I would definitely make these but I have found a quick way to cheat, which I’ve posted here.
I’m sorry there are no photos of these croutons, next time I do make them I will definitely add a picture to this post.
Note: these croutons are best eaten the day they are made, but you can reheat them in a low temperature oven.
The purpose of slow cooking the garlic in the confit is to mellow the flavor, resulting in a sweeter, richer taste.
Torn Croutons
1 loaf country bread
Garlic Oil from Garlic Confit (recipe below)
2 tbsp unsalted butter
1. Cut crusts of loaf and tear bread into irregular pieces no large than 2 inches. You need 3 cups of croutons, reserve any extra bread for another use.
2. Pour garlic oil into a large saute pan until oil is 1/8 inch deep. Heat over medium-low heat until hot. Spread bread in a single layer, you can do this is smaller batches if they do not all fit in the pan. Add butter. The butter and oil should be bubbling but not sizzling (if it is sizzling turn the heat down).
3. Stir croutons frequently, until they are crisp and golden brown on all sides, about 15 to 20 minutes. Move to one side of the pan and keep warm until ready to serve. You want all that garlicky and buttery flavor so you don’t need to drain them.
Garlic Confit
1 cup peeled garlic cloves
About 2 cups canola oil
1. Cut and discard the root end of the cloves. Place cloves in a small saucepan and pour canola oil to cover them by an inch.
2. Place saucepan over medium-low heat, and cook garlic gently. There should be small bubbles coming through the oil. Cook for 40 minutes or until the cloves are very tender with pierced with a knife tip, stirring every 5 minutes.
3. Remove saucepan from heat and allow cloves to cool in the oil. Once cool, refrigerate the garlic and oil in an airtight container. Store for up to a week.
Easy Garlic Croutons
Posted on 7 April 2010 | Comments Off on Easy Garlic Croutons
These are the croutons that I make regularly, they are perfect for giving some extra texture and an extra crunch to salads and to soups.
They may not have the exact same burst of flavor that the Ad Hoc Torn Croutons but are they are quick to make, requiring only a few minutes to prepare, they are full of fresh garlic taste and are marginally healthier (there is no extra butter in this recipe).
Note: while I specify sourdough bread, you can use any white bread you have around (I know it is not the healthiest you can eat but it does makes the most delicious croutons, and they are only small so a couple won’t hurt!).
You can add whatever ingredients you like to infuse into the oil. Often, I mix it up and adding fresh herbs along with the garlic for a rustic taste, thyme, rosemary and sage all work really well.
2 tbsp extra virgin olive oil
2 garlic cloves, peeled, smashed and roughly chopped
2 slices sourdough bread
1. Heat oil in a medium saute pan over medium-high heat. Add garlic, cook for a couple of minutes until the garlic becomes fragrant but not browned. Remove garlic from oil with a slotted spoon, removing as little of the oil as possible.
2. Add bread to pan and stir to coat in oil, turn heat down to medium, turning croutons occasionally until golden, about 5-7 minutes.
3. Serve with whatever fantastic meal you are having!
