Multigrain Waffles
Posted on 16 March 2010 | 2 responses
My picture of domestic bliss is me cooking waffles for my husband before he heads off to work… This sadly rarely happens because it isn’t often that a) I’m fully awake and able/willing to cook in the wee early hours of the morning and b) my husband has time to sit and think, let alone eat, before he heads off to work. So whenever we are able to enjoy a breakfast together it’s always a treat. With these waffles there really is almost no excuse though, except for the waiting time when you first combine the oats and buttermilk, these are a snap to make (but you could always jump in the shower, multitasking!). And as I am on my nutrition kick these are really good for you, containing only 188 calories and 4g of fat per waffle. They also contain calcium from the buttermilk, protein from the egg and fiber from the wheat germ. What more could you ask for?

As there are only the two of us and this recipe makes enough batter for about 6 waffles, I make the extras and then cool them and divide them in two and wrap each half in foil and then place them all in a freezer-proof ziploc bag. Perfect for ALL those mornings when our schedules don’t quite align 🙂
Multigrain Waffles
2 cups buttermilk
1/2 cup old fashioned oats
2/3 cup whole wheat flour
2/3 cup unbleached all-purpose flour
1/4 toasted wheat germ
1 1/2 tsp baking powder
1/2 tsp baking soda
1/4 tsp fine salt
1 tsp ground cinnamon
2 large eggs, beaten until white and yolk have combined
1/4 cup packed light brown sugar
1 tbsp canola oil
2 tsp vanilla extract
1. Mix buttermilk and oats in a medium bowl. Allow to stand for 15 minutes until oats have absorbed the buttermilk.
2. Combine whole-wheat flour, all-purpose flour, wheat germ, baking powder, baking soda, salt and cinnamon in a large bowl.
3. Stir eggs, sugar, oil and vanilla into the oat mixture. Add the wet ingredients to the dry ingredients. Mix with a rubber spatula until just combined.
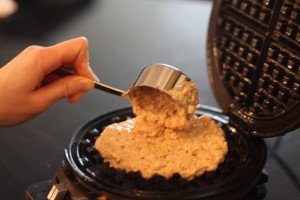
4. Coat a waffle iron with cooking spray and heat. Spoon 2/3 cup of batter onto the waffle iron. Cook until waffles are crisp and golden brown, 4 to 5 minutes. Repeat with remaining batter.
Split Pea Soup with Ham Hocks
Posted on 15 March 2010 | 6 responses
Every winter all I want to do is stay inside and make stews and soups a plenty. I have a nostalgia for pea and ham soup, I remember spooning the thick, almost gelatious soup out of a can and into a saucepan and then heating it until it thinned out, bubbling hot. Eating this soup always made me understand why the thick, smokey fog we used to have in Victorian London were called “pea-soupers”.
This soup is a slightly more adult version, the soup is thinner than the stick-to-your-bones versions with a lot of sophisticated flavor from the marjoram and bay leaf. I add extra chopped baked ham at the end but you don’t have to, you still have the meatiness from the ham hocks.
Like many other legumes, split peas are high in protein, high in dietary fiber and very low in fat. They also contain calcium, B vitamins, phosphorus and iron and no cholesterol. They are great for people on sugar restrictive diets as they have a low g.i. (glycemic index). I would say that all these nutritional benefits makes these dried beans one to put on your regular rotation. I want to come up with more recipes and I’ll post them on here as soon as I do.
Split Pea Soup
2 tbsp unsalted butter (1/4 stick)
1 large onion, chopped
1 cup celery, chopped
1 cup carrot, chopped
1 lb ham hocks (usually 2)
2 tsp dried marjoram leaf
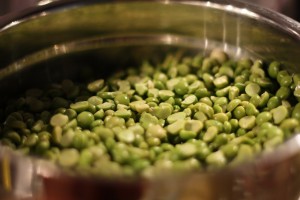
1 1/2 cups split peas, soaked overnight in 4 cups water
4 cups chicken stock or low sodium chicken broth
4 cups water
1 bay leaf
4 oz chopped baked ham, optional
1. Melt butter in a stockpot over medium-high heat. Add onion, celery and carrot and cook until soft, about 8 minutes. Add ham hocks and marjoram and cook for 1 more minute. Add peas, stock, water and bay leaf and bring to a boil. Cover partially and reduce heat to medium-low to keep at a simmer. Simmer for 1 and 1/2 hours, until the peas have begun to break apart.
2. Remove ham hocks, once they have cooked and if you are able remove any meat from the hocks and reserve, discard the bone and fat. Remove bay leaf. Puree the soup using an immersion blender (or regular blender or food processor) until you have a smooth soup.
3. Add ham and heat through until as warm as you like, then serve and enjoy!
The Final Recipe: Shrimp and Grits
Posted on 3 March 2010 | 6 responses
 There are certain recipes that I have tried and experimented with time and time again until I have gotten them just how I like them, my chili is one, my ragu another, my chicken soup, the list of staples that every home cook has up their sleeve goes on but my shrimp and grits were particularly important to me. My husband is from North Carolina and has grown up eating shrimp and grits, I would say it’s pretty high up there when it comes to his favorite foods and I love nothing more that giving my husband a taste of the place that he misses so much. As a native Englishwoman cooking shrimp and grits did not come easily to me. The first time I was served grits I refused to eat them based on their texture and how similar they looked to porridge, watery mashed potatoes or any manner of unfortunate things. How far I have come! I now not only eat grits with gusto in restaurants, I’m even making them at home. I often find making food at home is the best way for me to introduce new foods into my dietary repertoire. I ambitiously tried to make sauteed shrimp with sweet potato and smoked chile grits and green onion and cilantro sauce courtesy of Bobby Flay, whilst very delicious my husband was having none of it, there was no messing with this classic! So after countless trials where it was almost there, it finally happened. I got the validation that this recipe was the best shrimp and grits my husband has ever had*, so my quest to tweak this recipe is over and here is the final recipe.
Glossary; deglaze – dissolving cooking juices or small particles into liquid to get the most flavor for making sauces, a sec – almost dry, so you can just see the liquid.
“The Best” Shrimp and Grits
1 1/2 cups whole milk
1/2 cup cream
1 cup chicken stock
2 tsp kosher salt, plus more to season
1/2 cup white stone ground cornmeal
1 1/2 cups aged cheddar, coarsely grated
2 tbsp unsalted butter
3 rashers smoked bacon, cut into 1/2″ pieces
1 tbsp + 2tsp unsalted butter (1 tbsp = 3 tsp, you can divide butter into 1 tsp and 2 tsp and 2 tsp)
1/3 large red pepper, finely chopped
1/2 yellow pepper, finely chopped
1/2 jalapeno pepper, finely chopped
1 small onion, finely chopped
2 cloves garlic, chopped
1/2 lb large shrimp, shelled, deveined, tails on
1/3 cup white wine
1/2 cup chicken stock
2 glugs Texas Pete (a glug is the amount that comes out when you shake it)
1 scallion, finely sliced, for garnish
1. Add milk, cream, chicken stock and salt to a medium saucepan and bring to a boil. Sprinkle cornmeal over the boiling liquid, constantly whisking to prevent lumps. Continue to whisk for 4 minutes, until mixture thickens. Reduce heat to medium and continue to simmer for 20 minutes.
2. Set a 12″ saute pan over medium-high heat, add 1 tsp of the butter once the pan is hot. Add bacon and cook until browned and crispy but not burnt. Remove bacon with a slotted spoon and place on paper towels to drain.
3. Add 2 tsp butter to the bacon fat and add onion and peppers. Saute until soft, about 4 minutes. Add garlic and cook until cook until fragrant, about 2 minutes.
4. Season shrimp with salt and pepper and add to the saute pan, trying to place them in between the vegetables. Cook for 2 minutes on each side, until pink and just cooked through.
5. Remove shrimp and set aside on a plate, cover with tin foil to keep warm. Add white wine to deglaze the pan, making sure to scrape all the caramelized bits from the bottom. Reduce wine until a sec. Add chicken stock and hot sauce and reduce until sauce coats the back of the spoon. Whisk 2 tsp of butter in to sauce. Season with salt and pepper to taste.
6. Reduce grits to low heat and whisk in cheese and 2 tsp butter. Season with salt to taste.
7. Serve the shrimp on a bed of grits, cover with sauce. Garnish with bacon bits and finely sliced scallions.
* Controversial I know!
Fleur de Sel Caramels
Posted on 2 March 2010 | Comments Off on Fleur de Sel Caramels
I go through phases of liking different kinds of candy, at the moment I’m still tackling my Christmas candy so I’m consuming a handful of Jelly Belly as I write this (island punch are my new favorite), but I when I am peckish candy isn’t the first thing I reach for. I’m far more likely to be craving a juicy, furry nectarine or dreaming of a vanilla buttercream macaroon than reaching for a Snickers bar. I do make one exception to the candy that I crave – homemade toffee, very few things in life can make me happier than homemade toffee. This recipe is perfect for a hostess gift, petit fours for after dinner with coffee, or a mid-afternoon pick me up! You can serve them simply, just cut into squares or roll them into cylinders and you can leave them uncovered or wrapped in parchment or cellophane. They keep for about a month in an airtight container but I don’t think they will be around that long!
I saw this recipe on Ina Garten’s Food Network show Back to Basics and had to make it that evening. I noticed the quantities were off in the recipe on the FN website so I transcribed them from the show itself. All you need for this recipe is a good heavy bottomed pot (between 6″ to 8″ across the top and 5″ deep, 3-4 quart capacity), a 8″ square baking pan, parchment paper and a candy thermometer.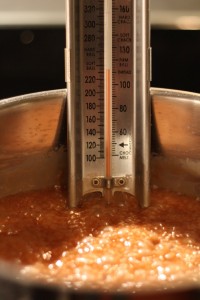
Fleur de Sel Caramels (adapted from the Barefoot Contessa’s recipe)
Vegetable oil
1 1/2 cups granulated sugar
1/4 cup light corn syrup
1 cup heavy cream
5 tbsp unsalted butter
1 tsp fleur de sel, plus more for garnishing
1/2 vanilla extract
4″ square pieces of parchment or acetate
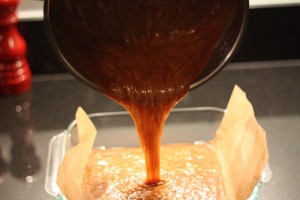 1. Line the bottom and sides of an 8″ square baking pan, allowing the paper to drape over 2 sides (see photograph above). Lightly grease the paper with vegetable oil.
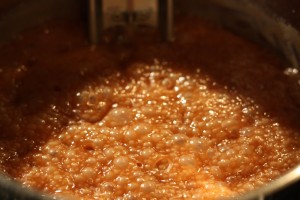
2. In heavy saucepan combine sugar, corn syrup, 1/4 cup water and bring to a boil over medium-high heat. Continue to boil until the caramel is a warm golden brown color. Don’t stir the mixture (you will get sugar crystallization which feels gritty), just swirl the pan to mix. Watch mixture carefully, it burns very quickly at the end.
3. At the same time bring the cream, butter and 1 tsp fleur de sel to a simmer in a small saucepan over medium heat. Remove from heat, set aside.
4. When the caramel mixture is golden brown slowly add cream mixture – it will bubble up violently, be mindful. Remove from the heat and stir in vanilla extract. Place back over medium heat and heat until caramel reaches 248* (firm ball – it should be labeled on the candy thermometer). Carefully and slowly pour the caramel into the prepared baking tin and allow to set in the refrigerator.
5. Now at this point you are able to either cut them into 1 inch squares, which you can wrap in the parchment or acetate. Or using the parchment paper to keep your fingers from getting sticky, roll your caramel tightly until you have rolled a third of it, then cut along the edge. Repeat twice more to make 3 identical tubes, sprinkle fleur de sel over each roll, then cut the rolls of caramel into 10 pieces and wrap the pieces. Sit back and enjoy your homemade candy!
Roasted Butternut Squash Soup
Posted on 1 March 2010 | 4 responses
On this beautifully clear but cold March New York day I have decided to make one of my favorite soups. I love butternut squash not only because it is so good for you, high in fibre, low in fat and packed full of antioxidants and nutrients, which give it beautiful burnt orange color. The main reason I love this fruit (that’s right, it has seeds so like all other gourds it is a fruit not a vegetable!) is because it has rich and buttery texture, which allows you to use a lot less butter than you would otherwise use to make something taste so good. It is so versatile and perfect for roasting and stuffing, it is delicious in warm salads, stews, and in this case soups.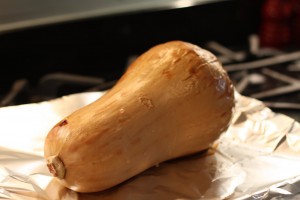

This soup is velvety smooth and so flavorful, the squash thickens the soup itself so you do not have to add potatoes or rice or any of the usual thickeners. I also love how the flavors of the butternut squash and sage mingle, it implies a much longer and more complicated recipe than the easy baking of the squash and finishing off with a simple one pot soup.
It is easy to make this soup vegetarian by exchanging the chicken stock that I usually use for an equal amount of vegetable stock.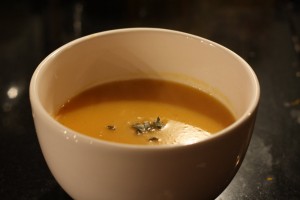
Roasted Butternut Squash Soup
1 large butternut squash (about 3 pounds, if you need to use 2 smaller ones to make up between 3-4 pounds)
6 tbsp unsalted butter (3/4 stick)
2 yellow onions
4 fresh sage leaves, chiffonade (for a step by step of how to chiffonade, click here), more for garnish
6 cups chicken stock or vegetable stock
Salt and pepper, to taste
Freshly ground nutmeg, to taste, optional
1. Heat oven to 400* F. Line a baking sheet with foil. Pierce skin of butternut squash (otherwise it may explode as it is baking), place on baking sheet and place in the oven. Roast squash for 1 hour or until the squash soft when you squeeze it.
2. Once the squash is cool enough to handle, cut in half and scoop out the seeds and discard. Scoop the flesh out of skin and discard skin.
3. Place a large saucepan over medium-low heat and melt butter. Add onions and sage leaves and cook until onion is soft and translucent, about 8 minutes. Add squash and stock and bring to a boil (you can turn the heat up here to speed the process), then reduce to medium-low and simmer for about 5-10 minutes, just to let the flavor mix it up! Turn off the heat.
4. Blend the soup. You can do this in a blender or food processor, I love my new immersion blender which save me time and handling hot liquids. Blend the soup until you have a smooth and velvety thick liquid with no lumps. If using a blender or processor return soup to clean saucepan. Reheat over medium-low heat. Season with salt and pepper, and nutmeg too if you are feeling festive.
5. Ladle into soup and enjoy!
Edamame Hummus
Posted on 26 February 2010 | 1 response
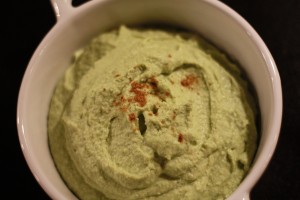 I have begun taking an online course about how to make your heart healthy. Amongst all the long words and scientific sounding theories there is one thing that resonates with me, the fresher the food, the brighter the color, the better it is for you. I love the thought that a variety of all these colored fruits and vegetables are making my body stronger and healthier for me.