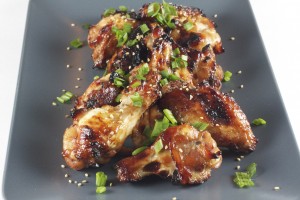
Sticky, Soy Glazed Chicken Wings
Posted on 6 October 2010 | 11 responses
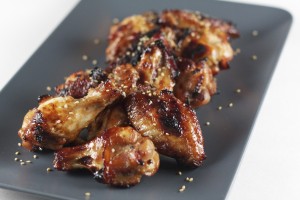
The hubbie was out of town last night so I did what every girl wishes she could do on a nightly basis… wear her sweats, eat chicken wings and watch Gossip Girl! While I do adore fried chicken wings dripping with buffalo sauce, I a) do not want the house to smell of fried foods and b) really do not want my sweats to be the only pants I am able to wear! So I went with this heart healthy recipe. These baked chicken wings do not sacrifice on flavor though. The sweet, sticky and spicy sauce coats the wings and the sesame seeds and sliced green onions add texture and freshness. I ate mine last night with a huge (and I mean massive!) baby lettuce, avocado and tomato salad with Japanese Style Salad Dressing. If anything could take my mind of the hubs being away it was some seriously tasty food and some awfully amazing tv!
Also as everyone knows football season is a long one (I can hear collective cheers and groans around the country) so you need to have a variety of easy but delicious recipes up your sleeves for any impromptu parties you may have. You can make everything ahead for this recipe and just refrigerate until your guests arrive then just toss the wings in the sauce and pop them in the oven. As you can see this recipe makes enough for two people (maybe one if no-one is around and you are really engrossed in a television program…) so you can double, quadruple etc as you need.
Notes: If you are buying full wings, cut into the three recognizable parts (tips, wingettes and drumettes) and discard tips. You can also use them for stock or chicken broth/soup.
Sticky Soy Chicken Wings, makes 12 wingettes, serves 2 as an entree
1 tsp vegetable oil
1 garlic clove, peeled
1/2 tsp kosher salt
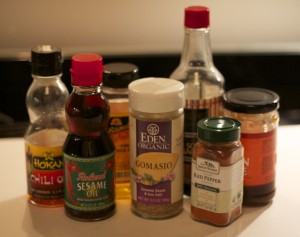
3 tbsp hoisin sauce
2 tbsp clover honey
2 tbsp soy sauce
3/4 tsp sesame oil
1/2 tsp chili oil
1/8 tsp cayenne pepper
6 drumettes and 6 wingettes (see Notes), about 1.4 lbs
1/2 tbsp sesame seeds
2-3 scallions, green part only, thinly sliced (reserve whites for Japanese Style Salad Dressing)
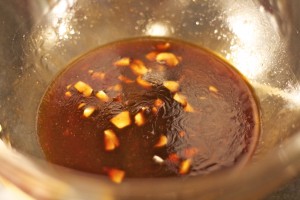
1. Heat oven to 425ºF. Line a baking sheet with foil and spread oil around. Using a pestle and mortar, crush the garlic and salt together to form a thick paste. Place in a large bowl, add the hoisin, honey, soy, sesame oil, chili oil and cayenne. Combine well. Reserve 1/3 of the sauce in a separate container.
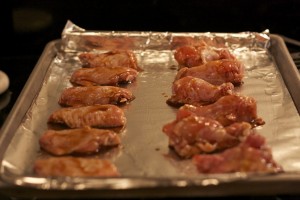
2. Add chicken wings to the large bowl and toss to coat well. Place chicken pieces skin side up on the oiled baking sheet.
3. Place in oven and bake for 15-17 minutes. Turn the pieces over and drizzle with the reserved marinade. Return to oven. Begin to check on the wings after 15 minutes, making sure they are browned, beginning to crisp and cooked through. Remove from oven and sprinkle with sesame seeds and sliced scallion greens. Serve to the hungry masses!
Truffled Mushroom Risotto
Posted on 5 October 2010 | Comments Off on Truffled Mushroom Risotto
As I mentioned in my Creamy, Brandied Mushroom Crepes, I did not like mushrooms for the longest time. By a long time, I mean from birth until sort of now… I would even go so far as to fill in the allergy section on my permission slips for school trips with mushrooms and spinach on the off-chance that they would feed them to me (that’s right, Mrs. Smith, I was never really allergic to either!). The remedy I have found for my dislike and general mistrust of mushrooms is to make something with them at home. For some reason when I make things myself I hate them less…
In this dish I add a few of my all time favorite things which thankfully, compliment the cremini mushrooms so well. This dish tastes like fall/autumn in a bowl. The Gruyere cheese has a nuttiness and meatiness of its’ own which pairs well with the meatiness of the mushrooms. The thyme has the same woodiness and the white truffle oil has the same earthiness as the mushrooms themselves. I can just imagine Titiana and Oberon sitting down for plate now…
I chose cremini mushrooms, also called crimini mushrooms, because I feel as though they have a better flavor than the button mushroom. The common white button, cremini and portobello are all the same variety of mushroom just at different stages of development. The youngest is the white button mushroom, causing them to be the mildest tasting and the softest; they owe their white color to being bred especially for this quality, in the wild they would be far browner. The portobello mushrooms are obviously the furthest along in the cycle, developing the large cap and the dark gills underneath (this is what would happen to all button mushrooms is they were left to grow). The cremini mushroom is in between these two phases. They have begun to develop the meaty taste, the darker gills and the brown coloration (hence them occasionally being called baby bellas) but are still small and tender. If you see both baby bellas and creminis in the vegetable aisle buy whichever looks healthy and is cheaper, they are exactly the same thing.
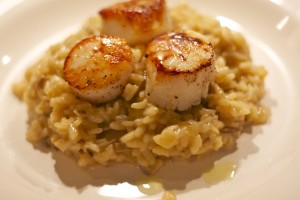
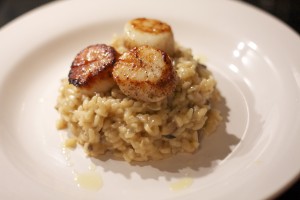
Tips: I served mine with three golden, pan-seared diver scallops and drizzled them with extra white truffle oil and a green salad with a white balsamic vinaigrette. I seasoned the scallops with kosher salt and pepper and cook them in a touch of extra virgin olive oil on high heat for 2 minutes on each side.
Truffled Mushroom Risotto, serves 2
2 tbsp unsalted butter
1/2 large Spanish onion, finely chopped
1 garlic clove, finely chopped
4 crimini mushrooms, finely chopped
1 cup arborio rice
1/2 cup white wine
2 1/2 cups chicken or vegetable stock
1/2 tsp thyme leaves
1/3 cup grated Gruyere cheese
1/4 cup grated Parmesan cheese
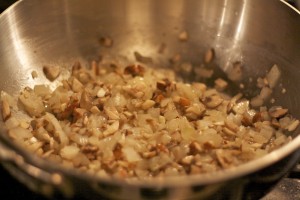
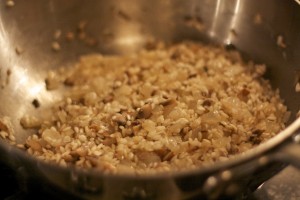
1. Pour stock into a medium saucepan and heat over high heat until boiling. Melt butter over medium heat, add onion and stir to coat with butter and cook for 5 minutes, until soft. Add garlic and let cook for 1 minute, until beginning to soften and become fragrant. Add mushrooms and stir to coat thoroughly, add a sprinkle of kosher salt and let sweat for 5 minutes, until the mushrooms begin to give off moisture.
2. Add rice and stir thoroughly with mushroom-butter mixture. Allow to cook for 1-2 minutes until the rice is warmed.
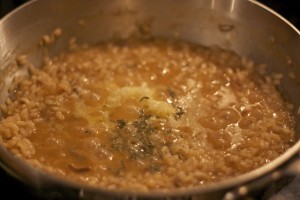
3. Add white wine and turn heat up slightly to medium-high and stir while simmering until the wine is absorbed. Begin adding the boiling stock in half cup amounts, simmering the liquid and stirring almost continuously to prevent the rice sticking to the pan until the stock is absorbed before adding more (this process should take about 20 minutes). Once the stock has been absorbed and the rice tastes cooked with only a slight bite, add the thyme and cheeses. Stirring the melt the cheeses.
4. Season with salt and pepper and serve immediately.
Vanilla Extract – Update
Posted on 29 September 2010 | 3 responses
As it has been a couple of weeks since my vanilla extract post I wanted to give you a quick update. You may remember that the extract was so unbelievably easy to make… split the beans, throw them in some vodka, shake and wait. I’m now in the waiting stage. I am absolutely no good at waiting, so every so often I’ll reach into the back of the dark cupboard where my extract is aging and shake it, sniff it, restrain myself from tasting it just yet, you know… the usual bad-at-waiting stuff.
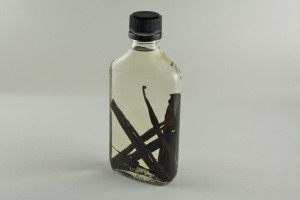
Here’s the extract now, a beautiful deep auburn color.
And here is how it was day 1. It is amazing how the color has already changed so much in so little time.
And I just bought another half pound of vanilla beans to get into mischief with in the kitchen!
If anyone has any requests, let me know! Shoot me an email at vienna@tinytestkitchen.com or leave a comment below. Happy cooking!
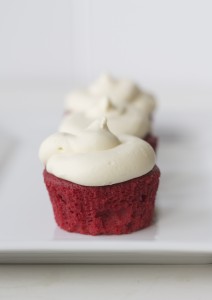
Red Velvet Cupcakes with White Chocolate Cream Cheese Frosting
Posted on 28 September 2010 | 14 responses
I love making these delicious cupcakes, they are always a huge hit. I do not think that is due to any expert baking skills that I may or may not have, it is all down to science… Every characteristic about these little cakes: how tender its’ crumb is; how moist they are; the amazing crimson color; their chocolatey-ness which pairs beautifully with the whipped white chocolate and cream cheese frosting. The only thing you have to be mindful of is to not over-mix the cake batter once the cake flour has been added, other than that the ingredients do it for you.
Now for your brief and highly specific science lesson. It is important to use cake flour to get the right texture in the cake. Cake flour is extra finely milled flour with less gluten; gluten is the protein that makes bread chewy and in this case the lack of it makes the cake extra tender. Whenever I make them I always marvel at the chemical reactions going on. People always say that baking is very technical and precise and while this is true in general, none more so than with these little delights. Somehow the baking soda and the cider vinegar react and fizz to make the cake extra fluffy. The buttermilk, salt and baking soda have some high school acid and base reaction going on to help cakes rise even more. Not to mention, the vinegar and buttermilk work together to make a red pigment in the cocoa powder called anthocyanin more pronounced… Who would have thought all that was going on in one little cupcake?
I have tried them out three different ways: these cupcakes, an impressively large three layer cake or adorable, tiny mini muffins. All three have their own niche market. The cake is perfect for afternoon tea or a sit down dinner where a plated dessert is more appropriate; the mini cupcakes are served at fancier evenings, like our annual Oscar party where I make ten or so different hors d’oeuvres and mini sized treats; and I make these cupcakes for a more informal gathering, such as a Saturday afternoon football party, serving them after pulled pork sandwiches.
Notes: You should be able to find cake flour at your local supermarket but if you are unable to you can substitute 1 3/4 cups plain flour and 1/4 cup cornstarch. If you are looking for other recipes that use cake flour to make sure you use the whole box, I promise you could not be disappointed with these Carrot Cake Cupcakes
or these Pecan Blondies with a Cream Cheese Swirl
or even these decadent Individual Chocolate Cakes with a Molten Center.
Also if you want to use a simple Cream Cheese Frosting rather than adding white chocolate (although I do suggest you try it at least once – it pairs beautifully), use the frosting from the aforementionedCarrot Cake Cupcakes.
Red Velvet Cupcakes with White Chocolate Cream Cheese Frosting, makes 20-22 cupcakes
Recipe modified from More From Magnolia by Allysa Torey
Red Velvet Cupcakes
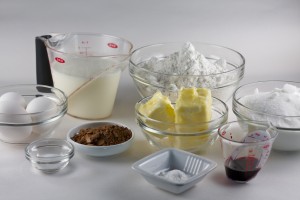
Just under 1 3/4 cups cake flour (not self-rising)
6 tbsp unsalted butter, at room temperature
1 1/2 eggs, room temperature
1 cup plus 4 tbsp sugar
1 1/2 tbsp red food coloring
1 1/2 tbsp unsweetened cocoa
3/4 tsp vanilla extract
3/4 tsp fine salt
3/4 cup buttermilk
3/4 tsp cider vinegar
3/4 tsp baking soda
1. Heat oven to 350ºF. Line 2 12-cup muffin trays with cupcake liners.
2. Sift flour and set aside. Place butter and sugar in the bowl of an electric mixer and beat together on medium speed for 5 minutes, until butter and sugar are light and fluffy. Add eggs in two additions and beat well after each.
3. In a small bowl, combine the red food coloring, cocoa and vanilla. Add to batter and beat well.
4. In a measuring cup, stir the salt into the buttermilk. Add to the batter in three parts, alternating with the flour. Beat until the ingredients are just combined.
5. In a small bowl, stir the cider vinegar and baking soda (it will fizz up a lot so use a slightly larger bowl than you think you need). Add to the batter and mix well. Using a rubber spatula, scrape down the batter in the bowl, making sure the ingredients are all well combined and the batter is smooth.
6. Pour batter into cupcake liners. Place trays in oven and cook for 20 minutes or until a toothpick comes out clean. Remove from oven and let the cupcakes cool for 5-10 minutes in their trays before removing and allowing to cool completely on a cooling rack.
White Chocolate Cream Cheese Frosting
1 lb cream cheese, at room temperature
6 tbsp unsalted butter, at room temperature
1 tsp vanilla extract
8 oz white chocolate, chips or chopped into small pieces
1. Place chocolate into a medium sized bowl. Bring a small saucepan of water to a simmer. Place bowl on top of water. Stir chocolate until melted. Remove from heat and set aside for 10 minutes, until cooled to luke warm.
2. Place cream cheese and butter in the bowl of an electric mixer and beat together until very smooth and fluffy, about 3 minutes. Add vanilla and beat well. Pour in chocolate and beat again.
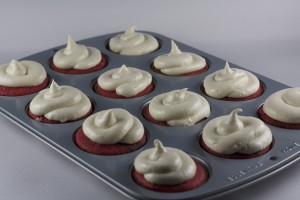
To frost the cupcakes…
Use a piping bag or a knife and spread the room temperature frosting.
Buttermilk Fried Chicken
Posted on 24 September 2010 | Comments Off on Buttermilk Fried Chicken
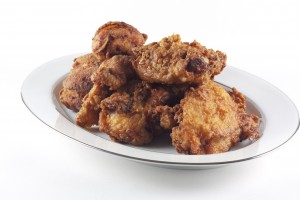
If you are after the ultimate fried chicken recipe, this is it! I do not have a long and varied history with fried chicken although I am sure many of you do; the first time I ate fried chicken was only about 6 years ago. I have, however, made up for lost time, attempting to eat as much fried chicken as my body will allow me to without my ballooning as a consequence. Sadly my severe germophobia (and food-borne-illness-ophobia) has prevented me from eating at some of the classic fast food fried chicken places, but I feel as though I give ever clean looking establishment a chance to show me what they’ve got.
The winner hands down was Thomas Keller’s restaurant Ad Hoc in Napa Valley. A few years ago, the hubbie and I went out to Napa for a spot of wine tasting and a whole lot of eating. We are at Ad Hoc on our second night and had an extraordinary pepper rubbed pork tenderloin served with a salad with yellow wax beans and a herby vinaigrette. We adored every minute of our time in the laid back home style restaurant.
The culinary pinnacle of our trip was meant to have been our lunch earlier in the day at the French Laundry but sadly we did not have the best experience (despite what the cheque would indicate) and we honestly had a far better time and meal at Ad Hoc. While chatting to our waiter throughout our dinner, we brought this up. I suppose he felt bad for us because somehow he got us on the list for the fully-booked, fabled fried chicken night later that week.
Our last meal at Ad Hoc was the perfect end to our trip and we walked across the road, back to our hotel feeling sated, slightly sleepy and the best possible kind of greasy.
I served the fried chicken with a bacon and pepper potato salad (working on the recipe) and peas (don’t ask, the hubs really wanted them and could not be swayed…)
Tips: I chose thighs and drumsticks as I am a dark meat kinda gal but you can, of course, use wings and breasts. The temperature of the oil needs to be slightly higher at 340ºF and the cooking time for breasts is 7 minutes and for wings, 6 minutes.
Notes: In the original recipe it states that the chicken should be brined for 12 hours. I brined mine for 2 1/2 hours and found it to be flavorful and extremely moist. If you have 12 hours or have made in the brine in advance (you organized person, you!), then double the amount of water added to the brine from 8 cups to 16 cups. This dilution will help prevent the chicken from becoming over-seasoned.
Oil for frying always seemed to be a huge waste as I used to through it away. But it can be strained and rebottled and used again for frying other things. The only oil I would not reuse is oil used to fry seafood (unless of course it is for more seafood), as the flavor stays in the oil.
Buttermilk Fried Chicken, makes 8 pieces of chicken
4 thighs, bone in and skin on
4 drumsticks, bone in and skin on
Brine
5 lemon halves (from 2 1/2 lemons)
24 bay leaves
1/2 bunch parsley (approx 2 oz)
1/2 bunch thyme (approx 1/2 oz)
1/4 cup clover honey
1/2 head of garlic, halved through the equator
2 tbsp black peppercorns
1 cup kosher salt
6 cups water, separated (see Notes)
2 1/4 cups ice
1. Combine 4 cups water and the rest of the ingredients (except the ice) in a large pot, cover and bring to the boil. Boil for 1 minute, stirring to dissolve salt. Remove from the heat and add the remaining 2 cups water and the ice. Stir and cool at room temperature and then chill before using. (Can be made up to 3 days in advance.)
2. Brine for up to 12 hours (see Notes).
For dredging and frying
Approx. 48 fl oz peanut oil, (see Notes)
2 cup buttermilk
Coating
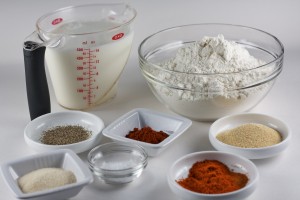
3 cups all-purpose flour
1/4 cup garlic powder
1/4 cup onion powder
2 tsp sweet paprika
2 tsp cayenne pepper
2 tsp kosher salt
1/2 tsp freshly ground black pepper
1. Remove chicken from brine and discard brine. Rinse pieces under cold water and pat dry with paper towels. Let the chicken sit out for 1 hour, or until it comes up to room temperature.
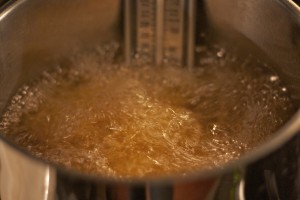
2. Heat oven to 400ºF. Pour your oil into a large tall pot until the oil is 2 inches deep (make sure that the oil only comes up 1/3 the height of the sides of the pot). Using a deep fry/candy thermometer, heat oil to 320ºF.
3. Combine all the ingredients for the coating in a large bowl, stirring to make sure that they are evenly mixed. Transfer half the coating mixture to a second large bowl. Pour the buttermilk into a third bowl and season with a sprinkle of salt and pepper. Set up your dipping station – the chicken pieces, one bowl coating, the buttermilk, then the second bowl of coating.
4. When the oil comes to temperature, dip as many pieces as will fit in your pot at one time, without being crowded, in to the coating, gently shaking off any excess; then buttermilk, allowing any extra to drip off; then second layer of coating, again gently removing any excess. Carefully lower the pieces into the oil.
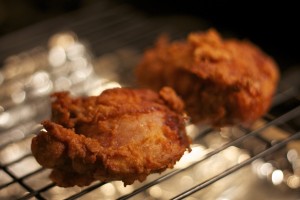
5. Fry for 2 minutes, before carefully moving the chicken pieces, continue to turn the chicken to make sure it cooks evenly. Fry for 10-12 minutes, or until the chicken is deep golden brown. Remove chicken pieces from the oil and place on a rack over a foil lined sheet pan to rest.
6. Continue to cook the rest of the chicken in batches, adding the finished pieces to the cooling rack. When you have finished cooking your chicken, turn the heat under the oil off. If you feel as though the chicken is not warm enough, place the baking sheet in the oven for 2 minutes to ensure that the chicken is hot and the crust is crunchy.
7. Let rest for a couple of minutes before serving, to allow the oil to cool slightly. Serve and enjoy!
The Ultimate Potato Gratin
Posted on 22 September 2010 | Comments Off on The Ultimate Potato Gratin
In the neighborhood we live in, a sandwich place opened up a little while ago. My husband was instantly enarmored with the prospect of quick meals and was extremely excited about it being in our building. I, while more hestitant, would also press my face against the glass to see the progress the builders were making on the kitchen and the dining room (we have almost no restaurants where we live – we take what we can get!) When it finally came to opening day I balked. I heard from some of our neighbors about the long waits and the frequency of incorrect orders. Finally though, I ventured in. I stared up at the tastefully decorated menu board and the second I saw two magical words all was forgiven, scrap that, smitten. Potato Gratin.
The next couple of weeks were a whirlwind love story for me and said sandwich place. The hubbie and I switched from date nights at cute restos around the city for date night downstairs, gleefully tucking in to some scrummy grub. Week one, we were going strong. Flavorful, well seasoned gratin was making my heart sing. Week two, slightly overloading on the carbs but still, happy as a clam. Week three and we had an upset, and not the good exciting football kind either. It was the kind that makes you want to write a new review on yelp. The gratin was completely unseasoned. I don’t know if you have ever had an unseasoned potato but I’ll save you the work and let you know – not good! Not being a quitter though, I gave them a couple more tries, always with the same disappointing result. It was back to making my own at home with no quick fixes.
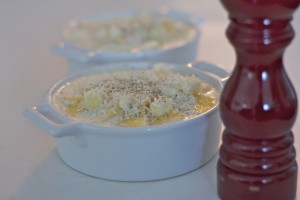
This gratin has everything you could want (and then some, the ooey-gooey cheesiness, the garlic scented creamy sauce) so if you want to cut down on the cheese or the garlic, or switch the cream out for milk, or halve the amount of butter…. I understand, but you have to know that it will taste soooo much better with it all in!
Potato Gratin, serves 2-4 as a side
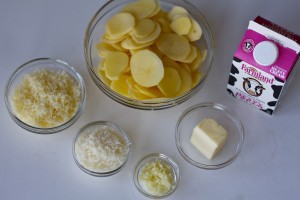
3/4 lb potatoes, peeled, thinly sliced, preferably Yukon Gold
1 1/4 cups heavy cream
1/2 cup milk
3 garlic cloves, finely minced
3/4 cup grated Gruyere cheese
1/4 cup finely grated Parmesan
1 tbsp unsalted butter, plus more for greasing the serving dishes
1. Heat oven to 375F. Butter ovenproof serving dishes (either 1 large one or 2 smaller). Combine cream and milk in a measuring cup. Begin to layer potato slices, after completing a layer, top with a sprinkle of Gruyere, garlic, salt and pepper and cover with the cream milk mixture. Repeat until all the potatoes, Gruyere and cream are used up. Top with tiny cubes of butter and Parmesan cheese and a sprinkle of salt and pepper.
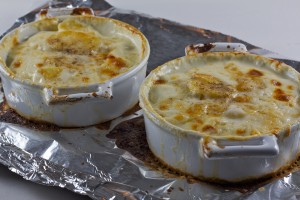
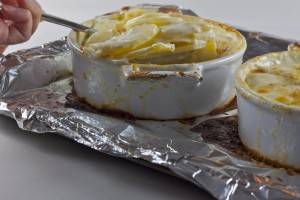
2. Cover a baking sheet with foil. Place serving dish/es on to prepared baking sheet and cover tightly with foil. Place in the oven for 45 minutes. Remove foil and allow potatoes to continue cooking for 10 until the top is beginning to brown and the cream is bubbling.
3. Remove from oven and allow to sit for 5 minutes, loosely covered with foil. Be careful as you are serving as the dish will still be hot. Enjoy!
How to Wrap, Freeze and Defrost Your Wedding Cake
Posted on 21 September 2010 | 54 responses
I am so excited! This is my 100th post. Thank you so much for reading, commenting and giving me ideas for new posts and recipes. As it’s a special post I thought I would let you into a special part of my life. Enjoy!
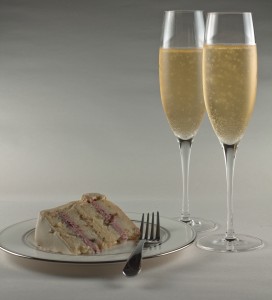
As I mentioned in my Labor Day Menu Ideas post my hubbie and I recently had our first anniversary. Somehow, we have been so busy that we haven’t had a chance to sit down, plan ahead and pick a day to defrost and eat a slice of our wedding cake. As most couples still do we froze the top layer of our cake to eat one year on, without any real research into the freezing or defrosting of the cake. I have eaten enough freezer burnt ice cream to know that wrapping the cake tightly was advantageous but when it came to defrosting I found a lot of misinformation online so I thought it would make the ideal informative post!
One of the first things that I had picked out for the wedding was the cake. Even before I was wearing my engagement ring I knew who I dreamt of baking my cake. Ron Ben-Israel. He is simply a cake baking genius and is the absolute best when it comes to weddings (I mean his website is weddingcakes.com), he books up months in advance and his cakes are the most gorgeous cakes I have ever seen and of course tasted! On one of my first dates with my hubbie, we had attended a corporate birthday party where one of Ron’s cakes were served. It was an almond cake with vanilla buttercream and it was absolutely divine. As everyone was leaving and we were one of the last there, I asked one of the waiters what was happening to the remainder of the cake. I was told it was being thrown away after the party had cleared out. Knowing this to be a crime against cake, I decided to give the remaining untouched half a home in my refrigerator…
Through some fabulous twist of kismet, we were lucky enough to have him make our cake for our wedding last year (thank you Mum and Dad!). Whenever we went for our tastings (you know me, there had to be more than one tasting), I was always astounded at how fabulous everything tasted and loved to watch the cakes being assembled in the workshop. One of the many amazing things about Ron’s cakes are everything on the cake, from the ribbons, the monograms, the exquisite flowers, are all edible!
Just a few ideas for all you brides to be out there… I love the way fondant creates a perfectly smooth surface but I don’t love the way it tastes. One solution is to roll the fondant very, very thin and lay it over the buttercream and sponge. You get the perfect surface but without the gummy taste! I had my fondant dyed a light champagne color to match my dress.
We had a multi-layer cake so we took full advantage of the flavors we could have. We had alternating cake types for each layer. The first type was a white almond sponge cake with hazelnut praline crunch and blackberry buttercreams and the second was a vanilla sponge cake with a passion fruit and lime buttercream with a white chocolate cream filling.
Notes: I know that many people leave for honeymoon the next morning so you can ask a family member or close friend to wrap, freeze and store it for you until you return. The whole process does not take too long though, I wrapped mine the morning after, with my head still full of hairpins, attempting to get the cake and my dress back to our apartment before rushing to the airport. I had a very sweet bellman bring up foil and cling wrap and made him stand in our room, holding the cake while I ran around it with wrap and foil. It can be done!
Method for wrapping and defrosting your cake.
1. Place cake in refrigerator the night of the wedding and leave to cool overnight.
2. The next morning, make sure that you wrap your cake very tightly. Wrap the cake so no air can touch the surface with three separate layers of cling wrap. Follow this with a layer of foil, again very tightly wrapped. If you have a cake box, place the wrapped cake inside. If not, simply place the wrapped cake at the back or the side of your freezer.
3. Wait one blissful year, and pull out the cake from its’ deep freeze. Unwrap the cake and remove and discard the wrap and the foil. Rewrap the cake loosely with waxed paper and then cling wrap. Place wrapped cake into the refrigerator overnight.
4. Leave the cake in the fridge until a couple of hours before you want to eat, 2-4 hours. At which point remove the cake and place it on your countertop and let it come to room temperature.
5. Cut the cake with a cake knife or a serrated knife. Enjoy and toast again to your married life!
Homemade Vanilla Extract
Posted on 18 September 2010 | 3 responses
Whenever I have to buy vanilla extract, which is fairly often given the amount of recipes I make containing vanilla extract, I always balk the price… Really I say? Ten dollars for two fluid ounces of something as simple as vanilla?? I understand that a lot of work goes into sourcing the right beans, finding the correct depth of flavor, adding a touch of sugar to make it a little more palatable. (*Personally I do not like extract companies adding simple syrup to their vanilla extract. Even if the extract is going straight into a sweetened cake, I would like to be the person who is adding the sugar to my desserts.) Which is why I have been resigned to pay ten dollars each time I wanted four tablespoon of extract… until now! No longer shall I be at the mercy of these extortionists! I am taking matters into my own hands. That’s right. We are about to make our own vanilla extract!
It could not be simpler (I am aware I say that a lot but really it usually can’t be any simpler), pour vodka on vanilla beans. Let sit for a couple of months, voila – extract! I use a fair amount of seeds and always keep the stripped pod. I always thought I may make extract or sugar or liquor but never had a real plan until I decided I just needed to do it. I had run out of vanilla extract for the last time. One of the best things about making your own is the fact that you need to run out again. You can truly find the spring over everlasting extract. Whenever you begin to get low, add some more vodka, shake it up and allow the beans to steep in the vodka and age.
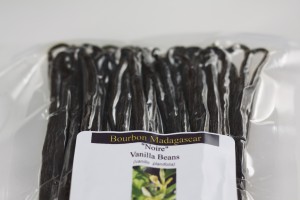
One common myth about vanilla extract is that it is made with whiskey, more specifically bourbon. This is not the case. The reason some of the higher end extracts are named Madagascan Bourbon Vanilla is down to the Bourbon Islands off the coast of Madagascar where lots of vanilla is grown.
Notes: The recipe below is more of a ratio, so if you want to make a quart of extract just quadruple the recipe, if you want half a cup halve the recipe.
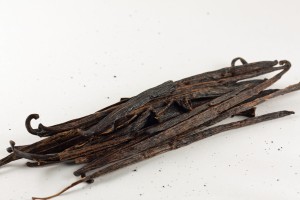
I used a mixture of whole vanilla beans, split almost completely lengthwise down the center so that it looks like a wishbone, and other beans which I have scraped the seeds out and saved the pod.
Vanilla Extract, makes 1 cup
1 cup vodka
3 vanilla beans, (see Notes above)
1. Place split vanilla beans into a sealable container. Pour over vodka until the beans are completely covered. Seal until bottle or jar is airtight. Shake vigorously occasionally and store in a cool, dark place for 2-3 months until the extract is a deep, warm golden caramel color.
2. See I told you it couldn’t be simpler! One more step you can take if you want to, is when you are ready to pour the extract into smaller bottles you could strain it.
Bucatini All’amatriciana
Posted on 15 September 2010 | Comments Off on Bucatini All’amatriciana
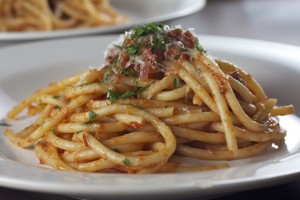
Unlike yesterday’s Carbonara recipe, the origins of this dish are not so mysterious. It is well known that the dish was created in Amatrice in the Lazio region that lies within central Italy. It quickly spread to Rome where it was embraced and recategorized as a Roman recipe. Like the carbonara this sauce should also be made with guaciale (unsmoked pork jowl) but bacon and pancetta work also. Traditionally this sauce can be made with or without chili but of course I chose to add some. Garlic and onion are more recent additions to the sauce but I find that they offset the acidity from the tomato nicely so for me, they are welcome additions.
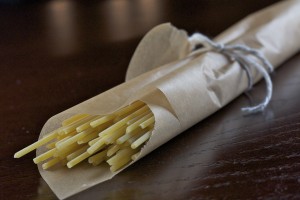
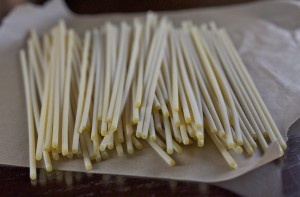
Apart from this sauce being exceptionally easy to prepare and practically everything you could want in a sauce (if I could have found a way of sneaking cream in this sauce I would!), the neatest thing about it may be the pasta it is served with. I had seen the name bucatini on menus before but had never seen the pasta itself. I headed to the grocery store with a list of a couple of harder to find ingredients for all the recipes I was testing that week, half assuming I would be unable to find it. I went to a couple of different grocery stores with no success and completely unaware of exactly what I was looking for. So I did what any 21st century gal does nowadays… I googled it. Lo and behold I found out if was not similar to the penne I was presuming but more similar to spaghetti except… it has a hollow through the center! I have no idea how they form it but it is amazingly neat! Thankfully De Cecco (my brand of choice for pasta) had it listed on their site. It’s the #15 line and in the US it is renamed perciatelli, for reasons unknown.
If you are unable to find bucatini/perciatelli, simply replace it with fettucini, spaghetti or penne. You can also order it online.
Bucatini All’amatriciana, serves 2 (with some extra for leftovers!)
1/2 lb bucatini pasta
1 tbsp unsalted butter
1 tbsp olive oil
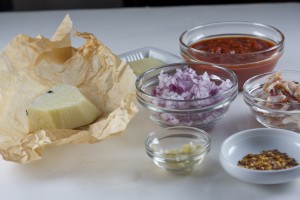
1/2 cup red onion, finely chopped
1 clove garlic, minced
1/2 tsp red pepper flakes
2 thick cut bacon strips, cut into 1/4″ strips (or pancetta)
1 cup chopped tomatoes (Pomi brand)
1/2 tsp red wine vinegar
3 tbsp Pecorino Romano
Parmesan and chopped Italian parsley, to serve
1. Cook pasta according to manufacturer’s directions in a large pot of salted, boiling water. Drain well.
2. Heat a large saute pan over medium high heat. Add butter and olive oil and onion, cook until soft about 1-2 minutes. Add garlic and chili flakes and cook for 1 more minute, stirring occasionally to prevent burning. Add bacon and cook until brown, 2-3 minutes.
3. Pour in the tomatoes and their juices and reduce heat to a simmer for 5 minutes. Add red wine vinegar and leave to simmer gently for 15-20 minutes. Add cooked pasta and toss in the sauce to coat. Add cheese and toss again.
4. Serve with Parmesan and chopped parsley.
Spaghetti Carbonara
Posted on 14 September 2010 | 4 responses
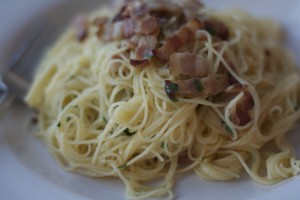
Creamy and rich carbonara sauce is one of those dishes whose origins are obscure and disputed. There are of course many theories and claims. One is that it is named after a restaurant in Rome called Carbonara; others stem from the etymology of its’ name, ‘carbone’ means charcoal in Italian so did coal miner’s eat this hearty meal before heading off to work? What is known is that this dish was not represented in the comprehensive La Cucina Romana which was published in 1927 and it is not recorded until after the second world war. The first published recipe was in Englishwoman Elizabeth David’s 1954 cookbook Italian Food (go England!), after she had spent time in Italy researching. The most probable theory I have heard is that US servicemen stationed in Italy had access to far better rations (i.e. the eggs and the bacon required for this dish) and asked people to make them a dish with it. The timing make sense as does the availability of the ingredients… What are your thoughts? Have you heard any other theories?
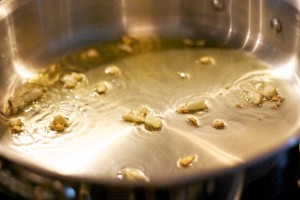
Traditionally, this dish should be made with guanciale, which is aged, unsmoked pig’s jowls or cheeks, Pecorino and Parmesan, eggs (yolks or whole). As guanciale is not always available pancetta and bacon have been commonly substituted. What is not authentic to the dish is cream… I am guilty of adding a splash of cream but you can also leave it out, as I have done on warmer days to lighten the dish. Garlic can be added or not depending on the recipe you read. All I knew was as I was writing mine, it was going to have garlic! I have quickly fried the crushed garlic and then removed it so the oil is lightly flavored with its scent and taste rather than overwhelming the dish.
As this dish only has a few ingredients make sure that the quality of each is the best you can afford. There are some amazing smoked pancetta and bacons out there, which may be more expensive but the flavor carries further so you do not have to use as much. I used my favorite bacon for this recipe, D’Artagnan uncured applewood smoked bacon and some perfectly aged cheeses.
Notes: As I mentioned in the paragraph above, using the best ingredients you can is very important in general but none so much as the eggs. The eggs are raw in this dish and then “cooked” with the heat of the pasta. For this reason you want to make sure that you are using the freshest eggs possible and do not serve this to anyone who may have be immunodeficienct: young children, elderly people, pregnant women, as the threat of salmonella is far higher. Also make sure to add the pasta right from the boiling water so it is still very hot, this will help cook the eggs, and remember to toss quickly to prevent the eggs from scrambling!
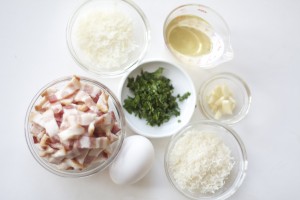
Spaghetti Carbonara, serves 2 as an entree
2 tbsp extra virgin olive oil
2 garlic cloves, crushed and roughly chopped
2 slices smoked thick cut bacon, cut into 1/4″ strips
3 tbsp white wine
1 large egg, beaten (see Notes)
1/4 cup Parmesan cheese
1/4 cup Pecorino Romano cheese
1-2 tbsp heavy cream
1 tbsp Italian parsley, chopped
8 oz spaghetti (preferably De Cecco brand)
1. Cook spaghetti according to manufacturers’ directions in a large salted pot of boiling water.
2. Add oil to a large saute pan over medium high heat. Once the oil is heated, add garlic. Stir often making sure the garlic does not burn and cook until golden brown. Remove garlic pieces and discard.
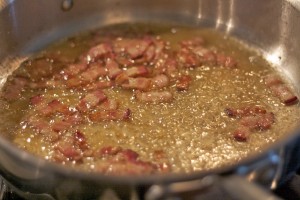
3. Add bacon to the pan and cook until its’ edges are browned. Pour off half the fat and the oil and add wine and scrape up any browned bits from the bottom of the ban. Simmer mixture for 2 minutes.
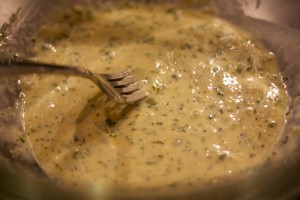
4. Meanwhile, in a large bowl, combine the egg, Parmesan, Pecorino, cream and parsley. Stir to mix well.
5. Add cooked pasta and stir rapidly to coat the pasta with the mixture (I use tongs for this but you could also use two forks and rapid toss the pasta). Add bacon and the liquid in the pan and continue to toss. Serve immediately with a more freshly grated Parmesan sprinkled on top.
