Fluffy, Light, Crispy Waffles
Posted on 14 July 2010 | 4 responses
As this is my second waffle recipe and my too-many-to-count-th breakfast recipe you may have guessed that I am big into breakfast/brunch/morning meals… My first waffle recipe was for Multigrain Waffles, which even though they contain wheatgerm, oats and wholewheat flour are still more delicious than the average person can handle that early in the a.m. These waffles are not quite as healthy as the other but are just as yummy (maybe more so, ssssh please don’t tell the gods of healthy eating!).
These waffles are the waffles we all wish we grew up with. They taste the way the perfect waffle should. They are light as air, they are fluffy, and they have a fantastic crispness to them. While they may work your arm (or your KitchenAid’s arm) when you are whisking the egg white, they only take minutes to pull together. If I could eat these every day and still fit into my skinny jeans I would. The second that baggy clothing comes back into style you know what I’ll be eating for my breakfast!
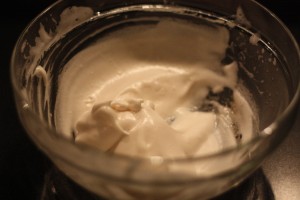
Notes: It is better to whip slightly older (but obviously still fresh!) egg whites. Also make sure they are at room temperature when you whip them; it helps the whites whip faster and fluffier (I don’t know how this happens – it’s science and magic!). You can tell you have soft peaks when the egg whites are white rather than clear, they have begun to get fluffy and when you pull your whisk out of the bowl, the whites still attached bend slightly and look like a bird’s beak (more toucan than woodpecker).
You can keep the waffles warm in a 200°F oven. Remember to keep them in a single layer to avoid them getting soggy!
Fluffy, Light, Crispy Waffles, makes 4 9″ waffles, reproduced from Fine Cooking Magazine
3/4 cup all-purpose flour
1/4 cup cornstarch
1/2 tsp table salt
1/2 tsp baking powder
1/4 tsp baking soda
3/4 cup buttermilk
1/4 cup milk
6 tbsp vegetable oil
1 large egg, separated
1 tbsp sugar
1/2 tsp vanilla extract
1. Heat waffle iron. Mix flour, cornstarch, salt, baking powder, and baking soda in a medium bowl. Measure buttermilk, milk and vegetable oil and mix in egg yolk throughly.
2. Beat egg white to soft peaks (see Notes). Sprinkle in the sugar and beat until peaks are firm and glossy. Beat in the vanilla.
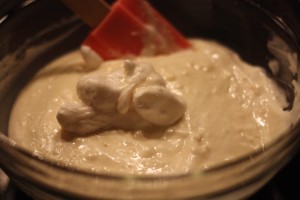
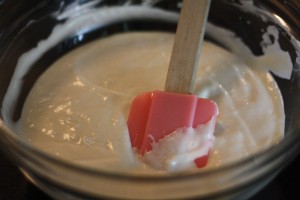
3. Pour buttermilk mixture into dry ingredients and stir until just mixed. Drop egg white into batter in dollops, fold in gently with a rubber spatula until just combined.
Your final batter should be light feeling and smooth, as shown below.
4. Add 2/3 cup to your waffle iron and cook until waffle is golden brown.
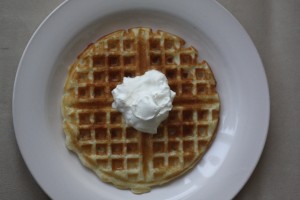
5. Serve with whipped cream and ample syrup. Enjoy!
Fusilli with Summer Yellow Squash, Bacon and a Light Cream Sauce
Posted on 13 July 2010 | 7 responses
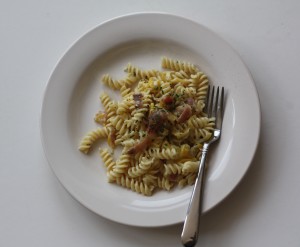
Huge apologies on the massive gap since my last post!! The hubby and I have been on a whirlwind tour of the absolutely divine Amalfi coast in Italy. We flew into Naples and then travelled to Positano, Sorrento, Capri and flew back to London by way of Rome. Talk about a romantic and beautiful country, I already miss it. Pictures will follow at some point! The whole time we were there the weather was gorgeous, which should inspire some salad eating in normal circumstances. While there were a couple of times that I did seek out some green for the most part I could not be distracted from the delectable pastas and pizzas; I think my favorite dish of the whole trip was the tagliolini with a zucchini flower cream I ate on our last night in Rome. I have no idea how they made it yet but I know I will be trying to figure out until I get it!
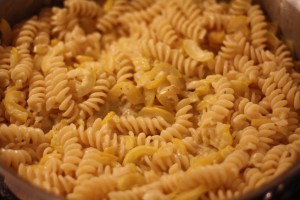
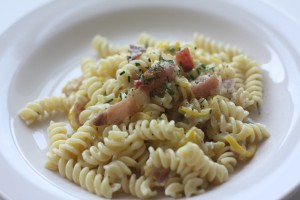
I thought that after a week of eating pizza and at least one pasta dish with some pastries and gelato thrown in for good measure that I would not be able to eat anymore when I came home. All plane flight home I kept reminding myself that the second we landed my healthy summer diet would really begin (even if it is a couple of months too late!) Somehow that did not happen and the first thing I made was this fusilli dish with some perfectly in season, local summer yellow squash.
This recipe is originally a Martha Stewart one, I have made just a few adaptations with easier to find ingredients and some chives for some color and a slight onion-y kick without the onion breath. It is a breeze to make, taking only 15-20 minutes to make, including chopping and bringing the water to a boil! It should serve four people but I hate not being able to offer seconds so I would say it serves 2-3. The worst that will happen is you will have leftovers, which is handy as this pasta dish is just as delicious the next day and when you first make it.
Notes: You can leave out the bacon to make this dish vegetarian friendly but I would suggest upping the garlic and the chives to kick up the flavor.
Fusilli with Summer Yellow Squash, Bacon and a Light Cream Sauce, serves 3 as an entree
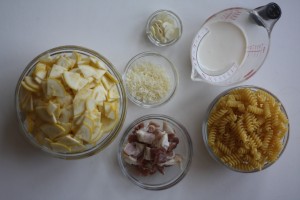
8 oz fusilli
4 slices smoked bacon, cut into 1/2″ pieces
1 lb summer yellow summer squash (about 2-3 medium squash)
2 garlic cloves, thinly sliced
1/2 cup heavy cream
1/4 cup grated Parmesan cheese
4 tsp chopped chives
1. Bring a large pot of salted water to a boil. Add pasta and cook until al dente, following package instructions. Reserve 1 cup pasta water; drain pasta and return to pot.
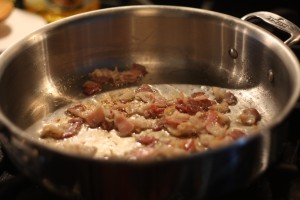
2. While the pasta is cooking, heat a large saute pan over medium heat. Add bacon and cook until browned and crisp, about 5 minutes. Using a slotted spoon, transfer pieces to a paper towel lined plate to drain. Leave bacon fat in pan.
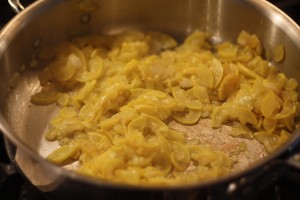
3. Return skillet to medium high heat and add squash and garlic to pan. Season with salt and pepper and stir to coat everything in bacon fat. Cover, and cook, stirring occasionally until squash begins to soften, about 7 minutes. Uncover and cook until liquid has evaporated and squash is tender, 2 minutes more.
4. Add cream and cooked pasta to skillet, stir to combine and cook until cream begins to thicken.
5. Add 3/4 of the reserved bacon and 2 tsp chives, stir to mix through. Remove from heat; stir in Parmesan and add enough pasta water to make a sauce that coats the pasta (I added about 1/2 cup). Serve immediately with the rest of the bacon, the chives and some finely grated Parmesan.
Gazpacho
Posted on 25 June 2010 | 8 responses
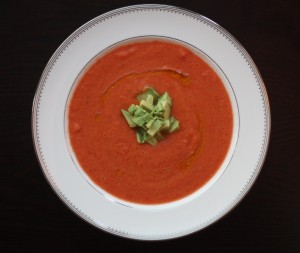
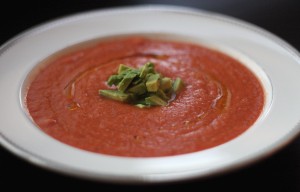
Gazpacho is the quintessential summer soup. Obviously begin chilled helps you cope with the sweltering heat but the flavors in this soup are ones that make you sweat a little, getting you even cooler. The soup traditionally comes from Andalusia in Spain where it has been made since mediaeval times. Peculiarly the addition of tomato is a relative new one; with them only being added to the soup in the 1700’s. Most of the ingredients in this particular soup are in the traditional recipes, the only addition I made that I had not seen elsewhere in mediterranean cookbooks is half a jalapeno (if you haven’t noticed by now I really do love spice!). Every historical recipe I have found for gazpacho has been different, showing that there really is no right or wrong way of making it. This also means that you can play around with the ingredients and add whatever you have on hand or substitute ingredients for others (one way of switching it up would be to change the vinegar to white wine vinegar or even sherry vinegar).
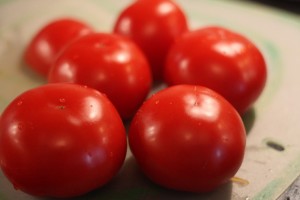
My craving for gazpacho started a little while ago. A few weekends ago some good friends from college and I were in Connecticut celebrating our friend’s birthday. The weekend had taken a very sporty turn with plenty of tennis, swimming and baseball (even if it was beer baseball… but more on that another time!) and we were all in need of a refreshing something to try to cool us down. As we were naming the things we were craving I suddenly became aware of how much I needed gazpacho. The chilled, refreshing soup would be the perfect thing that weekend but alas! We could not find any fully ripen tomatoes at that point. Thankfully, just in time for a lovely, humid New York summer there is a glut of tomatoes already. Some recipes call for adding tomato juice, this is due to the fact that tomato juice is a more consistent product than the juice from most tomatoes, at this time of year we thankfully do not have to worry about that. The juice should be sweet and flavorful enough already.
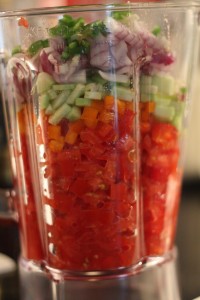
This recipe is really as easy as putting everything in a blender and whizzing it until you have the consistency you want. I prefer mine smooth but you can leave it chunkier for a more rustic appearance or you can put the soup through a strainer to get a very refined soup. I personally think that if the soup is too smooth it lacks texture and become too thin tasting.
Notes: I suggest adding creme fraiche to the soup right before serving. Please do not tell any of your Andalasian friends as they may cry…
Gazpacho, serves 4
1 slice white bread, crusts removed, cut into small squares
2 lbs large vine ripened tomatoes, roughly chopped
1/2 English cucumber, peeled and chopped
1 red onion, roughly chopped
1/2 red pepper, roughly chopped
1/2 orange pepper, roughly chopped
2 cloves garlic, chopped
1/2 jalapeno pepper, seeds removed and chopped
3 tbsp extra virgin olive oil, plus extra for swirling
2 tbsp red wine vinegar
1. Soak bread with 1 tbsp water. Leave to absorb water for 5 minutes. Carefully squeeze out excess.
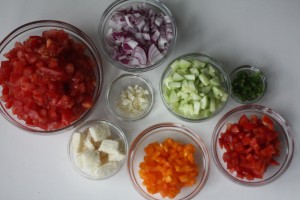
2. Place tomatoes, bread, cucumber, peppers, onion and garlic in a blender. Blend until desired level of smoothness.
3. Pour into a non metallic bowl (ceramic, glass or plastic) and add oil and vinegar. Season with salt and pepper. Mix thoroughly, cover with wrap and place in refrigerator for at least 2 hours to allow the flavors to meld.
4. Serve with your choice of croutons, a drizzle of some more extra virgin olive oil, avocado, chopped cucumber, diced pepper or creme fraiche.
Sauteed Tilapia with a Thai Cucumber and Papaya Salad
Posted on 23 June 2010 | Comments Off on Sauteed Tilapia with a Thai Cucumber and Papaya Salad
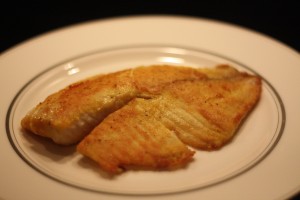
A couple of years ago I tried a green papaya salad with a similar dressing. Green papaya is an unripe papaya, because of its’ hard and crispy texture to make it usable in a salad you need to wilt it with salt and sugar for at least an hour. I wanted to make a salad quicker than that so decided to try it out with a perfectly ripe and sweet hawaiian papaya. I felt as though it may be missing the crispy texture so I decided to add some cucumber. I also think that the cucumber adds some coolness to what would otherwise be a spicy salad! The teeny, tiny Thai bird’s eye chilies should not be underestimated… other they are little they are super spicy so be careful when cutting them (see Notes below). The tangy, tart dressing is the perfect foil for the sweet, soft papaya and the crunchy fresh cucumber. The dressing is spicy, sweet and highly addictive.
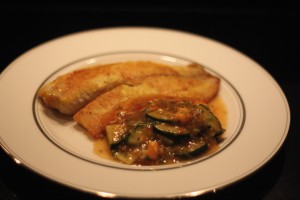
Tilapia is a white fleshed fish, it is light in taste and it is also sustainably farmed so you do not have the guilt factor that comes with so much seafood nowadays. As the filets are so thin you can quickly saute them, with just three minutes on each side to get them to a perfect golden brown crisp. The seasoned, flavored flour helps the fish create this crispy outside. This dish is easy enough that you can make it on a weeknight for a quick meal but tasty and interesting enough that you can serve it at a dinner party, which I intend to do in the very near future!
Notes: When cutting the Thai chilies be very cautious about touching your face, especially your eyes. Make sure to wash your hand immediately after handing and before touching your face so as not to hurt yourself.
Sauteed Tumeric Tilapia with a Thai Style Papaya and Cucumber Salad
Papaya Salad, serves 2 as a side, 4 as a condiment
3 tbsp fish sauce
Juice of 1 lime, about 2 tbsp
2 tbsp light brown sugar
1 clove garlic, minced
1 ripe hawaiian kapoho papaya, peeled and chopped into 1/2″ chunks
1/2 English cucumber, quartered lengthwise and sliced
2 Thai red chilies, seeds removed and finely chopped
3 scallions, greens and whites thinly sliced
2 tsp minced cilantro
1. Mix fish sauce, lime juice, sugar and garlic until sugar is dissolved. Add papaya, cucumber, chilies, scallions and cilantro. Stir until all ingredients are coated with fish sauce lime mixture. Set aside and let the flavors meld for 20-30 minutes at room temperature.
Sauteed Tumeric Tilapia, serves 2 as an entree
1/4 cup all purpose flour
1/2 tsp kosher salt
1/4 tsp tumeric
1/4 tsp freshly ground black pepper
2 tilapia fillets, about 8 oz each
2 tbsp canola oil
1. Heat oil in 12 inch flying pan over medium high heat. Combine flour, salt, tumeric and pepper in a shallow bowl until well mixed. Dredge tilapia in mixture, shaking off any extra. When oil has heated up, add tilapia. Cook for 3 minutes on each side, or until the filets are cooked through.
To assemble the dish…
Serve the tilapia immediately with the papaya and cucumber salad on the side. You can also serve a green side salad with a citrus vinaigrette.
Brioche French Toast
Posted on 22 June 2010 | Comments Off on Brioche French Toast
While everyday french toast is for the everyday this extra special french toast made with brioche and half and half tastes like a special occasion type breakfast. The amazing news is it so easy to make that you can literally make it every day. I do not think your figure will approve but your tummy will.
When I made this for the hubby recently after eating french toast his whole life he was amazed when I told him it was french toast. (I was happy at his reaction but also a little miffed… what was my french toast made with regular white bread?) But I agree, this is french toast taken to a whole new decadent level. The brioche is the perfect bread for this recipe. It is pillowy soft, eggy itself and slightly sweet but still savory. While I am slicing a loaf I usually have one of two nibbles with some salted butter – naughty! I also use brioche in this sandwich recipe.
While this recipe is designed for a romantic breakfast for two, it nicely doubles, quadruples and so on for as many people as you need to feed.
Notes: to all our British readers, french toast is the same as eggy bread.
I have used both cream and milk in this recipe as I always have them in the fridge. You can use 2/3 cup half and half to replace them.
Brioche French Toast, serves 2
2 large eggs
1/3 cup heavy cream
1/3 cup whole milk
2 tsp sugar
1/4 tsp vanilla extract
Pinch kosher salt
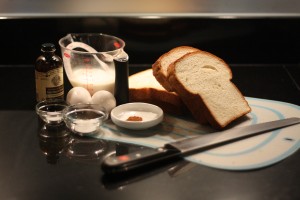
4 thick slices of brioche bread
2 tbsp unsalted butter
1. Heat oven to 250°F. Line a baking tray with foil. Whisk together eggs, cream, milk, sugar, vanilla and salt. Pour into a shallow dish.
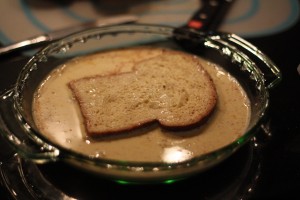
2. Heat 1 tbsp butter in a 12 inch frying pan over medium heat. Soak 2 brioche slices in the egg mixture, making sure to press the bread on both sides gently to make sure it is well soaked.
3. Place in frying pan and cook until brown on each side, about 3 minutes each side. Place in oven to keep warm. Soak the other 2 pieces of bread in the egg mixture. Add remaining 1 tbsp butter to pan. Once butter is melted, add bread to pan. Cook for 3 minutes on each side.
4. Serve with maple syrup, whipped cream and if you are terribly American (which I seem to be now) some crispy bacon! Delish!
Cream of Celery Soup
Posted on 21 June 2010 | 2 responses
Celery gets a bad rep. For some reason people think of it as more of a weight loss tool than a vegetable in it’s own right. Everyone has heard the rumor that chewing and digesting celery burns more calories than you take in from it, or is that just my all-girls school education? While that is not actually true (sad, I know!), celery is awesome for you in so many other ways. It is high in vitamins C and K – you are excused for not knowing what vitamin K is, it is a new-ishly named vitamin. Celery has a ton of fiber, is a natural diuretic and is naturally high is sodium so you do not need to add much more when you cook with it. I may be predisposed to loving it though as it was my grandma’s favorite vegetable. This fact could also be the most quaintly English thing I have ever heard!
This soup came about for a couple of reasons… I was a little bit bored, it was really cold and miserable and I needed to remind myself that spring was just around the corner and I had two huge heads of celery in our fridge. For unknown reasons whenever something sits in my fridge for a couple of days I get anxious; I am convinced that everything goes off in a matter of moments. (*please don’t judge me and write me off as neurotic, I’m just a huge clean/germ freak!)
So with all that on my mind I needed to find a quick, practical vehicle for all this celery. The first things that popped into my mind were a cream of celery soup, chicken salad and crudites with an interesting and healthy dip. Here is the said soup’s recipe.
As the weather is now gorgeous (or a little too humid, depending on how you enjoy New York summers), spring has been and gone – today is the first day of summer people! I thought that it was high time I posted this delicious, spring/summer soup. You can make the soup lighter by leaving out the cream and having a stock based soup. I love adding the cream because even in summer I believe a little richness rounds out a soup.
Notes: I added some creme fraiche to this soup as I had some on hand but you can leave it out or add mascarpone or heavy cream.
Cream of Celery Soup, serves 4-6
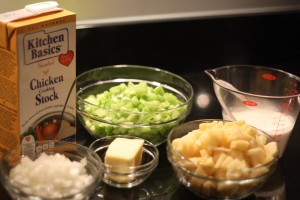
4 tbsp butter
3 cups celery, medium rough chop (about 8 stalks)
1/2 large onion, medium rough chop (about 1 1/4 cups)
2 medium Yukon Gold or similar potatoes
4 cups chicken stock
3/4 cup heavy cream
3 tbsp creme fraiche
3 tbsp chopped chives
1. Melt butter in a large saucepan over medium-high heat. Add celery, onions and potatoes and stir to cover them in butter. Salt with 1/2 tsp kosher salt and turn the heat down to medium-low and place a lid on the pot, let sweat for 15 minutes. Stir occasionally and make sure that they are not burning, they should be releasing lots of water, softening and becoming fragrant.
2. Add chicken stock, bring to a simmer over medium-high heat. Keep at a gentle simmer for 20-25 minutes.
3. Remove from heat, allow soup to cool slightly. Begin to blend in batches, you can use a blender (which I prefer, as I believe it gives you a smooth soup) or an immersion blender. I like to hold the lid of the blender in place and cover it with a kitchen towel (or a tea towel for those of you in the UK) just in case the steam causes the lid to move during blending.
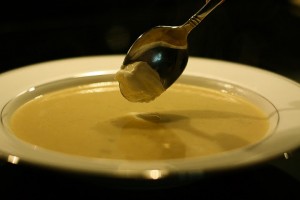
4. Pour the batches of the blended soup into a different pot and return to medium heat. Add and stir in the cream. Heat through and serve. Garnish with creme fraiche and chives.
Shortbread Biscuits with Petticoats
Posted on 18 June 2010 | Comments Off on Shortbread Biscuits with Petticoats
Ask any ex-pat and they will tell you that aside from being away from their friends, family and family pets (our dogs mean a lot to us!) the thing that they miss the most is the food. As many of you know, I am from England and while the rest of the world is laboring under some peculiar and false assumption that English food is not good, it is in fact very good and I do certainly miss it. I may be more than a wee bit biased but I really do enjoy eating traditional English food. I may be going out on a limb here but I am pretty sure that most people would too if they tasted good British grub. After all didn’t we just invent the gastropub, which is taking this country by storm? I feel as though every bar is now serving bangers and mash and fish and chips just to keep up with the trend (both of which are awesome but are far better in Britain!)
As anyone who has been back to the homeland recently knows one of the things that I miss most, food-wise at least, are biscuits. Not cookies but biscuits. I miss Digestives, Rich Tea, HobNobs, and Walker’s Shortbread. Sure you can get them all in New York but I am not willing to pay $8 for a pack of biscuits that should cost me 70 pence, call me crazy… So I did what any homesick Brit would do, I tried to create the most authentic tasting shortbread recipe that I could make with the ingredients I had on hand and here it is.
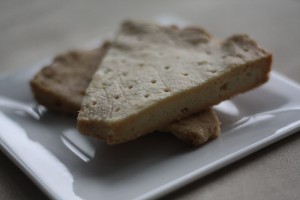
Shortbread biscuits, makes 8 pieces, each large enough for a perfect dunk in your tea!
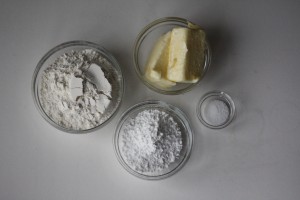
2 cups all purpose flour
1 cup unsalted butter, at room temperature (2 sticks)
3/4 cup confectioners’ sugar
1 1/4 tsp kosher salt
1. Butter a 10 inch fluted tart pan (I use this one). Sift flour and salt into a medium bowl. Place butter in the bowl of an electric mixer fitted with a paddle and mix on medium high until smooth, about 4 minutes.
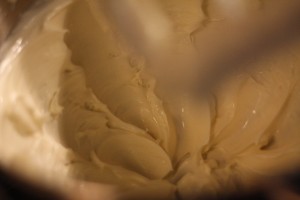
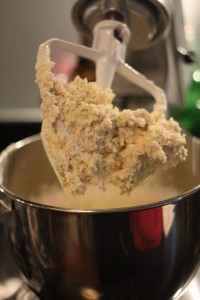
2. Add confectioners’ sugar in small batches, scraping down the sides of the bowl occasionally. Beat until pale and fluffy, about 2 minutes. Reduce speed to low, add flour all at once, mix until just combined and the texture is the same as the below picture.
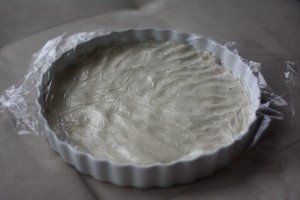
3. Heat oven to 300F. Place dough into the tart pan, cover with plastic wrap and press down to make one even layer of dough.
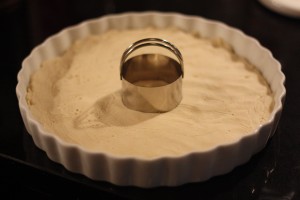
4. Chill dough covered in refrigerator until firm, about 40 minutes. Remove plastic wrap. Cut out a round with a 2 1/4 inch biscuit cutter, discard.
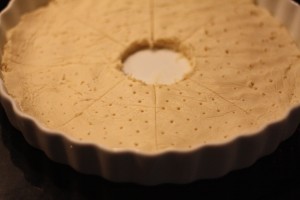
5. Cut dough into 8 slices with a small knife. Using a toothpick or skewer, prick dough all over with 1/4 inch intervals.
6. Bake until golden brown and firm, about 60 minutes, begin checking after 45 minutes as it sometimes cooks quicker. Transfer pan to a wire rack to cool. Recut slices, let cool completely in pan.
Carne Asada Fajitas
Posted on 17 June 2010 | 4 responses
As this week has somehow become a super healthy week I thought I would add one more delicious yet waist band friendly meal before I do a sweet treat tomorrow.
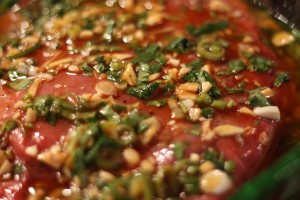
Just like the Marinated Skirt Steak on Monday, this flank steak (or arrachera as the cut is called in Mexico) is a less expensive cut of meat. Like skirt steak you also have to marinate it but this time for longer, I would suggest at least four hours but longer ideally (you could put the steak in the marinade before you head to work).
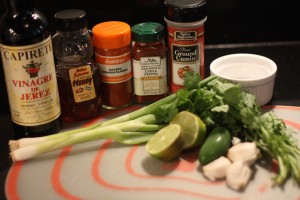
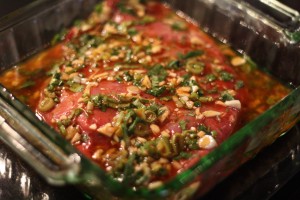
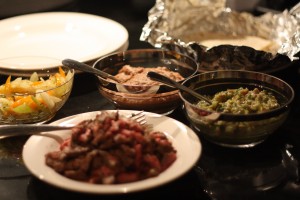
I served this with sauteed onions and peppers, refried beans, guacamole, sour cream and different kinds of hot sauce. I had two fajitas and tried a different sauce of each, one had taco sauce and the other, my go-to Huy Fong Garlic Chili Sauce. Not surprisingly I preferred the super spicy Garlic Chili Sauce! The flank steak retained enough of the flavors from the marinade, the vinegar seeped into the meat nicely and the paprika, cumin and New Mexico chile pepper gave it a little zip. I really feel as though what sets this marinade apart though is the prevalence of fresh ingredients; the garlic, the lime juice, the chopped scallions and cilantro all permeate the meat and make the steak taste completely fresh even though it has a nice char to it from the grill.
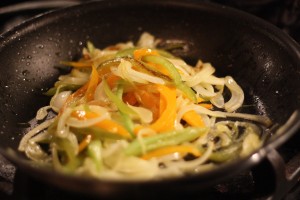
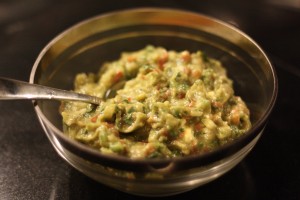
I cooked the peppers and the onions simply over a medium low heat with a splash of olive oil and a sprinkle of salt until they were soft and cooked through. I also made the guacamole. It is a super quick side which I will post the recipe for soon.
Notes: as I was typing the directions for the garlic I suddenly realized that not everyone would know what crushed meant. I do not mean using a garlic press, I mean crushed with the flat side of a chef’s knife and then roughly chopped into smallish chunks.
Carne Asada Fajitas
6 garlic cloves, crushed and roughly chopped (see Notes)
1/3 cup cilantro, stems and leaves roughly chopped, tough ends removed
2 scallion, green and whites, roughly chopped
Juice of 1 lime, about 2 tbsp
3 tbsp sherry vinegar
1 tsp kosher salt
1/2 tsp smoked Spanish paprika
1/2 tsp ground New Mexico chile pepper
1/4 tsp ground cumin
4 tbsp olive oil
4 tbsp canola oil
1-1 1/2 pound flank steak
1. Mix all ingredients in a small bowl, except for oils. Whisk in oils. Pour marinade into a 9 by 9 inch baking dish. Add beef and turn to coat. Leave to marinate in the refrigerator for at least 4 hours, up to 24 hours, turning every hour or so.
2. Remove baking dish from refrigerator about 1 hour before cooking. When ready to cook, heat grill pan over medium high heat. Cook for 7-10 minutes on each side, depending on how well cooked you would like it.
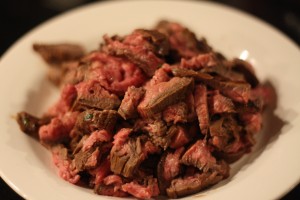
3. Remove from grill and cover with foil, let rest for 5 minutes. Slice thinly.
4. Serve with other fajita accompaniments, see above for ideas.
Seared Tuna Salad
Posted on 16 June 2010 | 4 responses
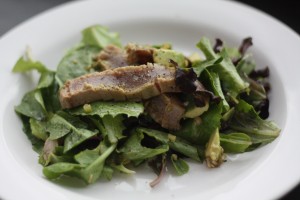
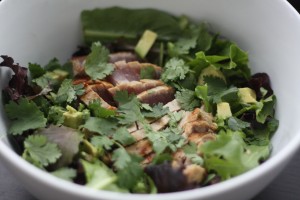
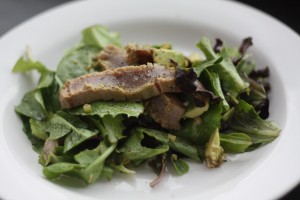
As promised in yesterday’s post, Japanese Style Salad Dressing, here is a recipe for a delicious Seared Tuna Salad. This salad is an easy make-it-yourself restaurant style dish. I have so often ordered salads so similar to this in Japanese restaurants and never really thought about making one at home until I saw a gorgeous fresh-as-can-be tuna steak on sale and had to think of something to do with it. This recipe would be perfect to make for an easy weeknight dinner party, you can prepare the marinade in the morning and just add the tuna for a short thirty minutes before cooking. Fish is great for a quick marinade as it takes the flavors so quickly.
In the post yesterday I mentioned that the dressing is addictive and seriously moreish. Even though the hubby had already eaten, he had one mouthful of this salad and had to go and get a plate for himself. Occasionally I would frown upon two dinners (not always, I believe there are times when it is a necessity, especially late night), I am fully supportive of eating this as the second supper. This meal is seriously healthy; the fish is lean yet contains good omega 3 oils and it is only quickly seared in no oil!; the collection of fresh produce that is used in this dish is awesome. You get almost four servings of vegetables in this delicious salad. The only change that I would make for dietary restrictions would be for gluten allergies or people with high cholesterol, you can use gluten free soy or low sodium soy.
Notes: As always, remember to use the freshest ingredients you can. This tuna is seared lightly so the inside is pink. For people with compromised immune systems i.e. elderly people and pregnant women, you can saute the tuna until cooked through.
Seared Tuna Salad, serves 2 as an entree
Marinated Tuna Steak
1 tbsp soy sauce
1 tbsp mirin (sweetened Japanese cooking wine)
1 tbsp sesame oil
1 tbsp rice vinegar
3/4 tsp ginger grated on a Microplane
2 scallions, greens only, sliced (whites reserved for salad dressing; see Notes)
1 jalapeno, halved, seeded and thinly sliced
8 oz wild yellowfin tuna loin steak
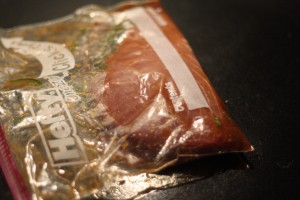
1. Combine soy, mirin, oil, vinegar, ginger, scallion greens, and jalapeno in a sealable bag. Add tuna, move the marinade around the steak and place in refrigerator to marinate for 30 minutes.
2. Remove tuna from refrigerator and remove from marinade, taking off as much as possible. Heat a 9 inch frying pan over medium high heat. The tuna should have retained some oil from the marinade so place directly into the frying pan. Cook for 1 1/2 minutes before turning and cooking the other side for 1 minute. Let rest for 2 minutes. Slice tuna along the short side into 1/4 inch thick slices.
To assemble the salad…
Cooked, marinated tuna steak
1 serving of Japanese Style Salad Dressing
1/2 avocado, diced
1/4 cup cilantro leaves
3-4 cups mixed baby lettuce leaves
1. Place lettuce leaves in a bowl. Top with tuna, avocado and cilantro. Pour dressing over and toss. Serve immediately.
Japanese Salad Dressing
Posted on 15 June 2010 | 5 responses
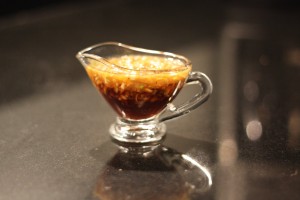
Even though it sounds remarkably boring of me, one of the things that I look forward to most when eating out at Japanese restaurants is the salad. The vegetables used in the salad are not usually particularly interesting, although I do love the shredded carrots that are sometimes put in, it is the dressing takes it to another level.
The dressing is tangy, sweet and tart all at the same time. It is also incredibly moreish, making it even easier to get to the recommended five servings of fruit and veg a day. You can use almost any lettuce; in the 80’s I feel as though it was always served with shredded iceberg lettuce, but increasingly restaurants are using more interesting greens.
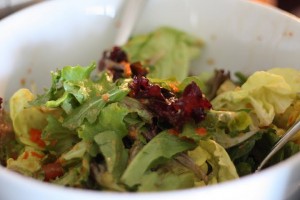
I have served this dressing with mixed baby lettuce, spring mixes, shaved radicchio, basically any lettuce! As I love avocado, I will usually dice some and throw it in there. Also shredded carrots, sliced raw peppers, and thinly shaved raw radishes are all great to add. The dressing gives the salad enough of kick that you do not need too many ingredients and can keep it simple. Usually I serve this as a side dish but I went slightly outside my box yesterday and made into an entree. It was a Seared Tuna Salad to be precise! Here is a sneak peek of the pic.
Japanese-style Salad Dressing
1/4 cup scallion whites, chopped finely (2 scallions)
2 1/2 tsp soy sauce
1 1/2 tsp rice vinegar
1/4 tsp sugar
1/8 tsp ground mustard
Pinch of fleur de sel
Pinch of freshly ground pepper
1 tsp sesame oil
1 1/2 tsp canola oil
1. Combine scallion whites, soy, vinegar, sugar, mustard, salt and pepper. Whisk in oils until emulsified.

